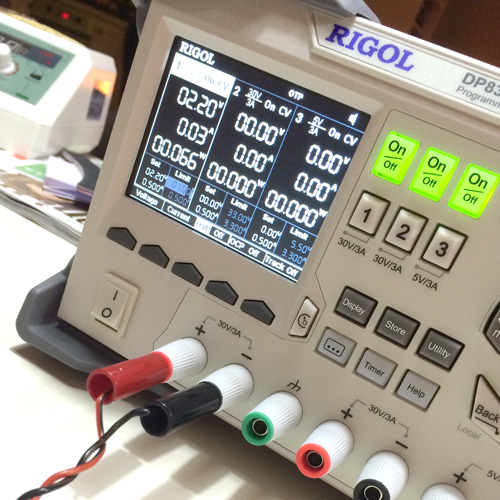
Not so long ago, I wrote a post about my new toy, the Rigol DP832 Programmable DC Power Supply. One of the features I mentioned, was the ethernet connection allowing me to control the power supply over ethernet using the official software. Since this software is Windows only, I took some time to figure out if it is possible to write an iOS app for it.
After some elaborate hacking and debugging googling, I figured out I was able to connect to the Rigol using telnet on port 5555. The rigol was connected to my network on ip 192.168.0.2, so I fired up the terminal and tried the following:
$ telnet 192.168.0.102 5555Trying 192.168.0.102...
Connected to 192.168.0.102.
Escape character is '^]'.
Great, I was in … but without any clue on which commandos I had to type in, it would be a long weekend to build something useful. Once again, my friend Google came to the rescue, and pointed me to the extensive Rigol DP800 programming guide. Documents like these are rare, so this alone is a reason to buy a Rigol.

Sending the commands.
After studying the document, I figured out how to check if I really was connected to my device. My terminal was still connected, so I typed the following command:
*IDN?
As the documentation describes, this should return the following:
The query returns the ID string of the instrument which consists of 4 parts separated by commas “,”, for example, RIGOL TECHNOLOGIES,DP831A,DP8A000001,00.01.01. The first part is the manufacturer name, the second part is the instrument model, the third part is the instrument serial number and the forth part is the digital board version number.
And indeed, it worked:
*IDN?
RIGOL TECHNOLOGIES,DP832,DP8C********,00.01.11
I obfuscated my serial code for (non) obvious reasons.
Now, let’s try the fun part: control this awesome toy!
- Select the specified channel as the current channel and set the voltage/current of this channel.
:APPL CH1,12,0.5
It worked! The voltage of channel 1 jumped to 12 volt, and the current was set to 0.5 amps. Now, last but not least, let’s toggle channel 1 on:
[
] - Enable or disable the output of the specified channel.
:OUTP CH1,ON
Great, this al works as I hoped!

Query data.
So, controlling the device works perfect, but how about querying it?
? - Query the voltage/current of the specified channel.
:APPL CH1
CH1:30V/3A,12.000,0.500
As you can see, this returns a string of data. It tells me that Channel 1 is capable of 30V/3A, the voltage is currently set to 12v and the current is set to 0.5A.
Using the Measure function, we can even measure the output!
:MEAS:ALL? - Query the voltage, current and power measured on the output terminal of the specified channel.
:MEAS:ALL? CH1
12.0022,0.0004,0.005
This tells me it is currently delivering 12.002V, with 0.0004A which adds up to 0.005W.
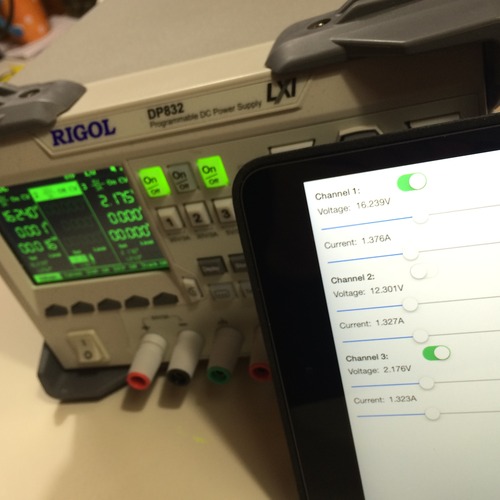
So, how about that App?
With the info above it turned out to be quite easy to create an app that controls the Rigol … wirelessly! In the thrilling video below, you can see it actually works like a charm.
I’ve posted the (undocumented) code for this App on GitHub so you can give it a spin. But note that this demo currently only works one way: it controls the Rigol, but doesn’t read out any values.
You can do what ever you want with the code, but know that the extremely sexy looking, high sophisticated, trendy, award winning user interface is patented on every pixel!
For now, it is a perfect proof of concept, but since it turned out to be more easy than I thought, I might work on it some more in the future.
Leave a comment down below if you’re interested in the App or if you have specific features in mind.