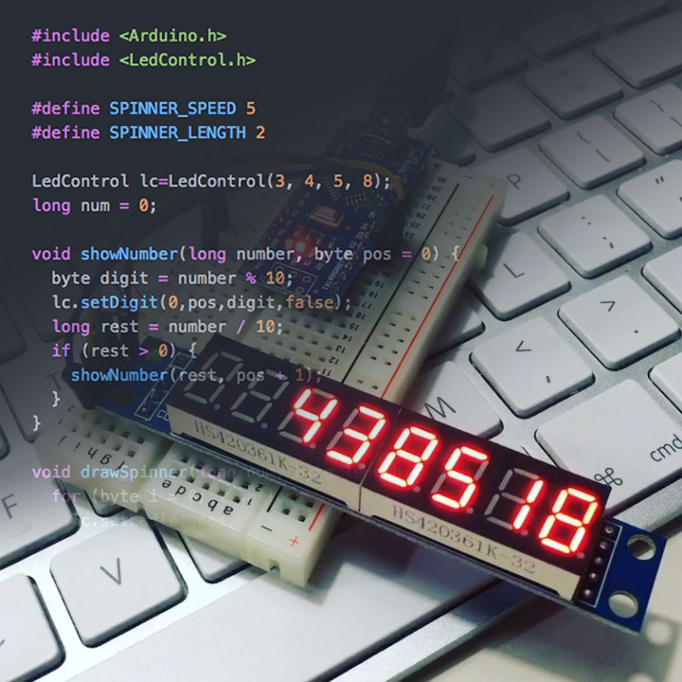
2 weeks ago I posted a small clip on my Instagram which showed a MAX7219 counter demo. Using this 8 digit, 7 segment display is pretty straight forward, but some people asked me how I printed the incremetal counter, since the MAX7219 LedControl library only allows you to print one digit at a time …
Displaying a counter is probably the first task you want to try out if you get your hands on the MAX7219 displays. I must admit I was pretty surprised that the LedControl library did not support this by default.
I was even more surprised that they showed a 30 line example to display a 3 digit number:
void printNumber(int v) {
    int ones;
    int tens;
    int hundreds;
    boolean negative;

    if(v < -999 || v > 999)
       return;
    if(v<0) {
        negative=true;
        v=v*-1;
    }
    ones=v%10;
    v=v/10;
    tens=v%10;
    v=v/10;
    hundreds=v;
    if(negative) {
       //print character '-' in the leftmost column
       lc.setChar(0,3,'-',false);
    }
    else {
       //print a blank in the sign column
       lc.setChar(0,3,' ',false);
    }
    //Now print the number digit by digit
    lc.setDigit(0,2,(byte)hundreds,false);
    lc.setDigit(0,1,(byte)tens,false);
    lc.setDigit(0,0,(byte)ones,false);
}

Time to come up with a better solution!
Of course there are countless (no pun intended) ways to accomplish the desired effect: printing a multiple digit number by calling one function.
The approach I choose, uses recursion: a method where the solution to a problem depends on solutions to smaller instances of the same problem.
If you are a beginner in the Arduino (or programming) world, this might sound a bit overwhelming, but in this case it simply means that the function calls itself until the main task (printing the full number) is completed.
Let’s walk through the full code to see how I managed to print this number using a function of 7 lines.
First, we need to include all necessary libraries:
#include <Arduino.h>
#include <LedControl.h> // Available here: https://github.com/wayoda/LedControl
In most cases, you don’t need to include the Arduino.h file, but since I’m using Platform.IO in stead of the horrible Arduino IDE, this is required. And while we’re at that subject: take some time to make this switch. Platform.IO is SO much better than the Arduino IDE.
Next, we need to create an LedControl instance, which controls our MAX7219 display:
LedControl lc = LedControl(3, 4, 5, 1); // dataPin, clockPin, csPin, numDevices
Additionally, let’s create a variable to use as the counter. Since we want to use all 8 digits, this variable should go up to 99,999,999. Since an int will only go up to 32,768 (and an unsigned int: 65,535), we will use a long. This will allow us to count up to 2,147,483,647.
long num = 0;
Now, on to the real magic: we need to define the function to display the number.
void showNumber(long number, byte pos = 0) {
  // all magic goes here
}
This means we can call this function with the desired number as it’s argument. As a second argument, we define the position to start from. The digits are numbered right to left, from 0 to 7. So we want to start with 0, increasing it’s position for every next digit. Since we define a default value of 0, we can omit this argument when calling this function.
Of course, this still doesn’t do any real magic, so it’s time to add some code to this function:
byte digit = number % 10;
By calculating the modulo (%) of the number using 10 as the divisor, we get the last digit of the number we want to print. For example: if the number is 123, the variable digit will contain 3.
Using the setDigit method, we can now put this number on the display:
lc.setDigit(0, pos, digit, false);
- The first argument (
0) tells the method we want to use device0. Note that we currently only have one device configured, so you can ignore this0for now. - The second argument (
pos) defines the position on the display. If no specific position is defined when our function is called, thisposwill be0. - The third argument (
digit) defines the number we want to display. This is the number we’ve just calculated on the previous line using the modulo operator. - The fourth argument (
false) tells the display if it needs to turn on the deciaml point. To keep things simple, we will just keep this turned off.
Ok, so now are able to display one digit on our display, how about the rest of the numbers? Great question! Let’s continue to extend our function:
long remainingDigits = number / 10;
By dividing the number by 10, we get all the remaining digits we need to display.
if (remainingDigits > 0) {
    showNumber(remainingDigits, pos + 1);
}
And there it is … the real magic! The recursion I talked about! Above lines will do the following:
- If the
remainingDigitsvariable is greater than0, there still are digit’s left to display, and so we need to perform the recursive action. - Recursion: let the function call it self using two calculated arguments:
remainingDigitsandpos + 1
And that’s all there is to this magic recursion approach! The full function is as follows:
void showNumber(long number, byte pos = 0) {
    byte digit = number % 10;
    lc.setDigit(0, pos, digit, false);

    long remainingDigits = number / 10;
    if (remainingDigits > 0) {
        showNumber(remainingDigits, pos + 1);
    }
}
To make it’s effect more clear, consider the following: if we call this function with 12345 as it’s first argument, the following function calls will be performed:
showNumber(12345); // shows a 5 on position 0
showNumber(1234, 1); // shows a 4 on position 1
showNumber(123, 2); // shows a 3 on position 2
showNumber(12, 3); // shows a 2 on position 3
showNumber(1, 4); // shows a 1 on position 4
And that’s all it needs to do!

Now, of course, to finish up our full sketch we need a setup and loop function:
void setup() {
    lc.shutdown(0, false); // Disable the display's power save mode
    lc.setIntensity(0, 15); // Set the display to full brightness
    lc.clearDisplay(0); // Clear the display
}

void loop() {
    showNumber(num); // Show the number using our function
    num++; // Increase the number
}
And with these two methods. Our full sketch is completed!
#include <Arduino.h>
#include <LedControl.h>

LedControl lc=LedControl(3, 4, 5, 1);
long num = 0;

void showNumber(long number, byte pos = 0) {
    byte digit = number % 10;
    lc.setDigit(0,pos,digit,false);
    long remainingDigits = number / 10;
    if (remainingDigits > 0) {
        showNumber(remainingDigits, pos + 1);
    }
}

void setup() {
    lc.shutdown(0, false);
    lc.setIntensity(0, 15);
    lc.clearDisplay(0);
}

void loop() {
    showNumber(num);
    num++;
}
Of course, the showNumber function currently doesn’t work for negative numbers or floats. But it does give you a good idea on how a recursive function can help you to make life a little bit easier when writing your code.
As you can see in the example video, I’ve also added a small spinner. Check out this GitHub Gist to see how it accomplished that …
If you have any questions or suggestions about the code above, feel free to leave a comment down below.
Happy coding!