So, in the last batch of Electrocards I assembled, one of the displays had a very poor brightness. A fun project to see if I would be able to debug this issues.
Electrocard: Writing The Software
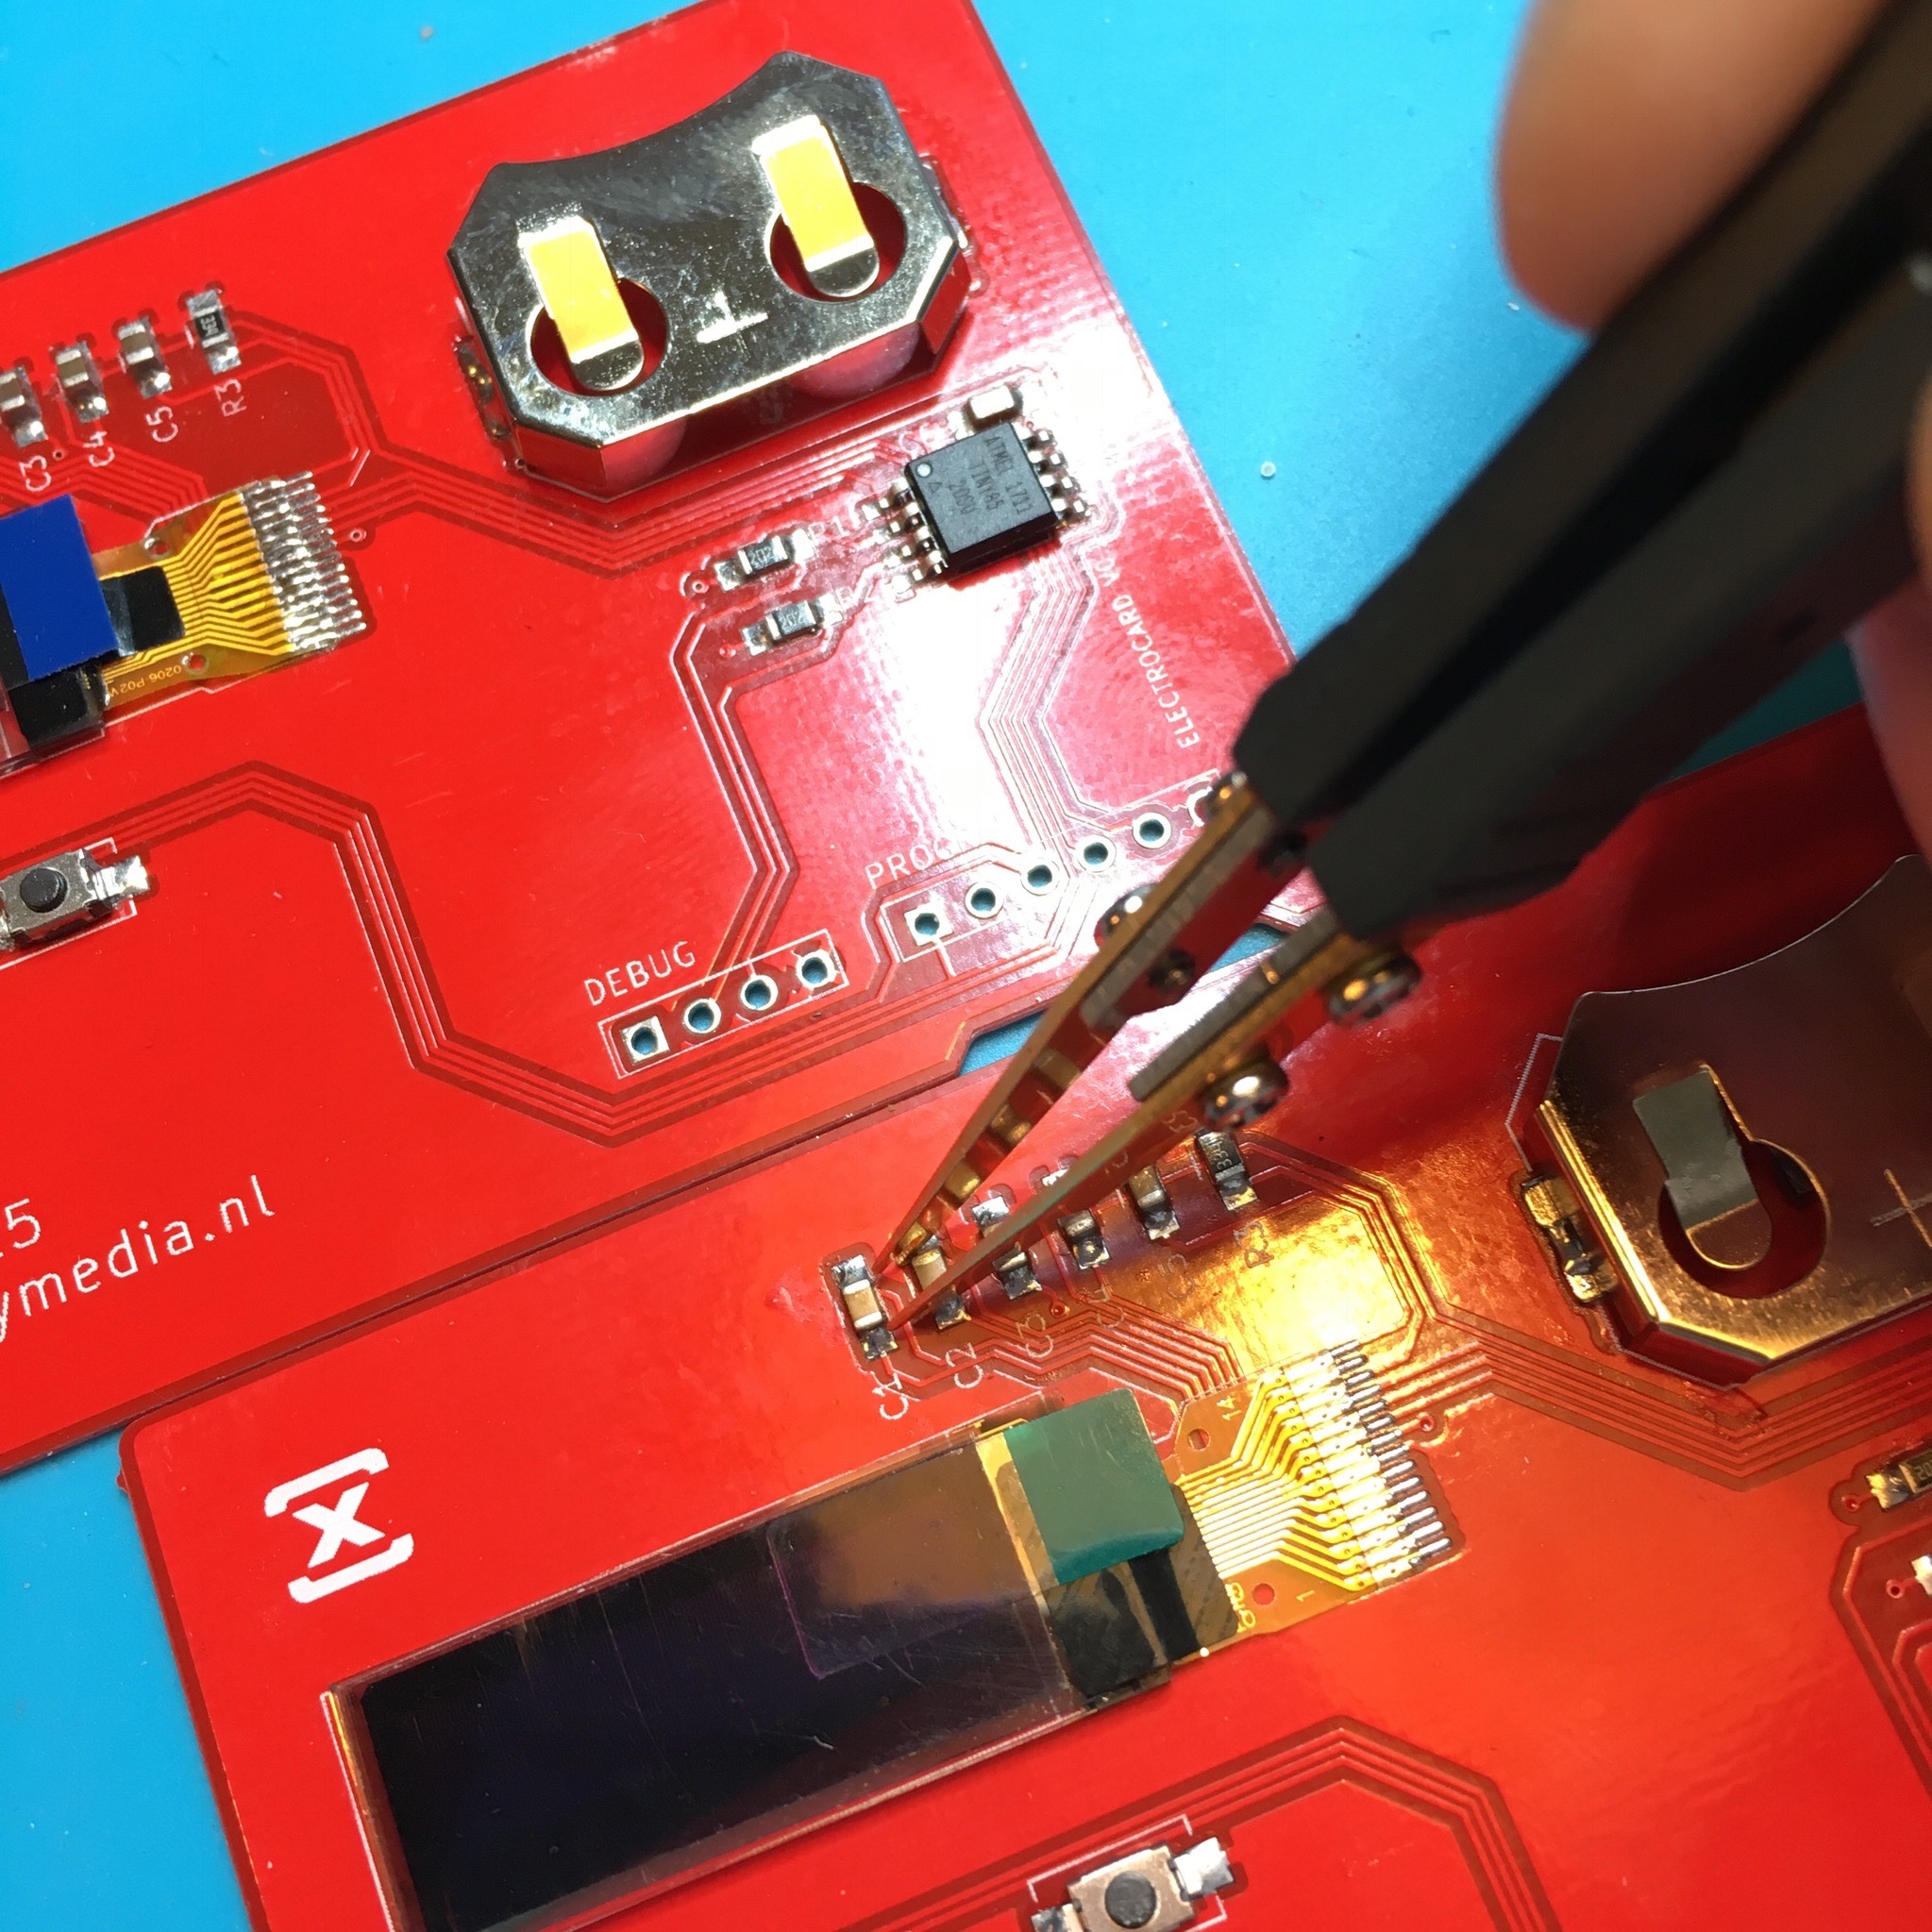
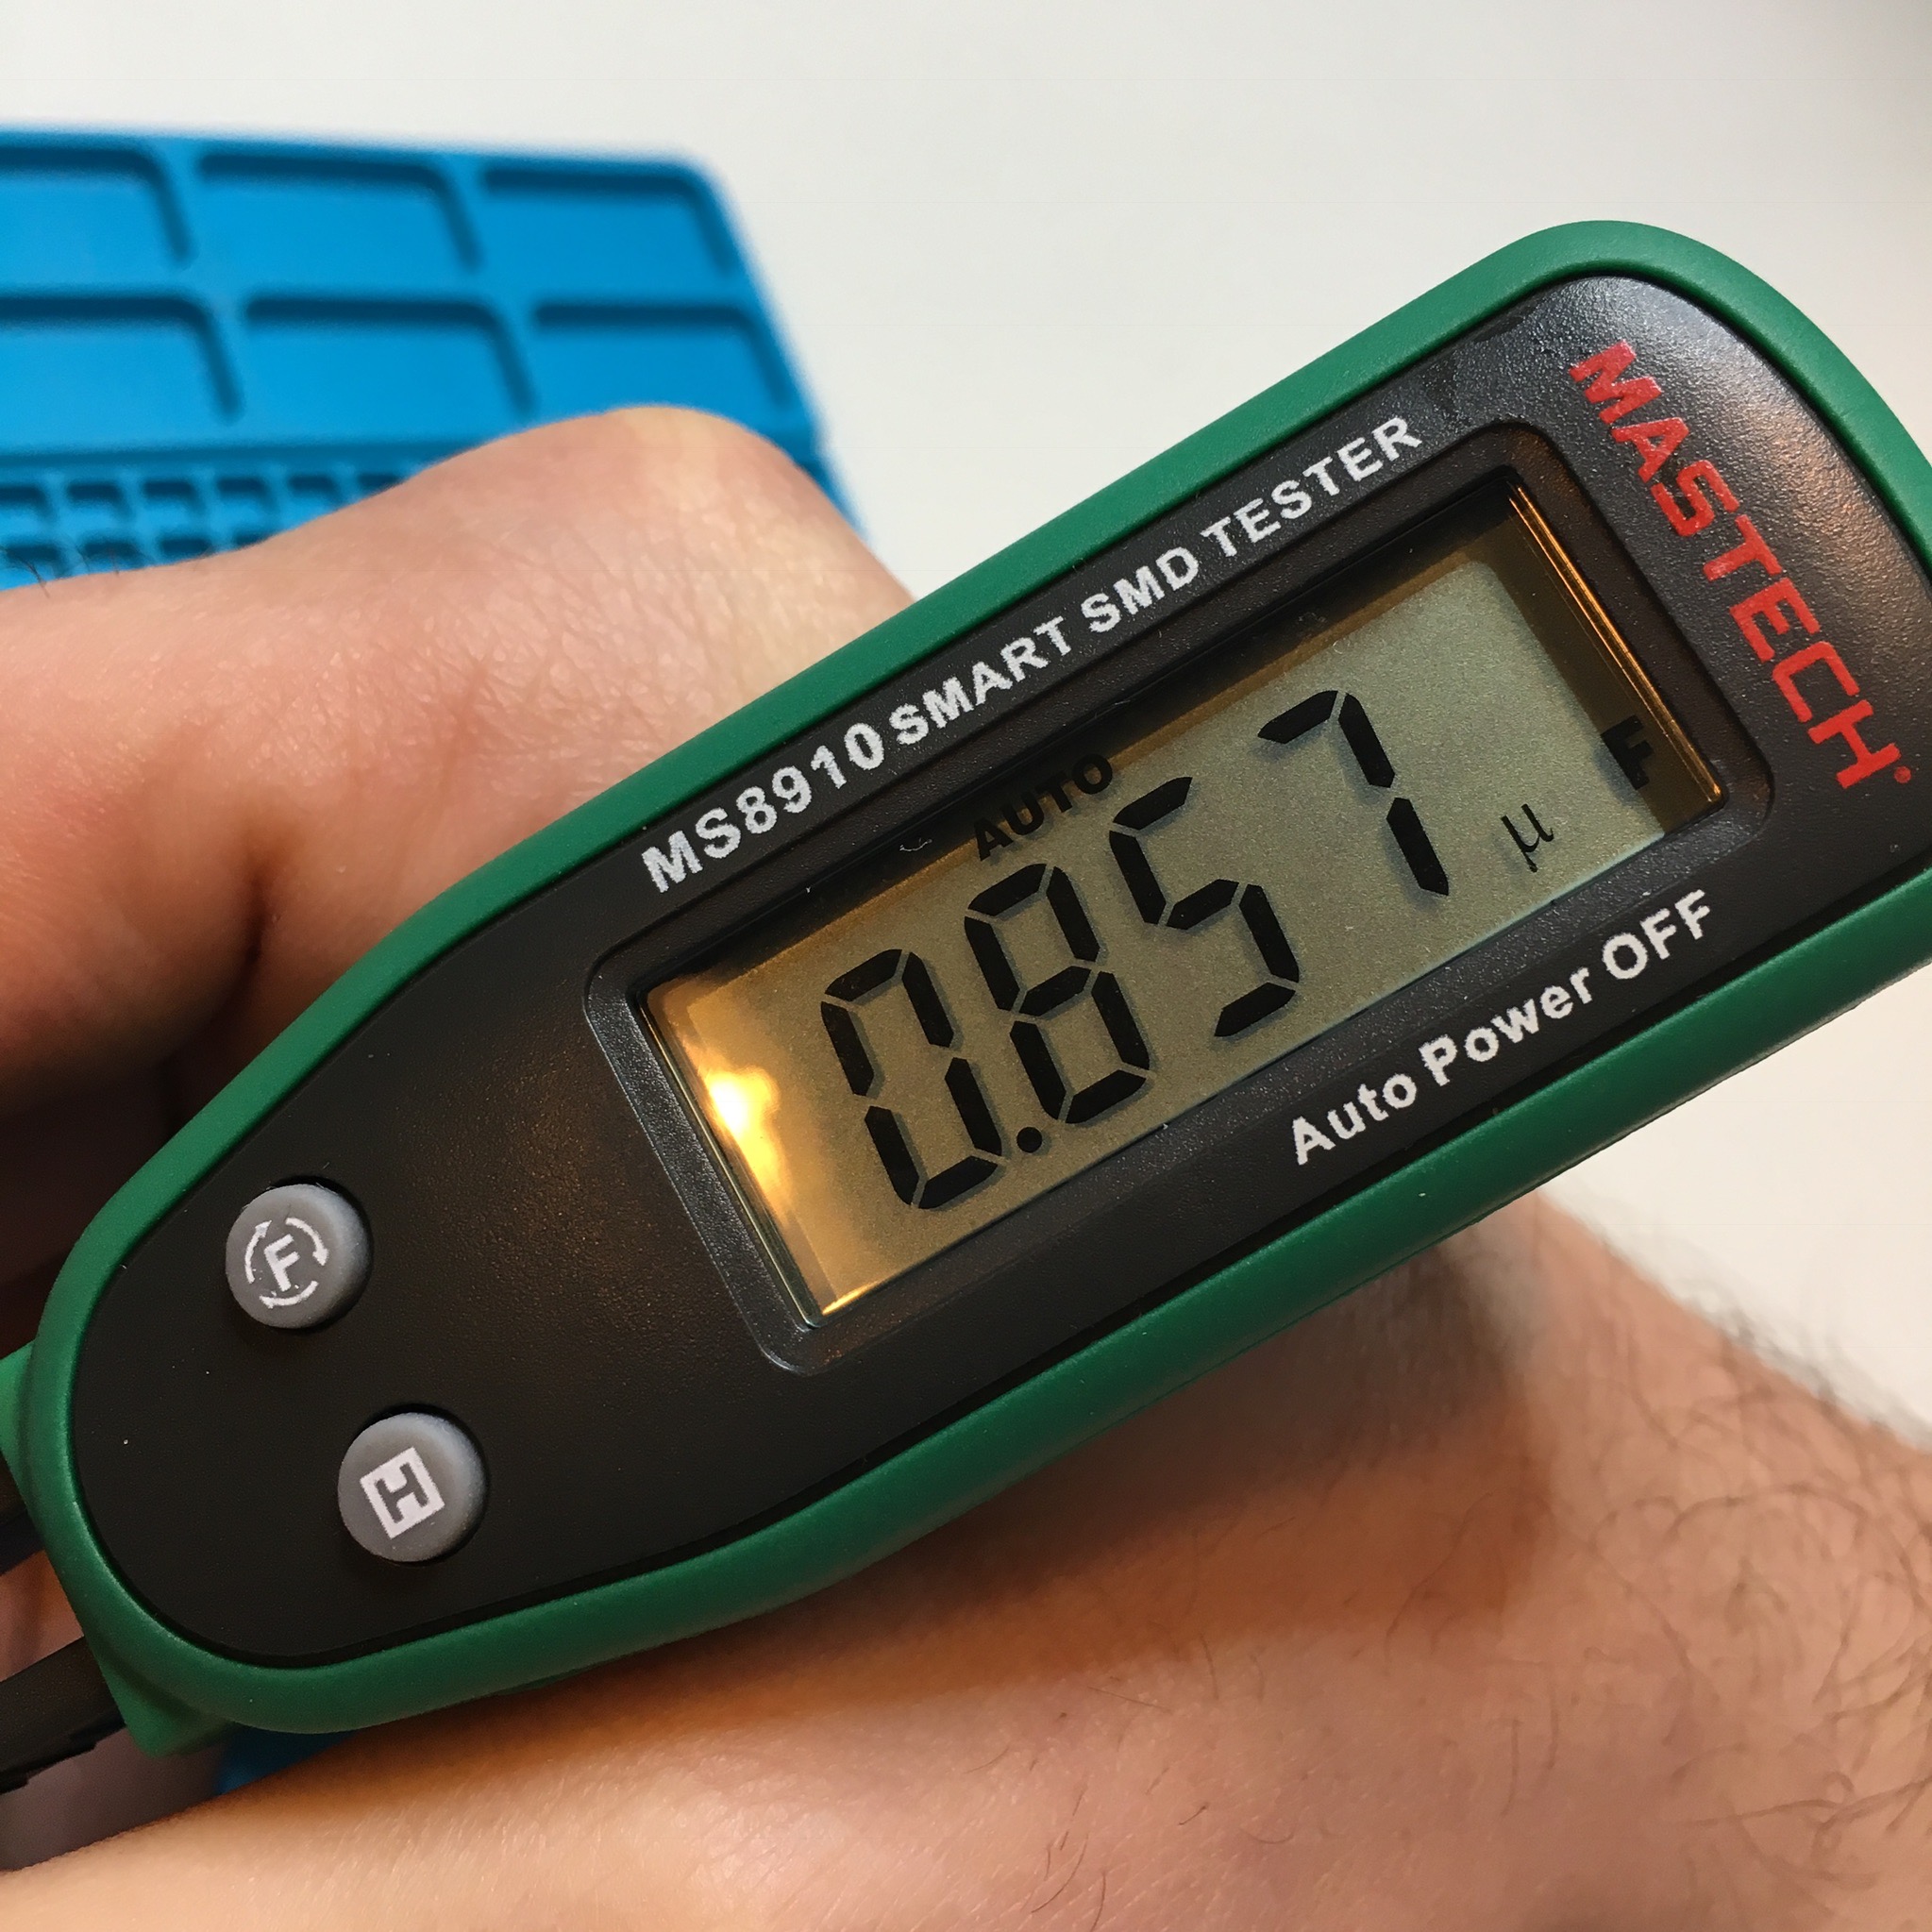
The benefit of having multiple copies of your board (including correctly functioning boards) is that you can simply compare your measurements. So with the help of my $15 SMD multimeter I started poking around on the board. Of course, some items give strange values since they are connected to the board, but it’s a good first step.
C1, C2 and C3 should give a value somewhere near 1uF. And on the functioning board, this was indeed the case.
However, On the faulty board C2 resulted in an overload message on my multimeter. Did I really find the issue with my second measurement?
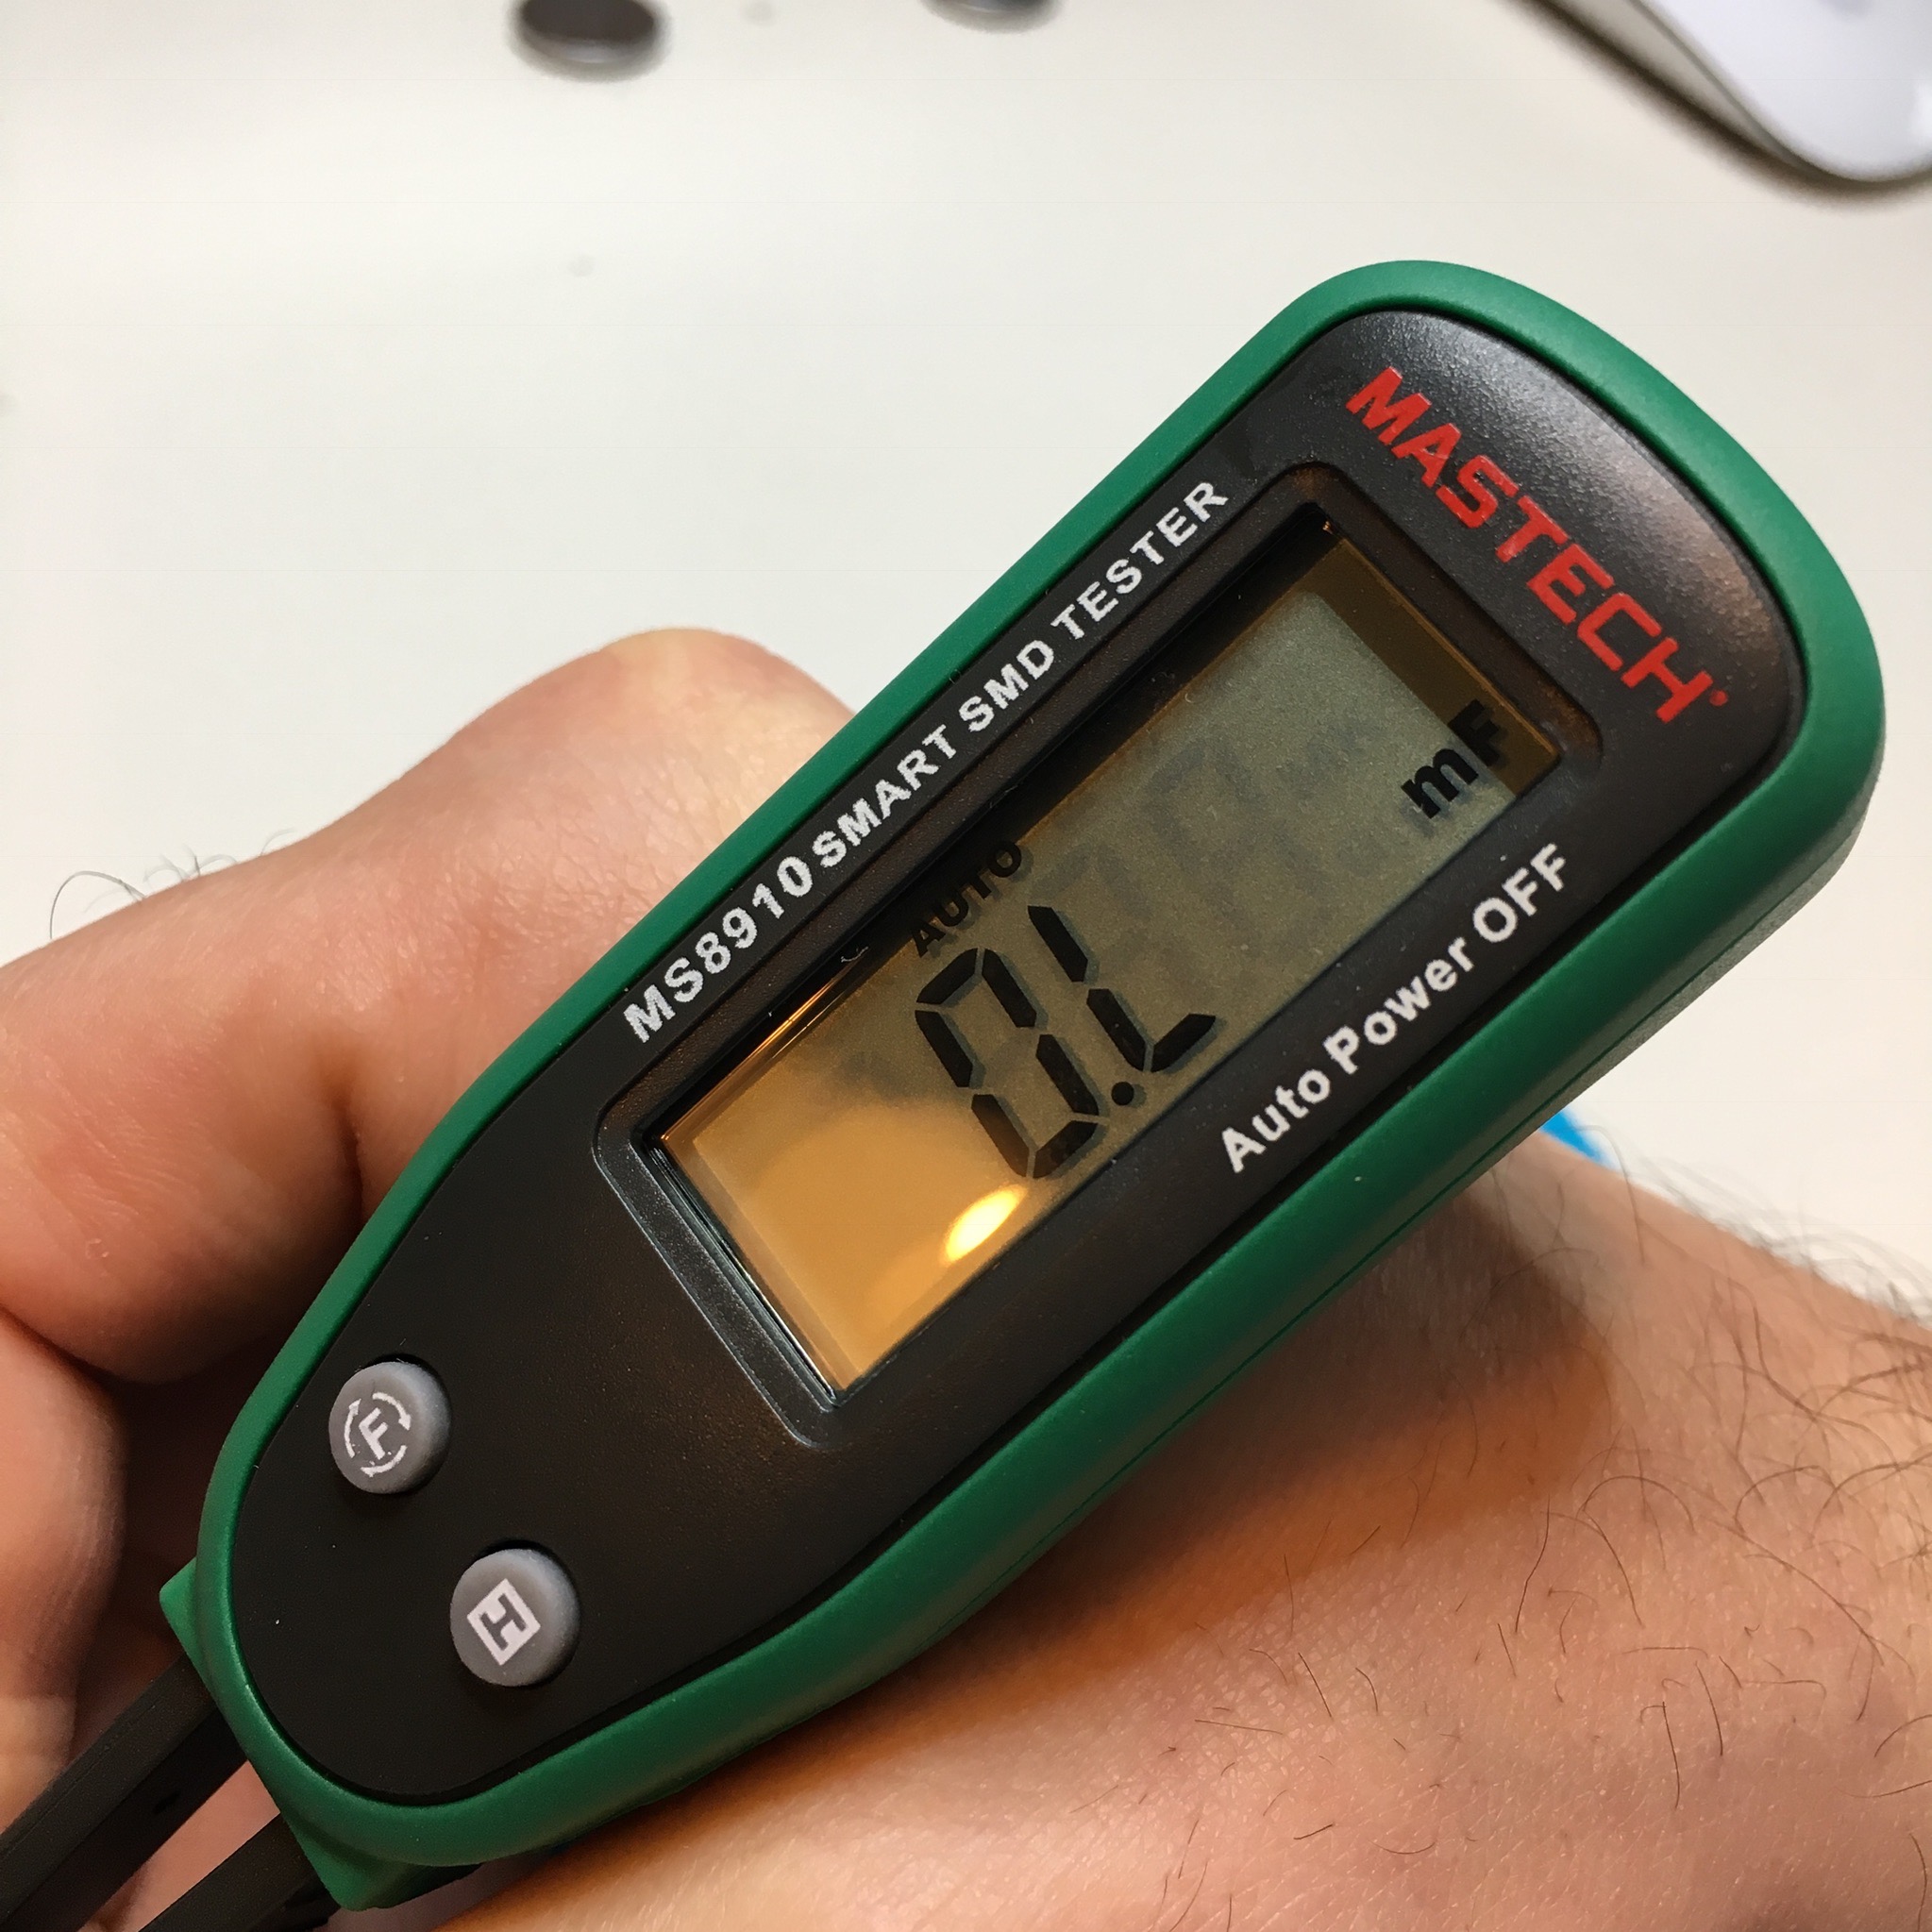
C1 and C2 are used by the OLED’s internal voltage pump. This voltage pump creates the high voltage nessecery to light op the OLED pixels. Without a correctly funtioning voltage pump the pixels won’t light up bright enough (or not at all …). So an issue with C2 could indeed cause the problem.
With a few karate kicks, some screaming and crying I managed to remove the faulty capacitor.
Replacing the capacitor was just as easy, so less than a minute later I was able to do another measurement. Unfortunately the problem still persisted.
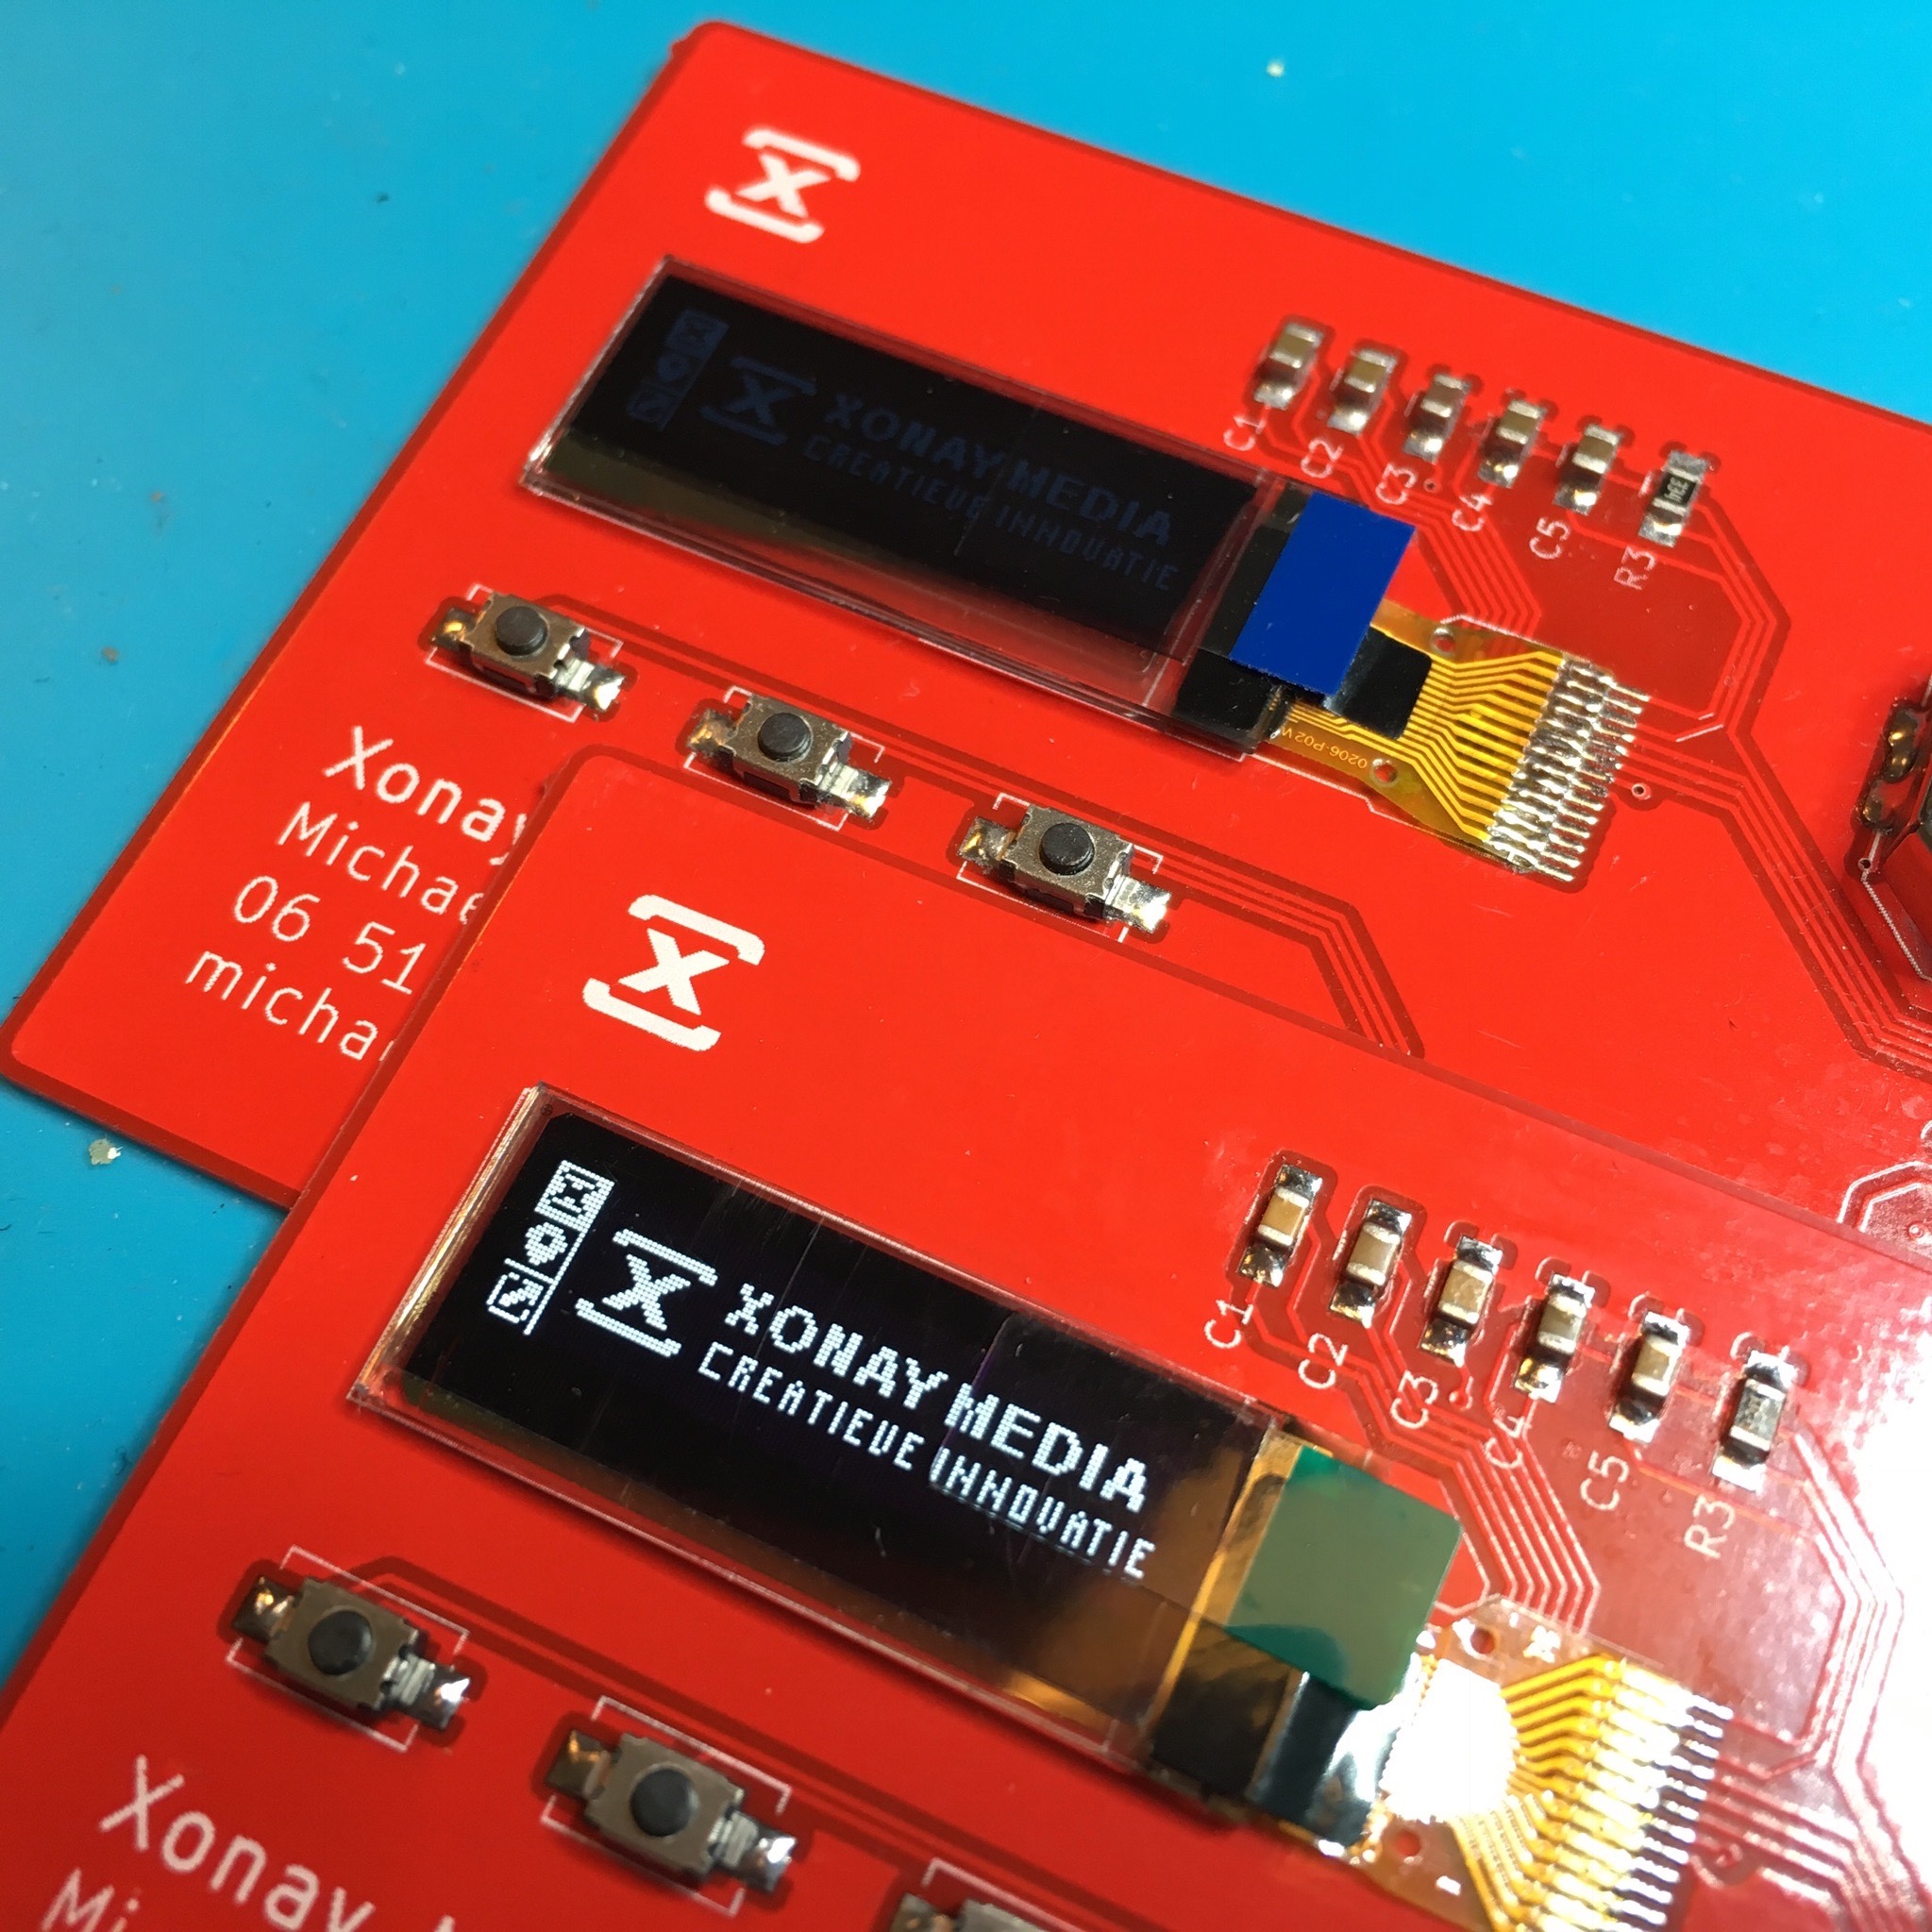
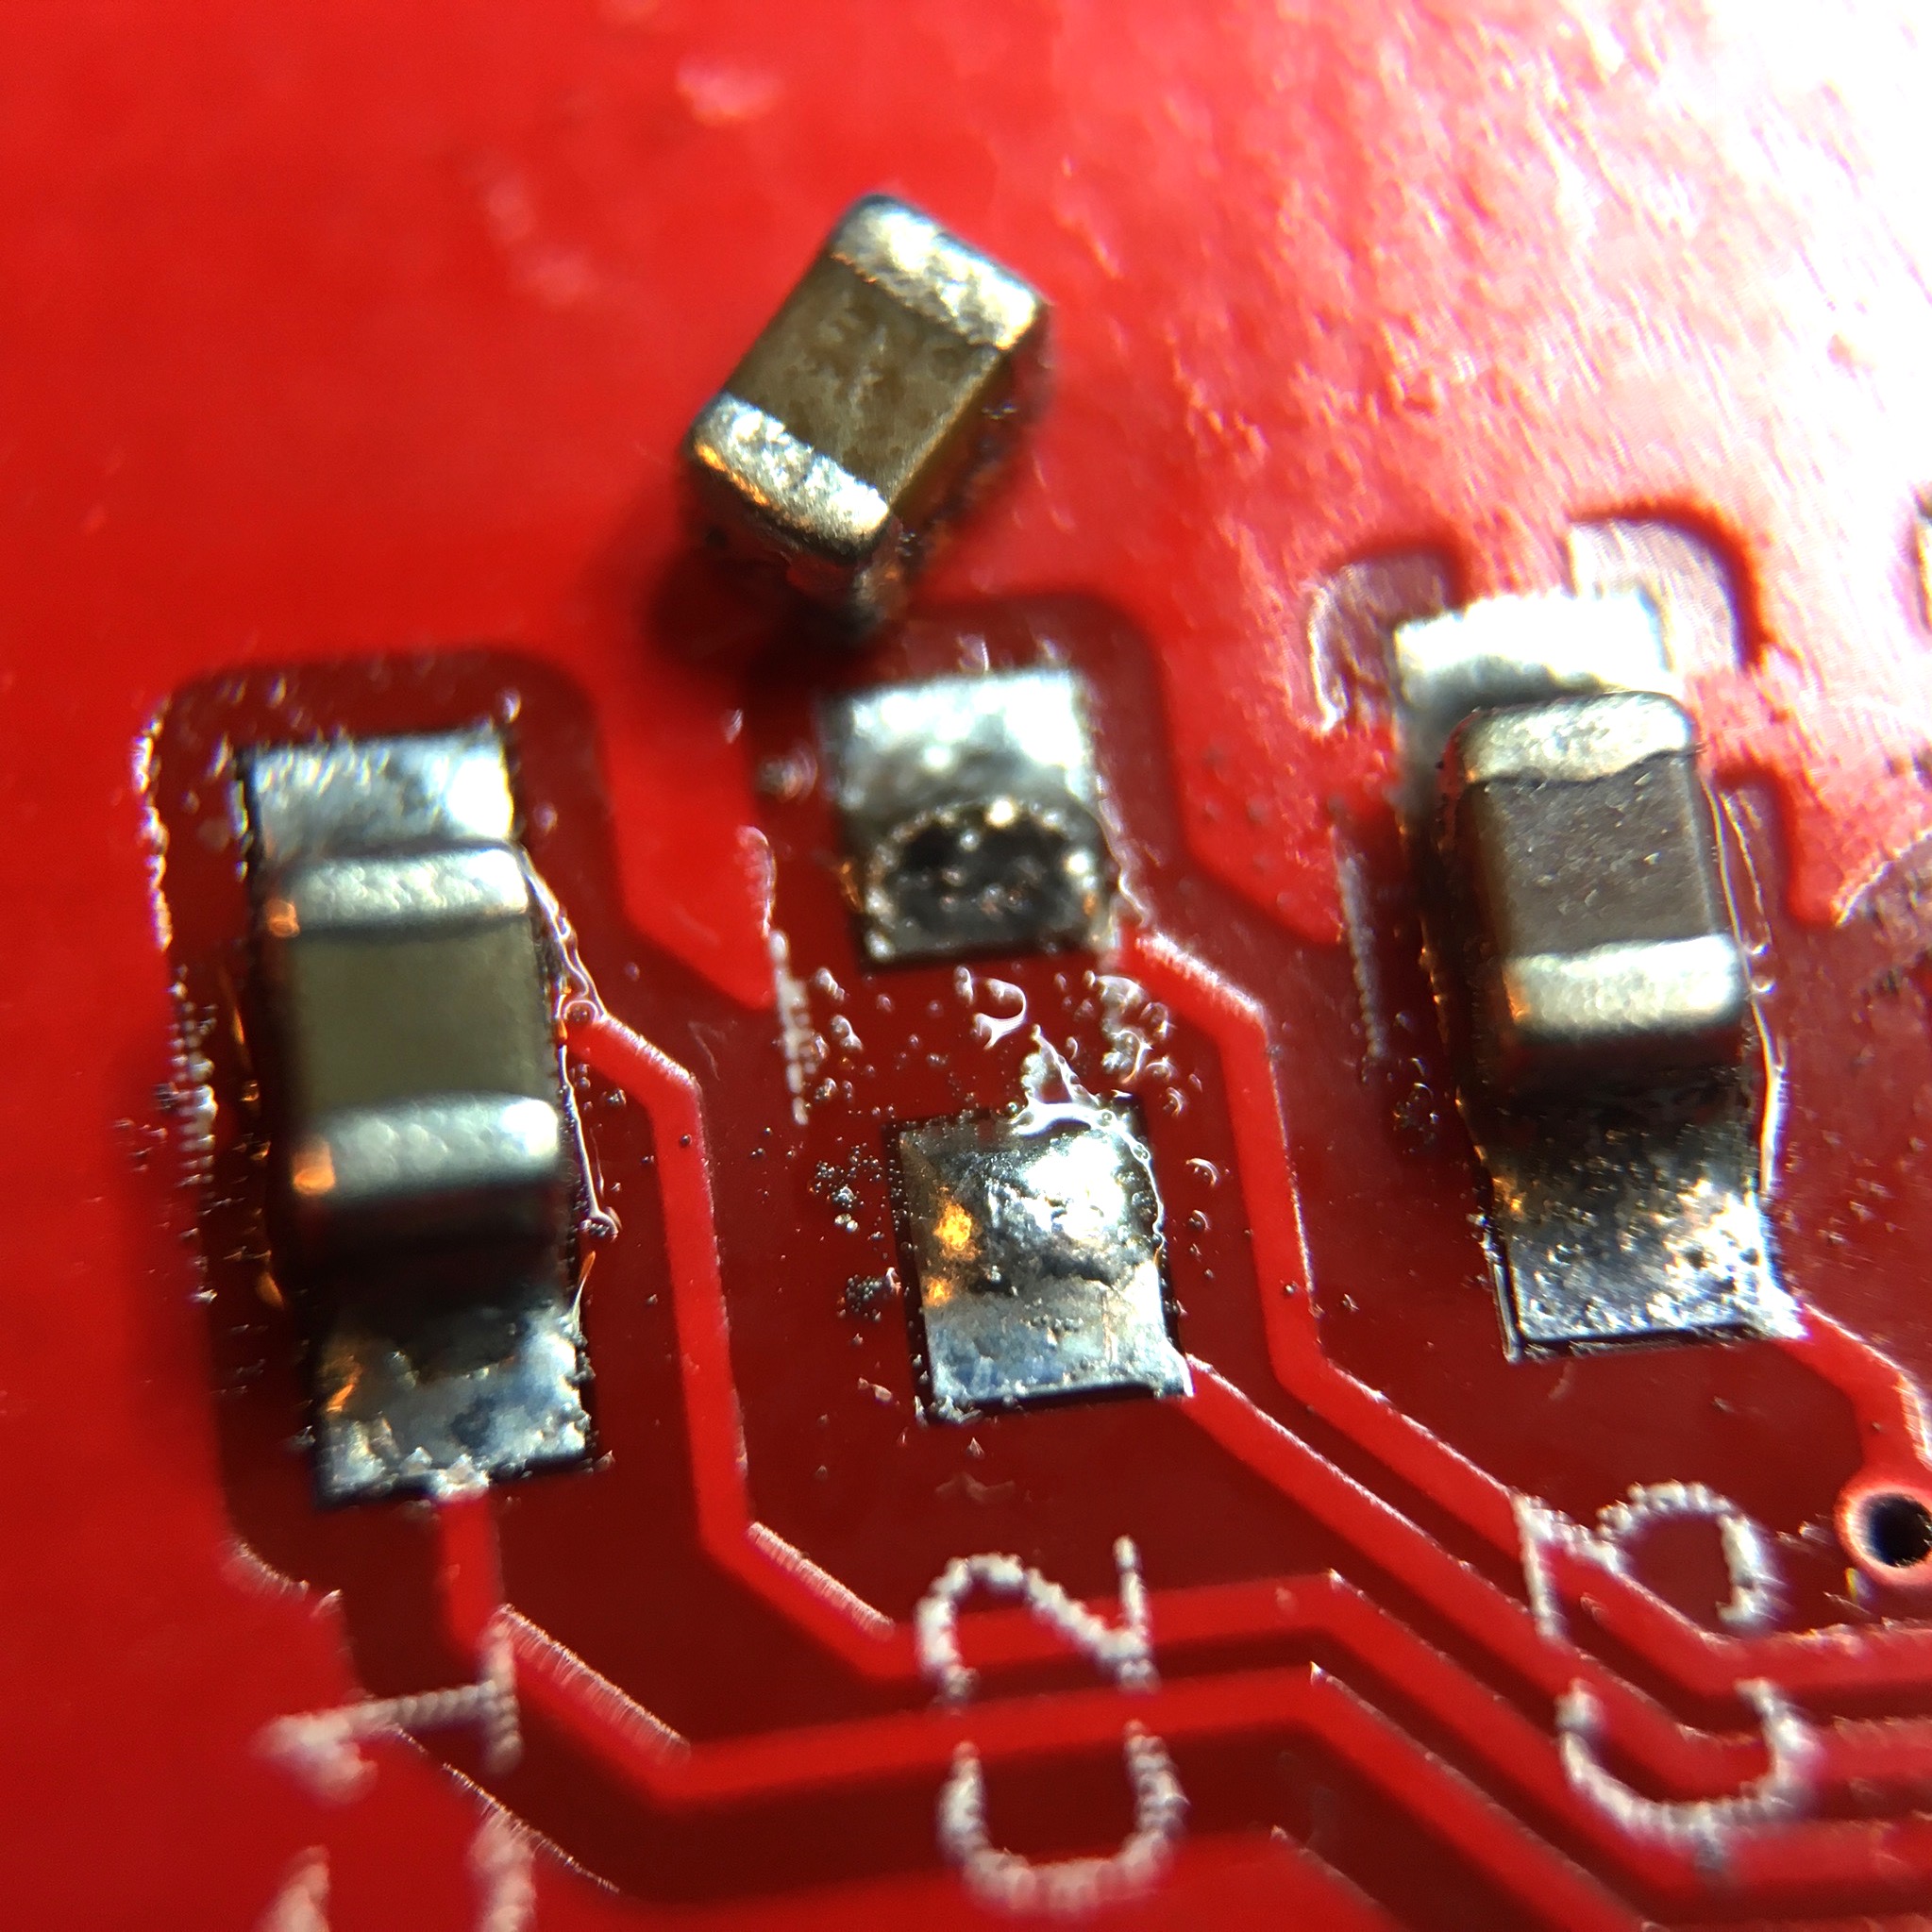
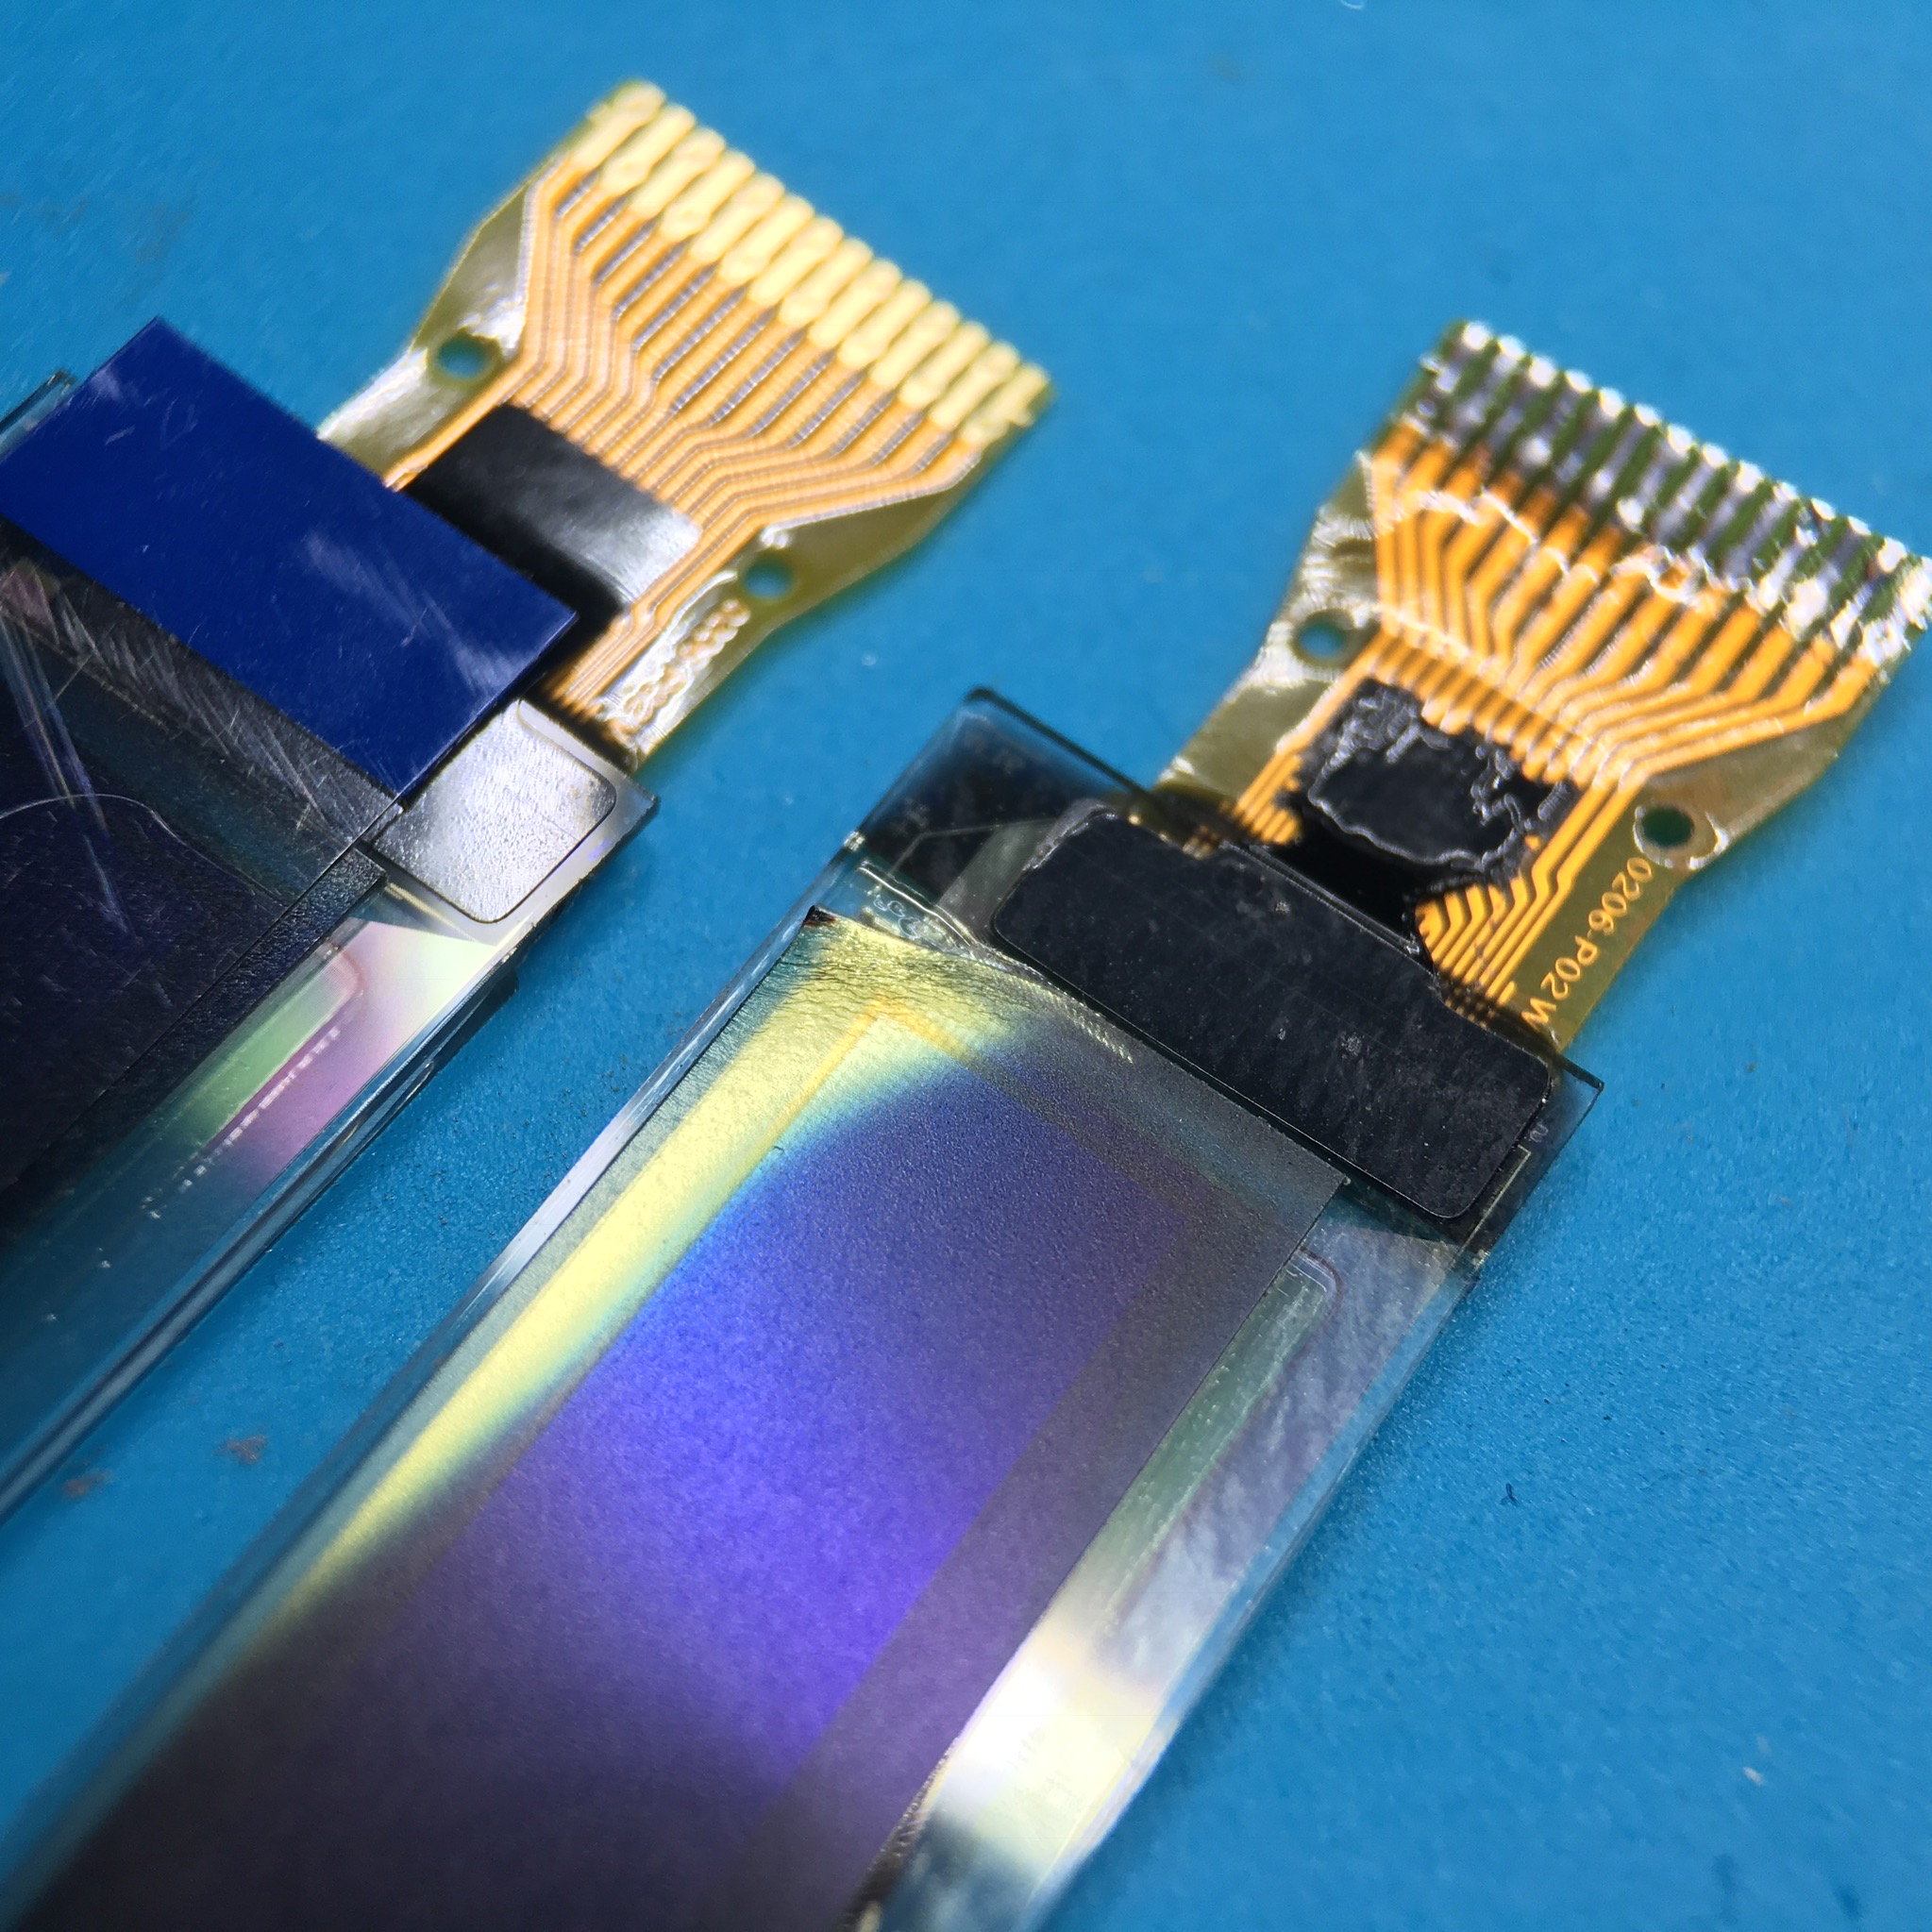
This lead me to an other possible cause: a shortage in the display’s board connector. And with the help of an macro lens on my iPhone, I figured out it wouldn’t be very strange. Boy this solder joint looks messy!
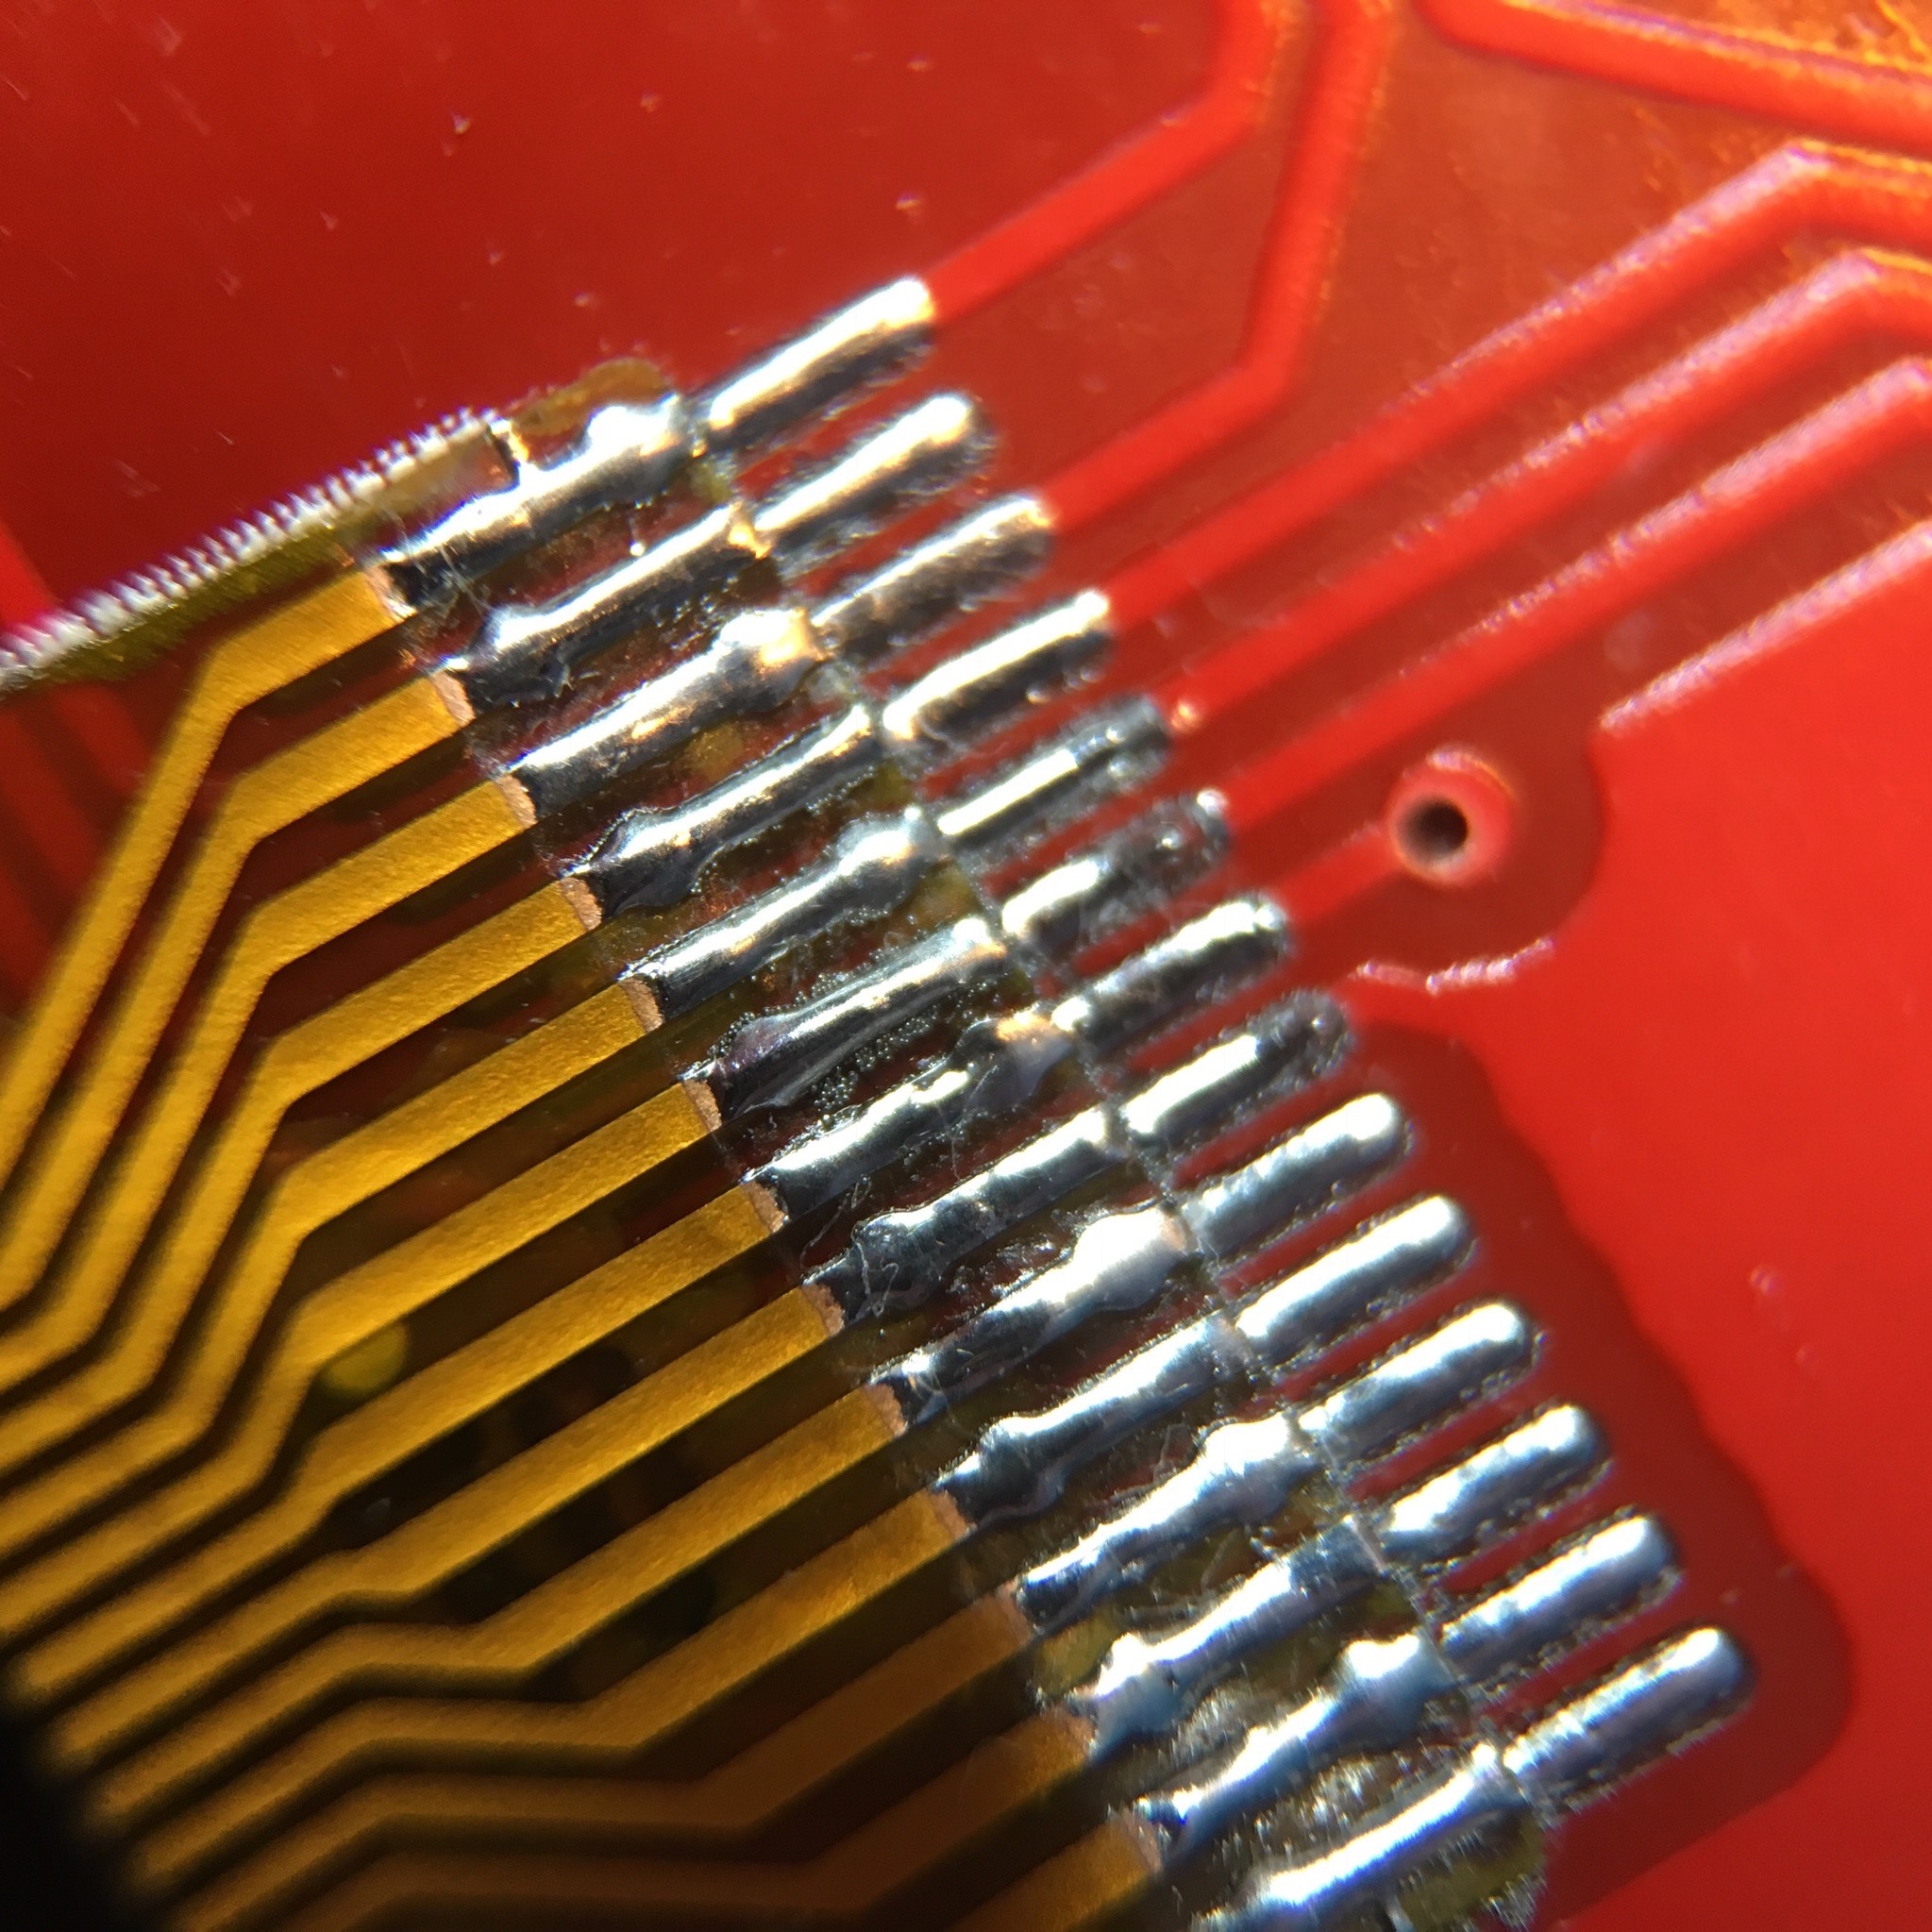
One quick swipe with my soldering iron over the joints removed the short. And lo and behold: the issue was gone, indeed!
Of course, the next step would be making a nice photo for this blog post to show the result. But since the new C2 capacitor was placed a little bit crooked, I decided to quickly give it a blast of hot air. Pure for aesthetics.
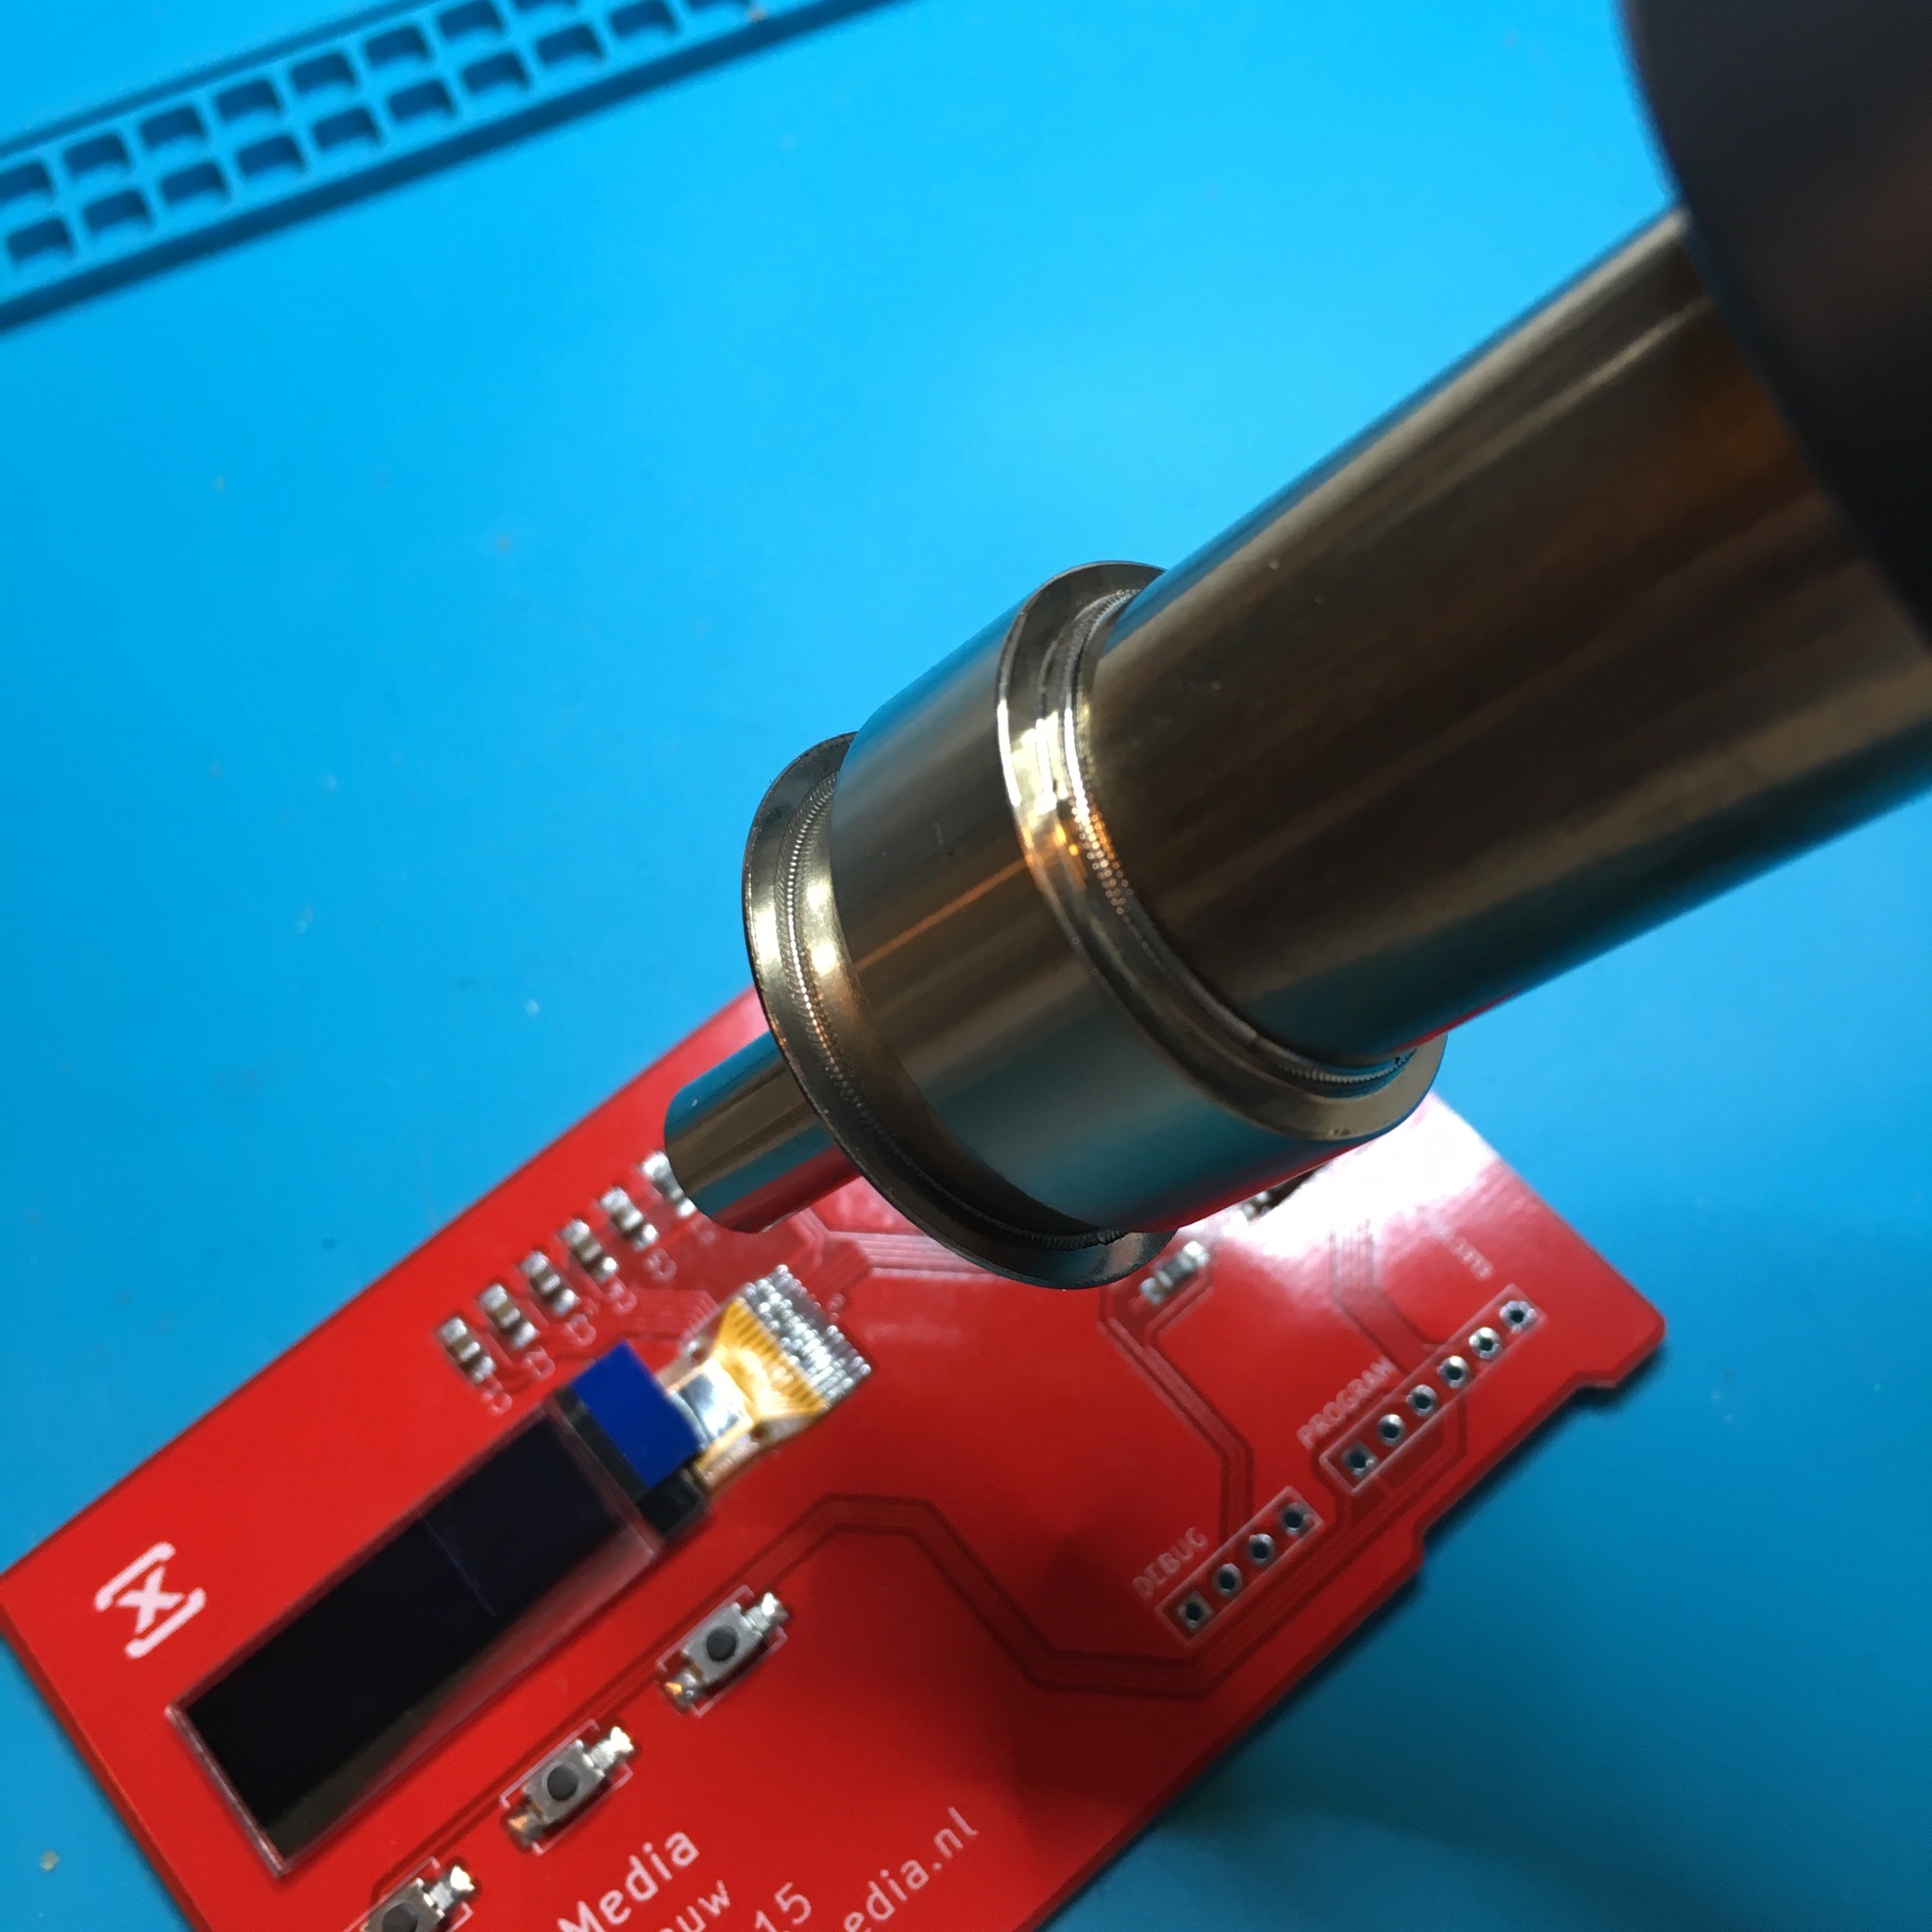
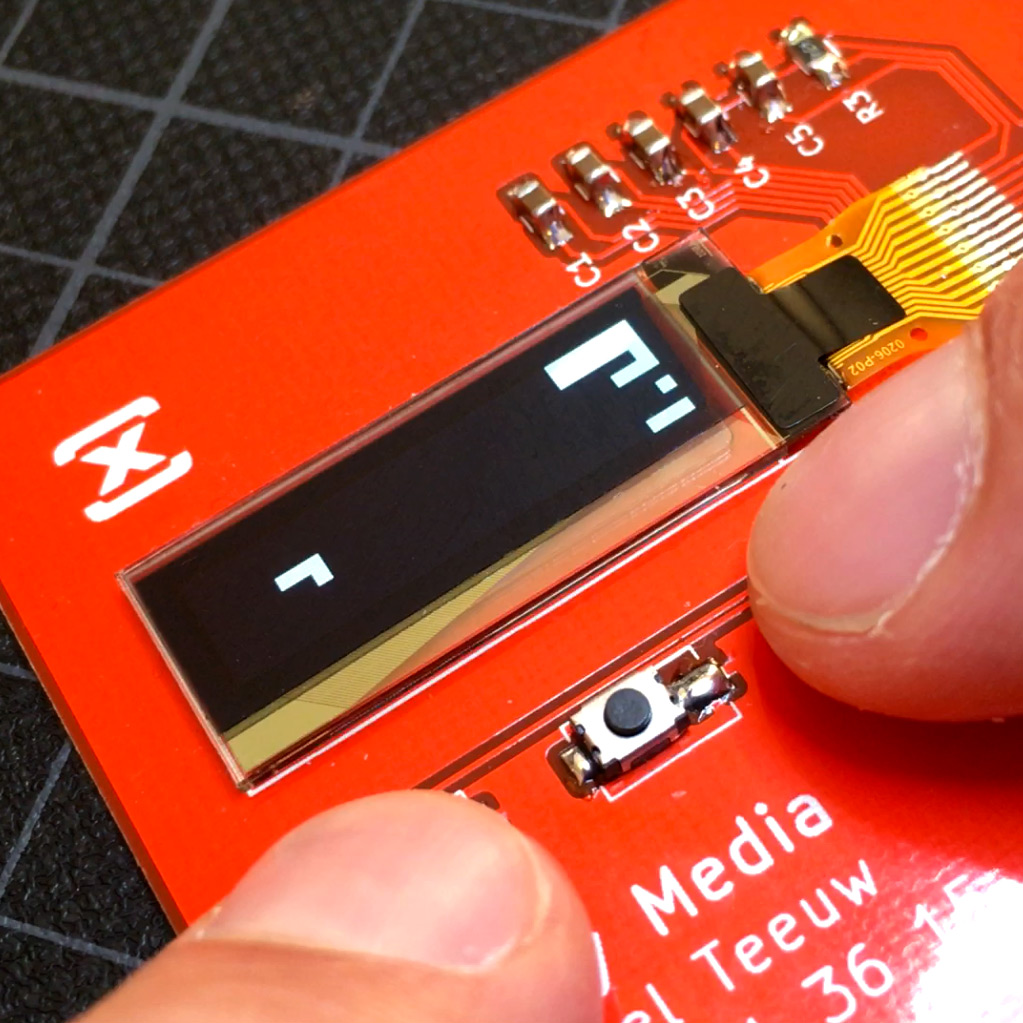
Well, that turned out be be a mistake. Apparently the tiny OLED screen near the capacitor didn’t really enjoy the cosy warm atmosphere. It still worked, but it clearly had some visible damage.
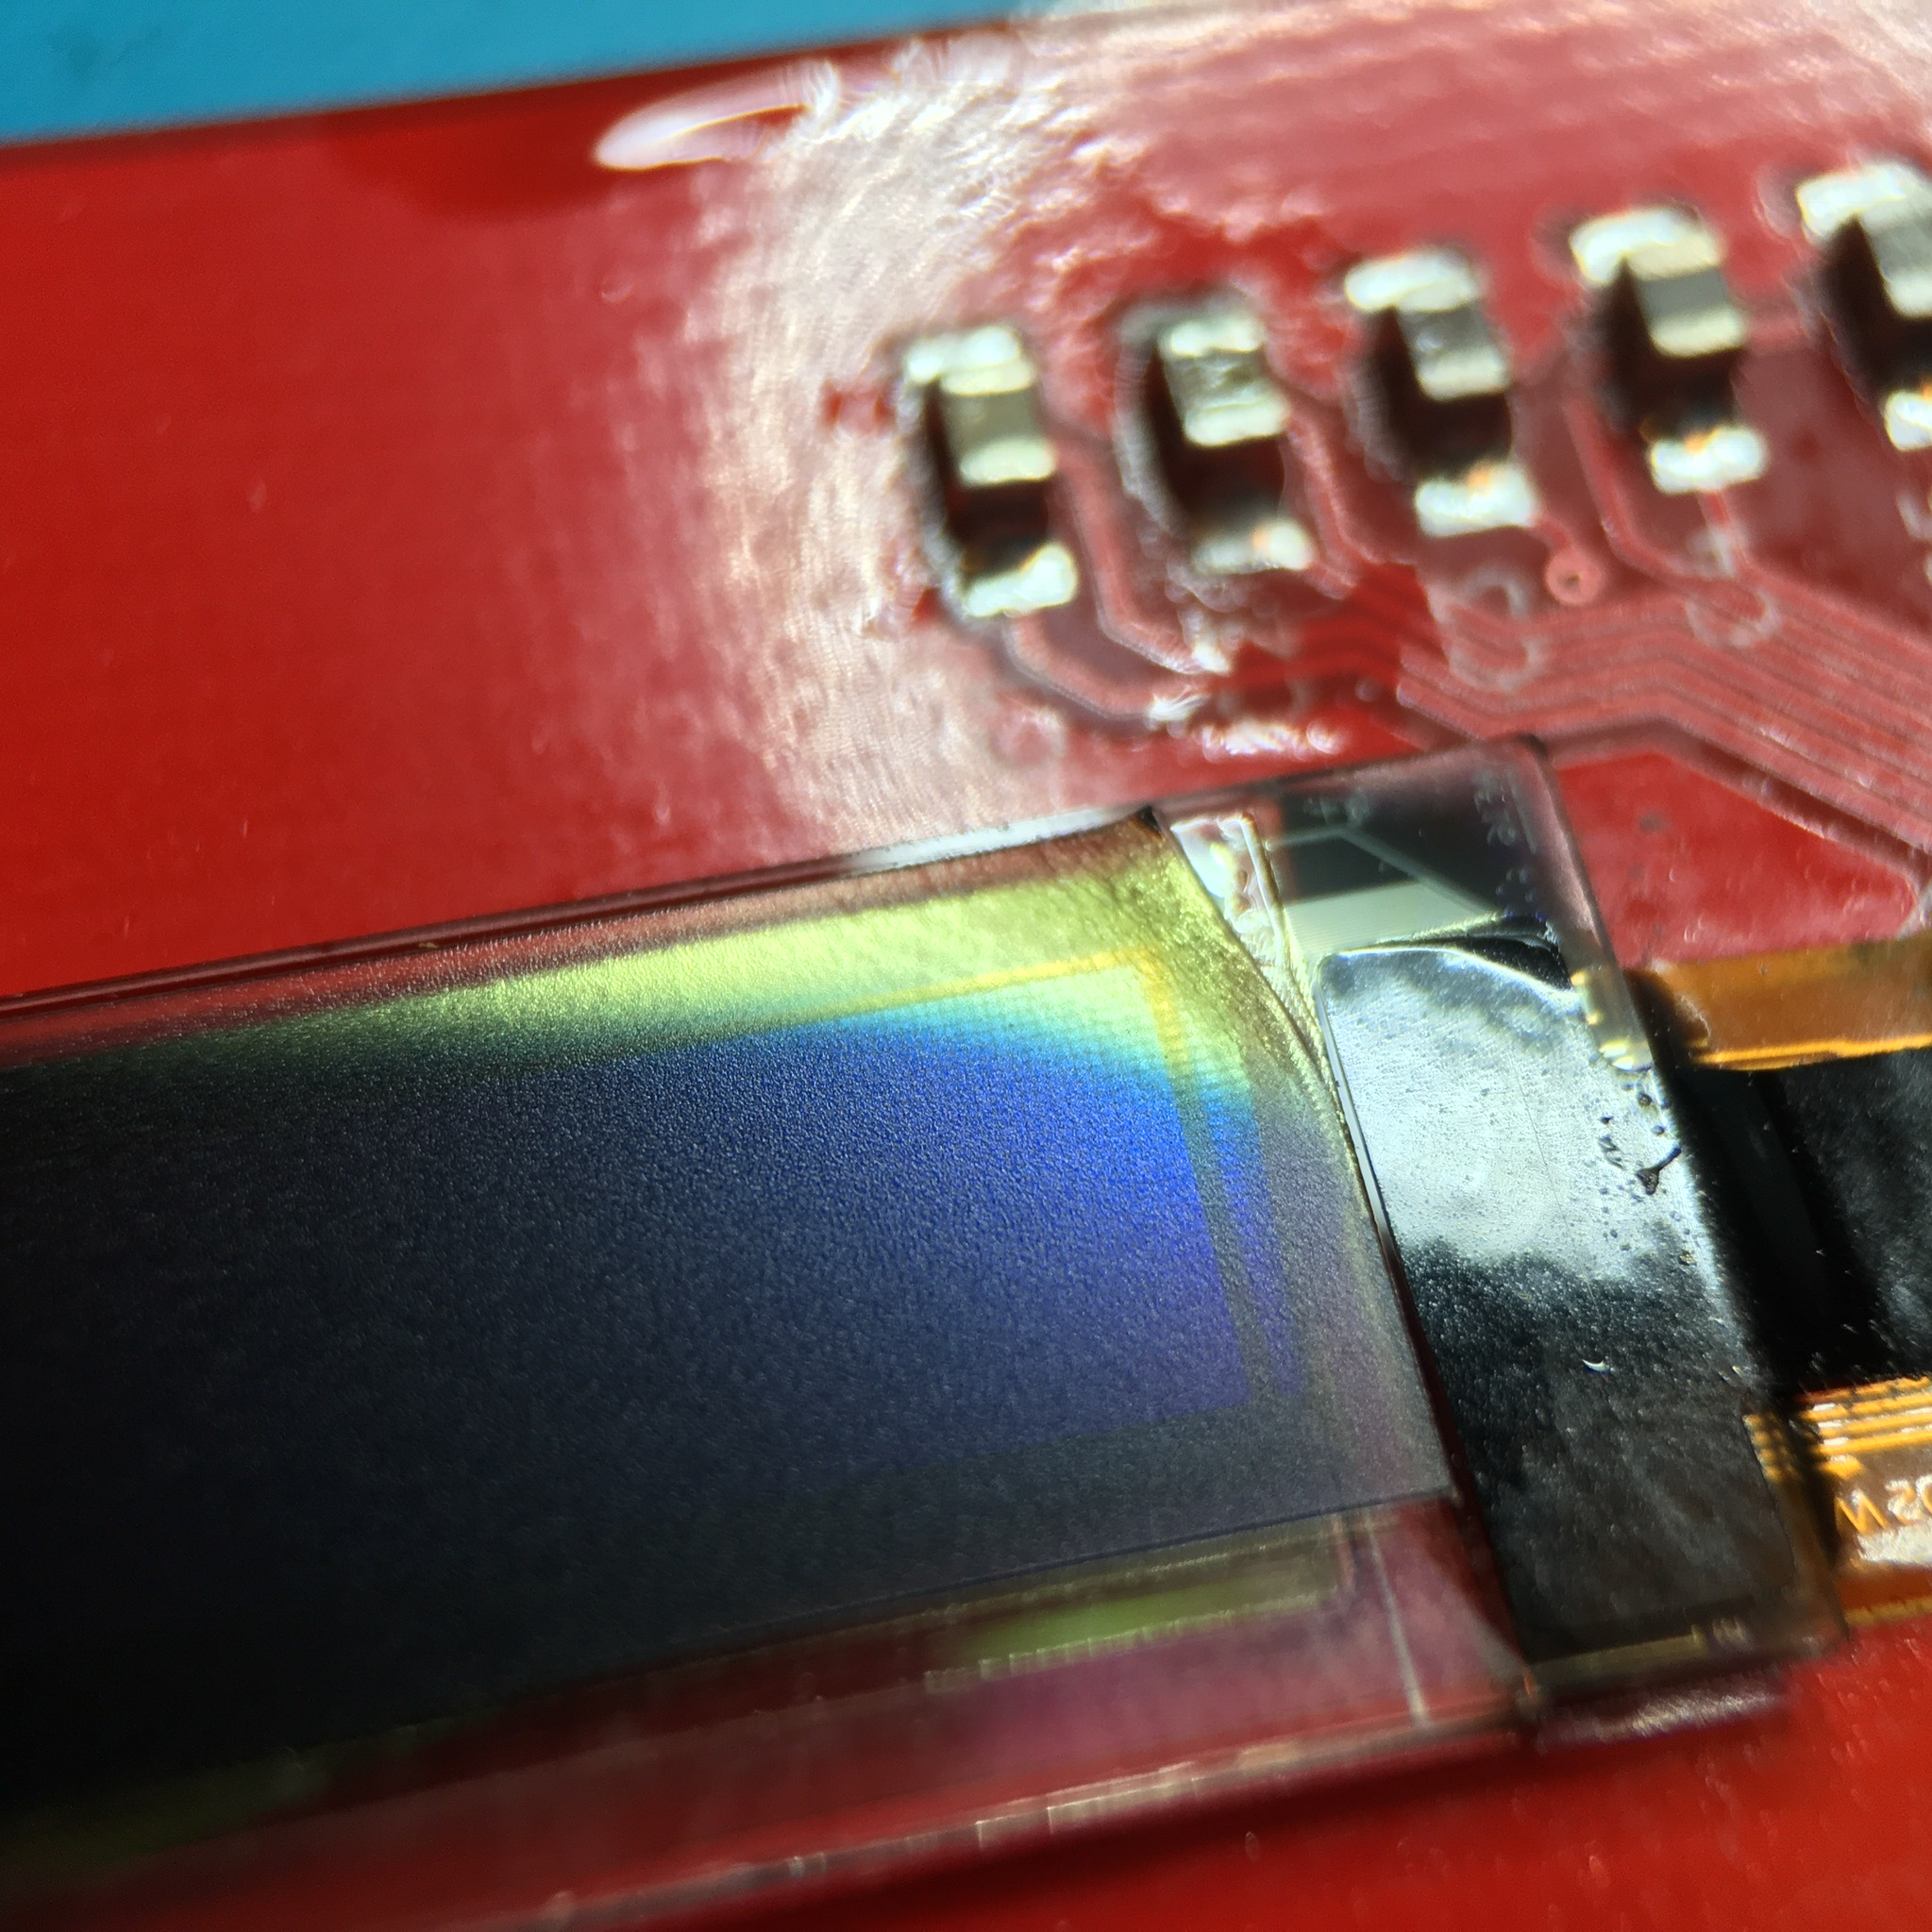
The greenish yellow part of the screen on the photo below was caused by the heat. Not by a reflection of light. Oops!

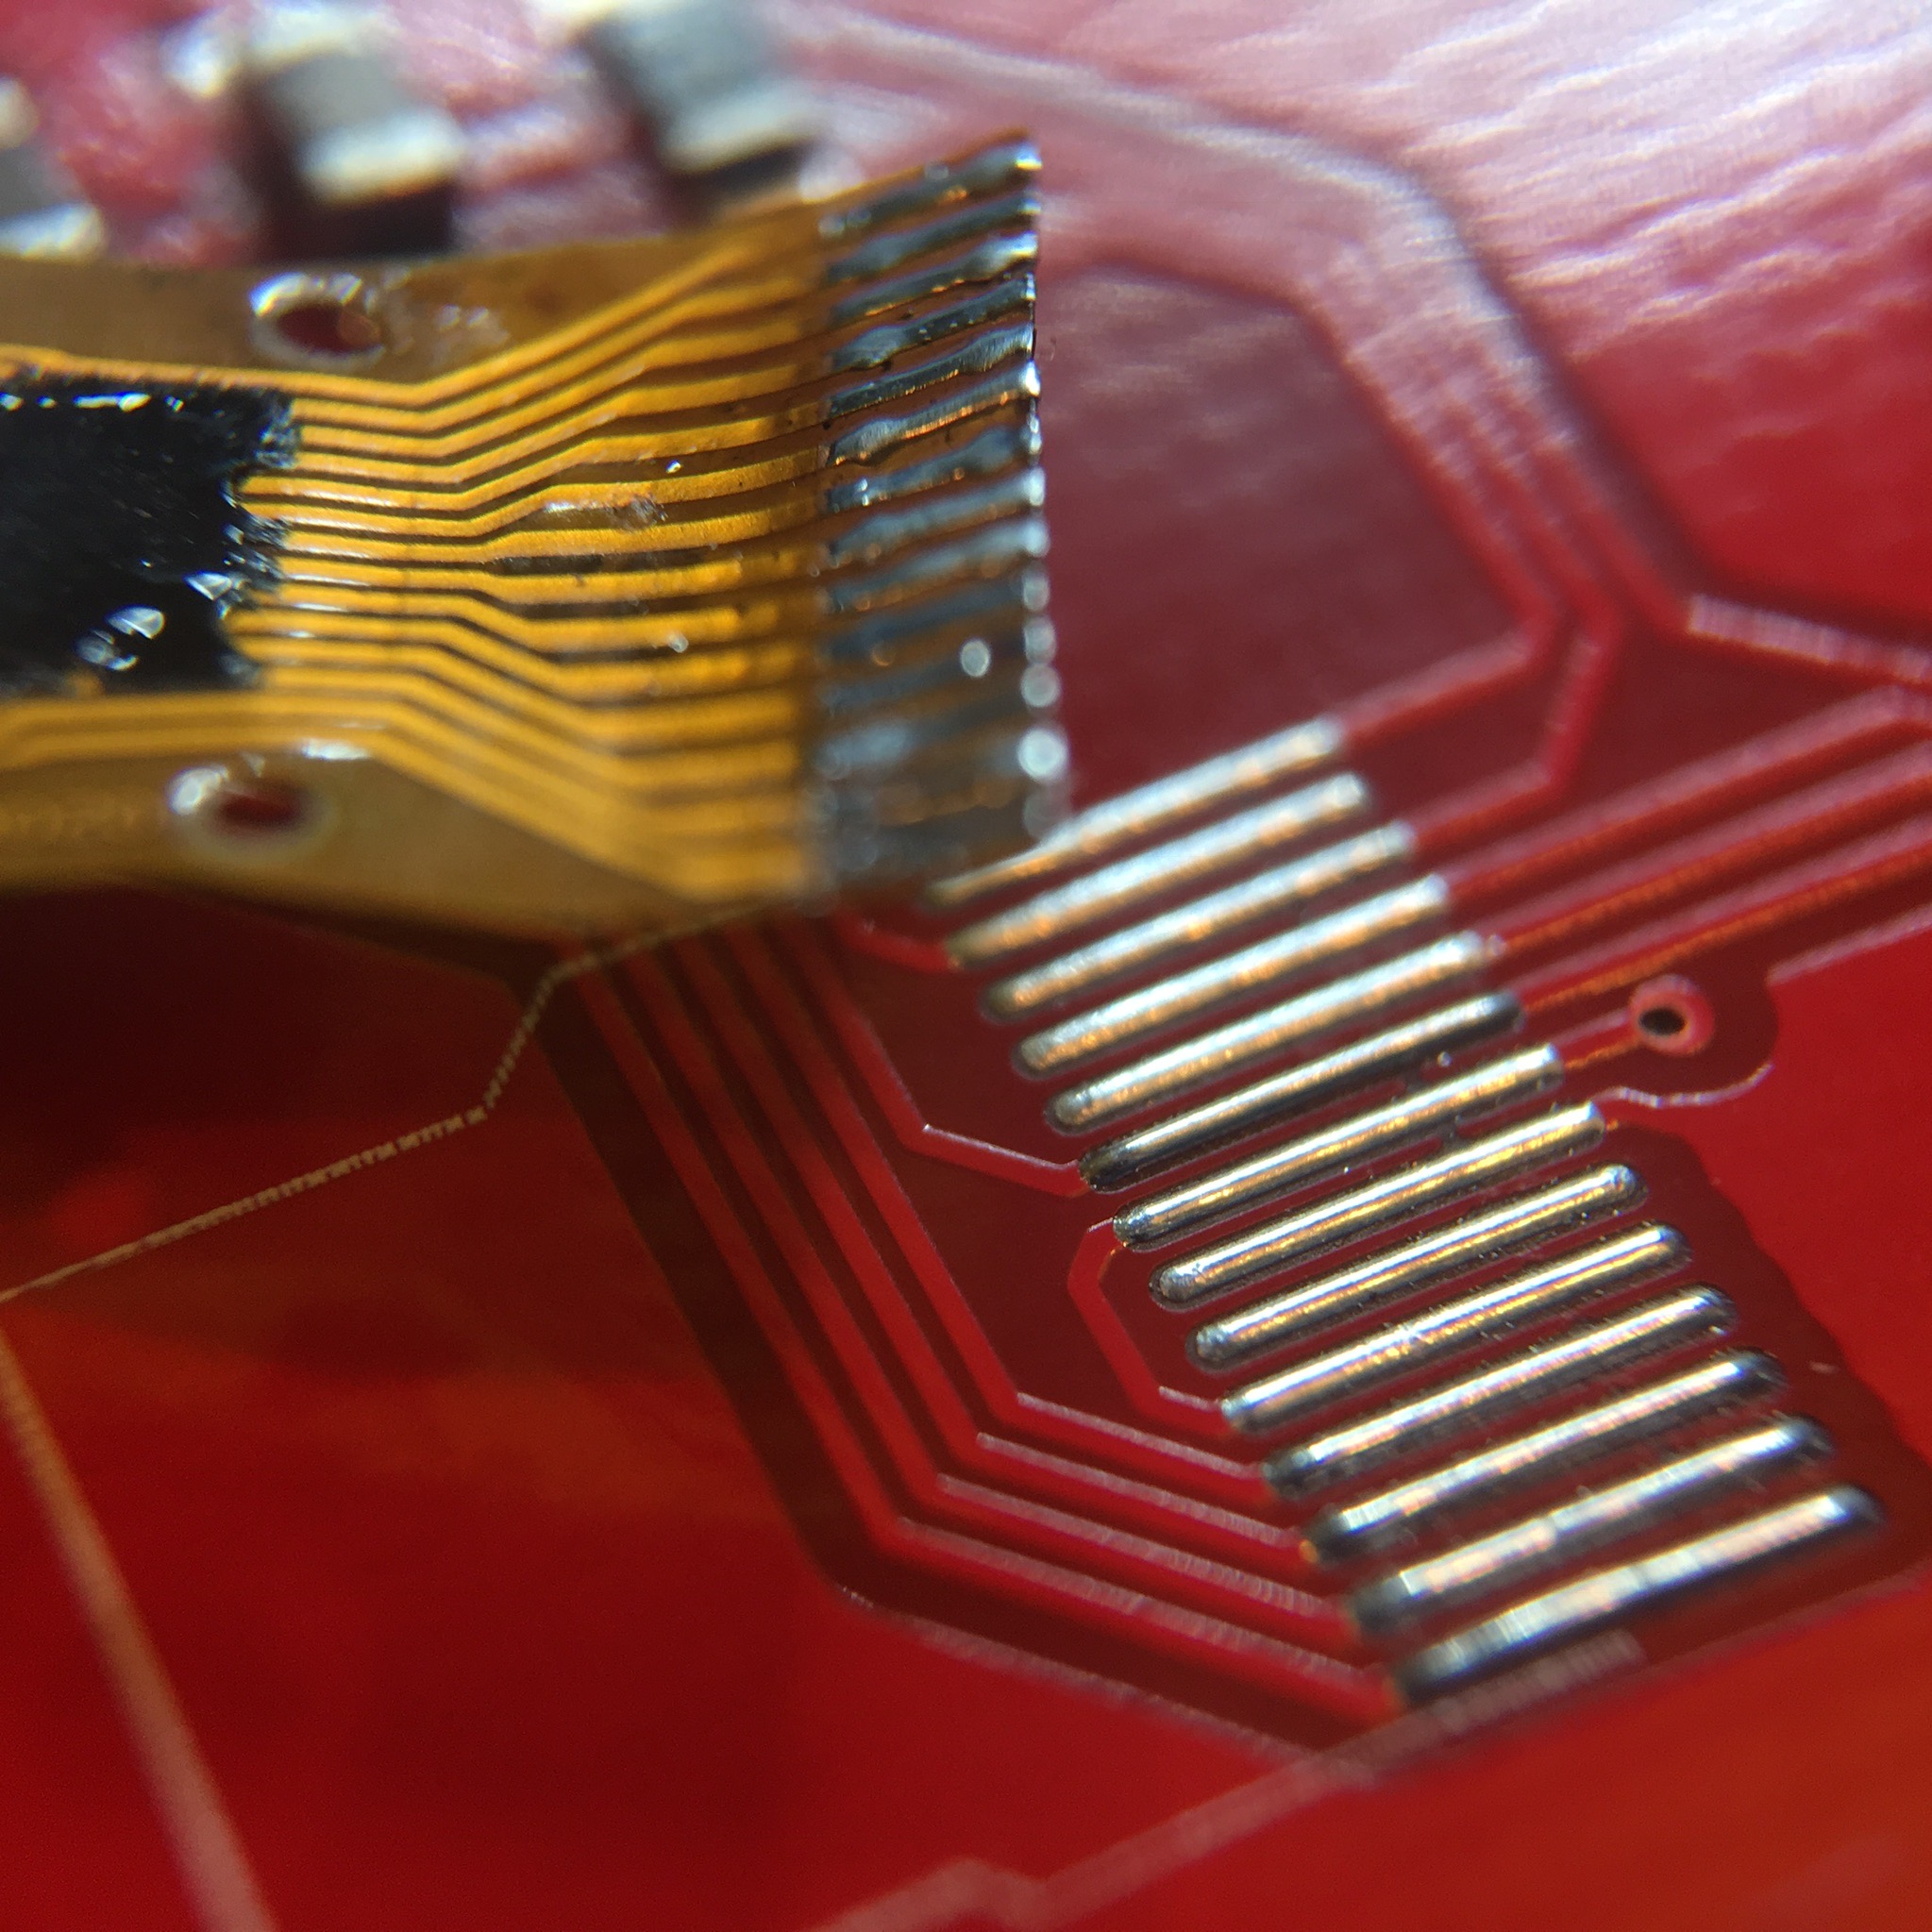
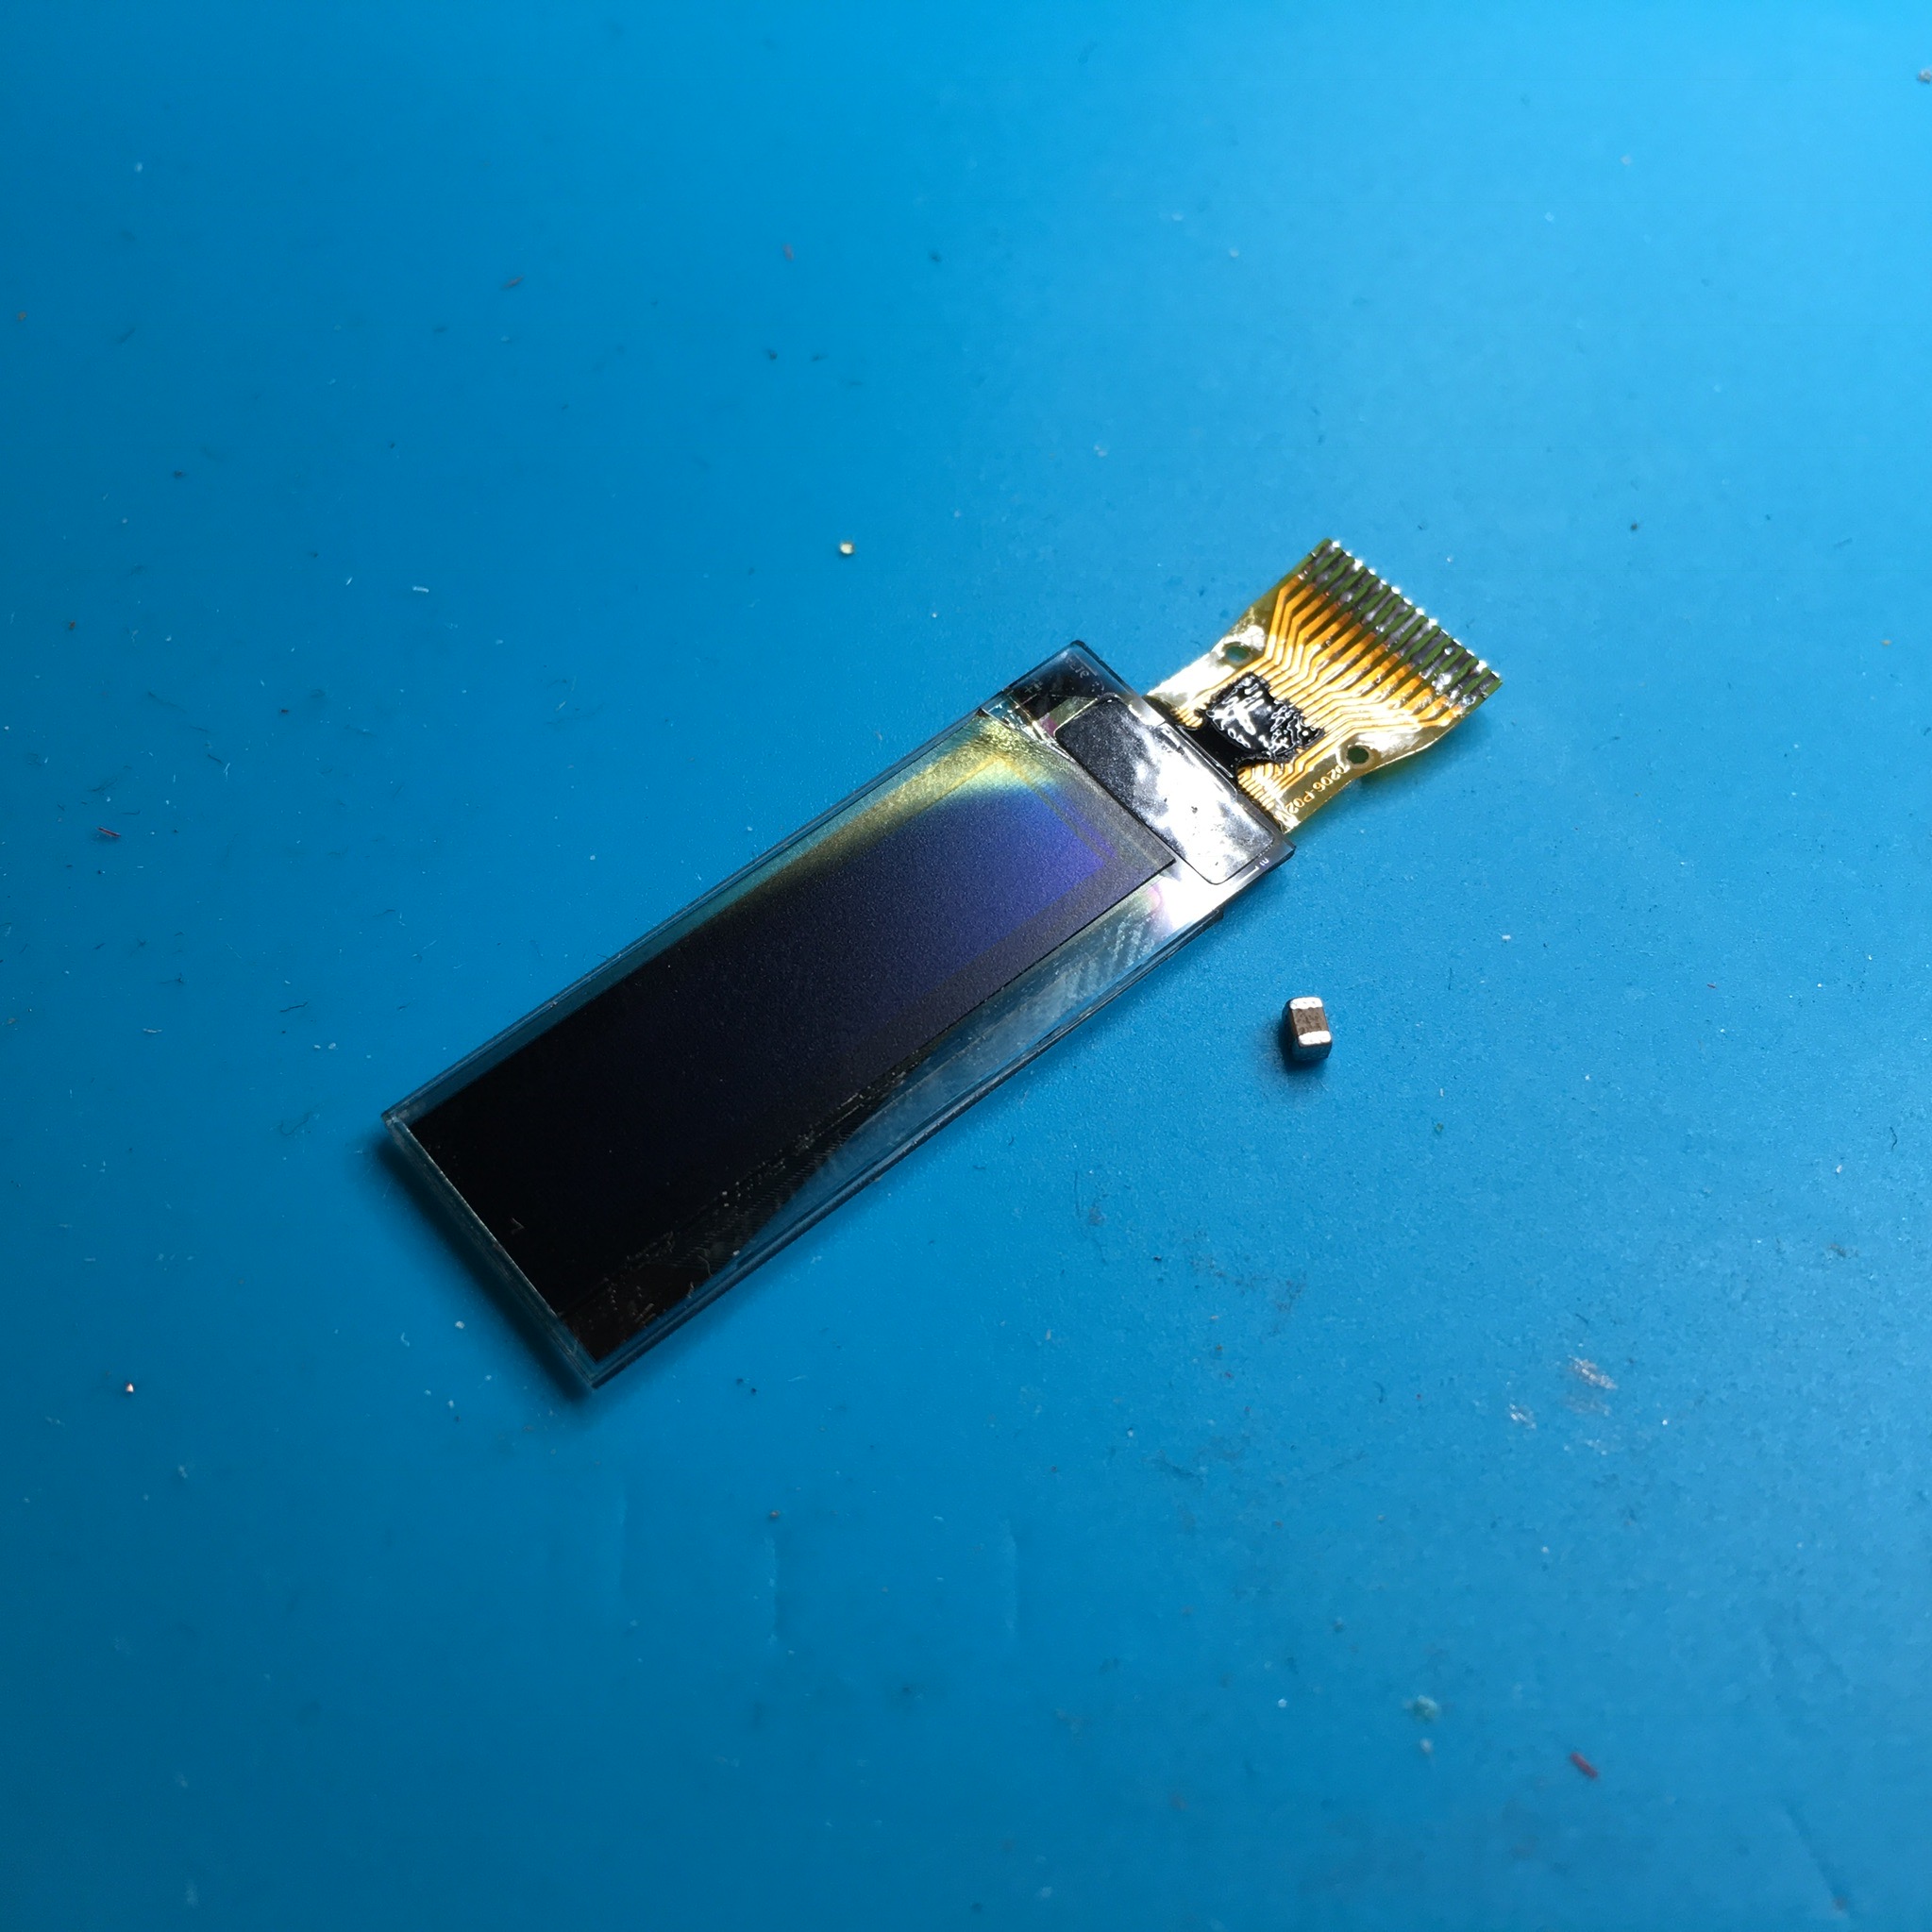
So with another blast of hot air I removed the damaged screen and cleaned up the soldering pads.
Luckily I have a huge stash of OLED’s laying around, so a replacement part was quickly found.
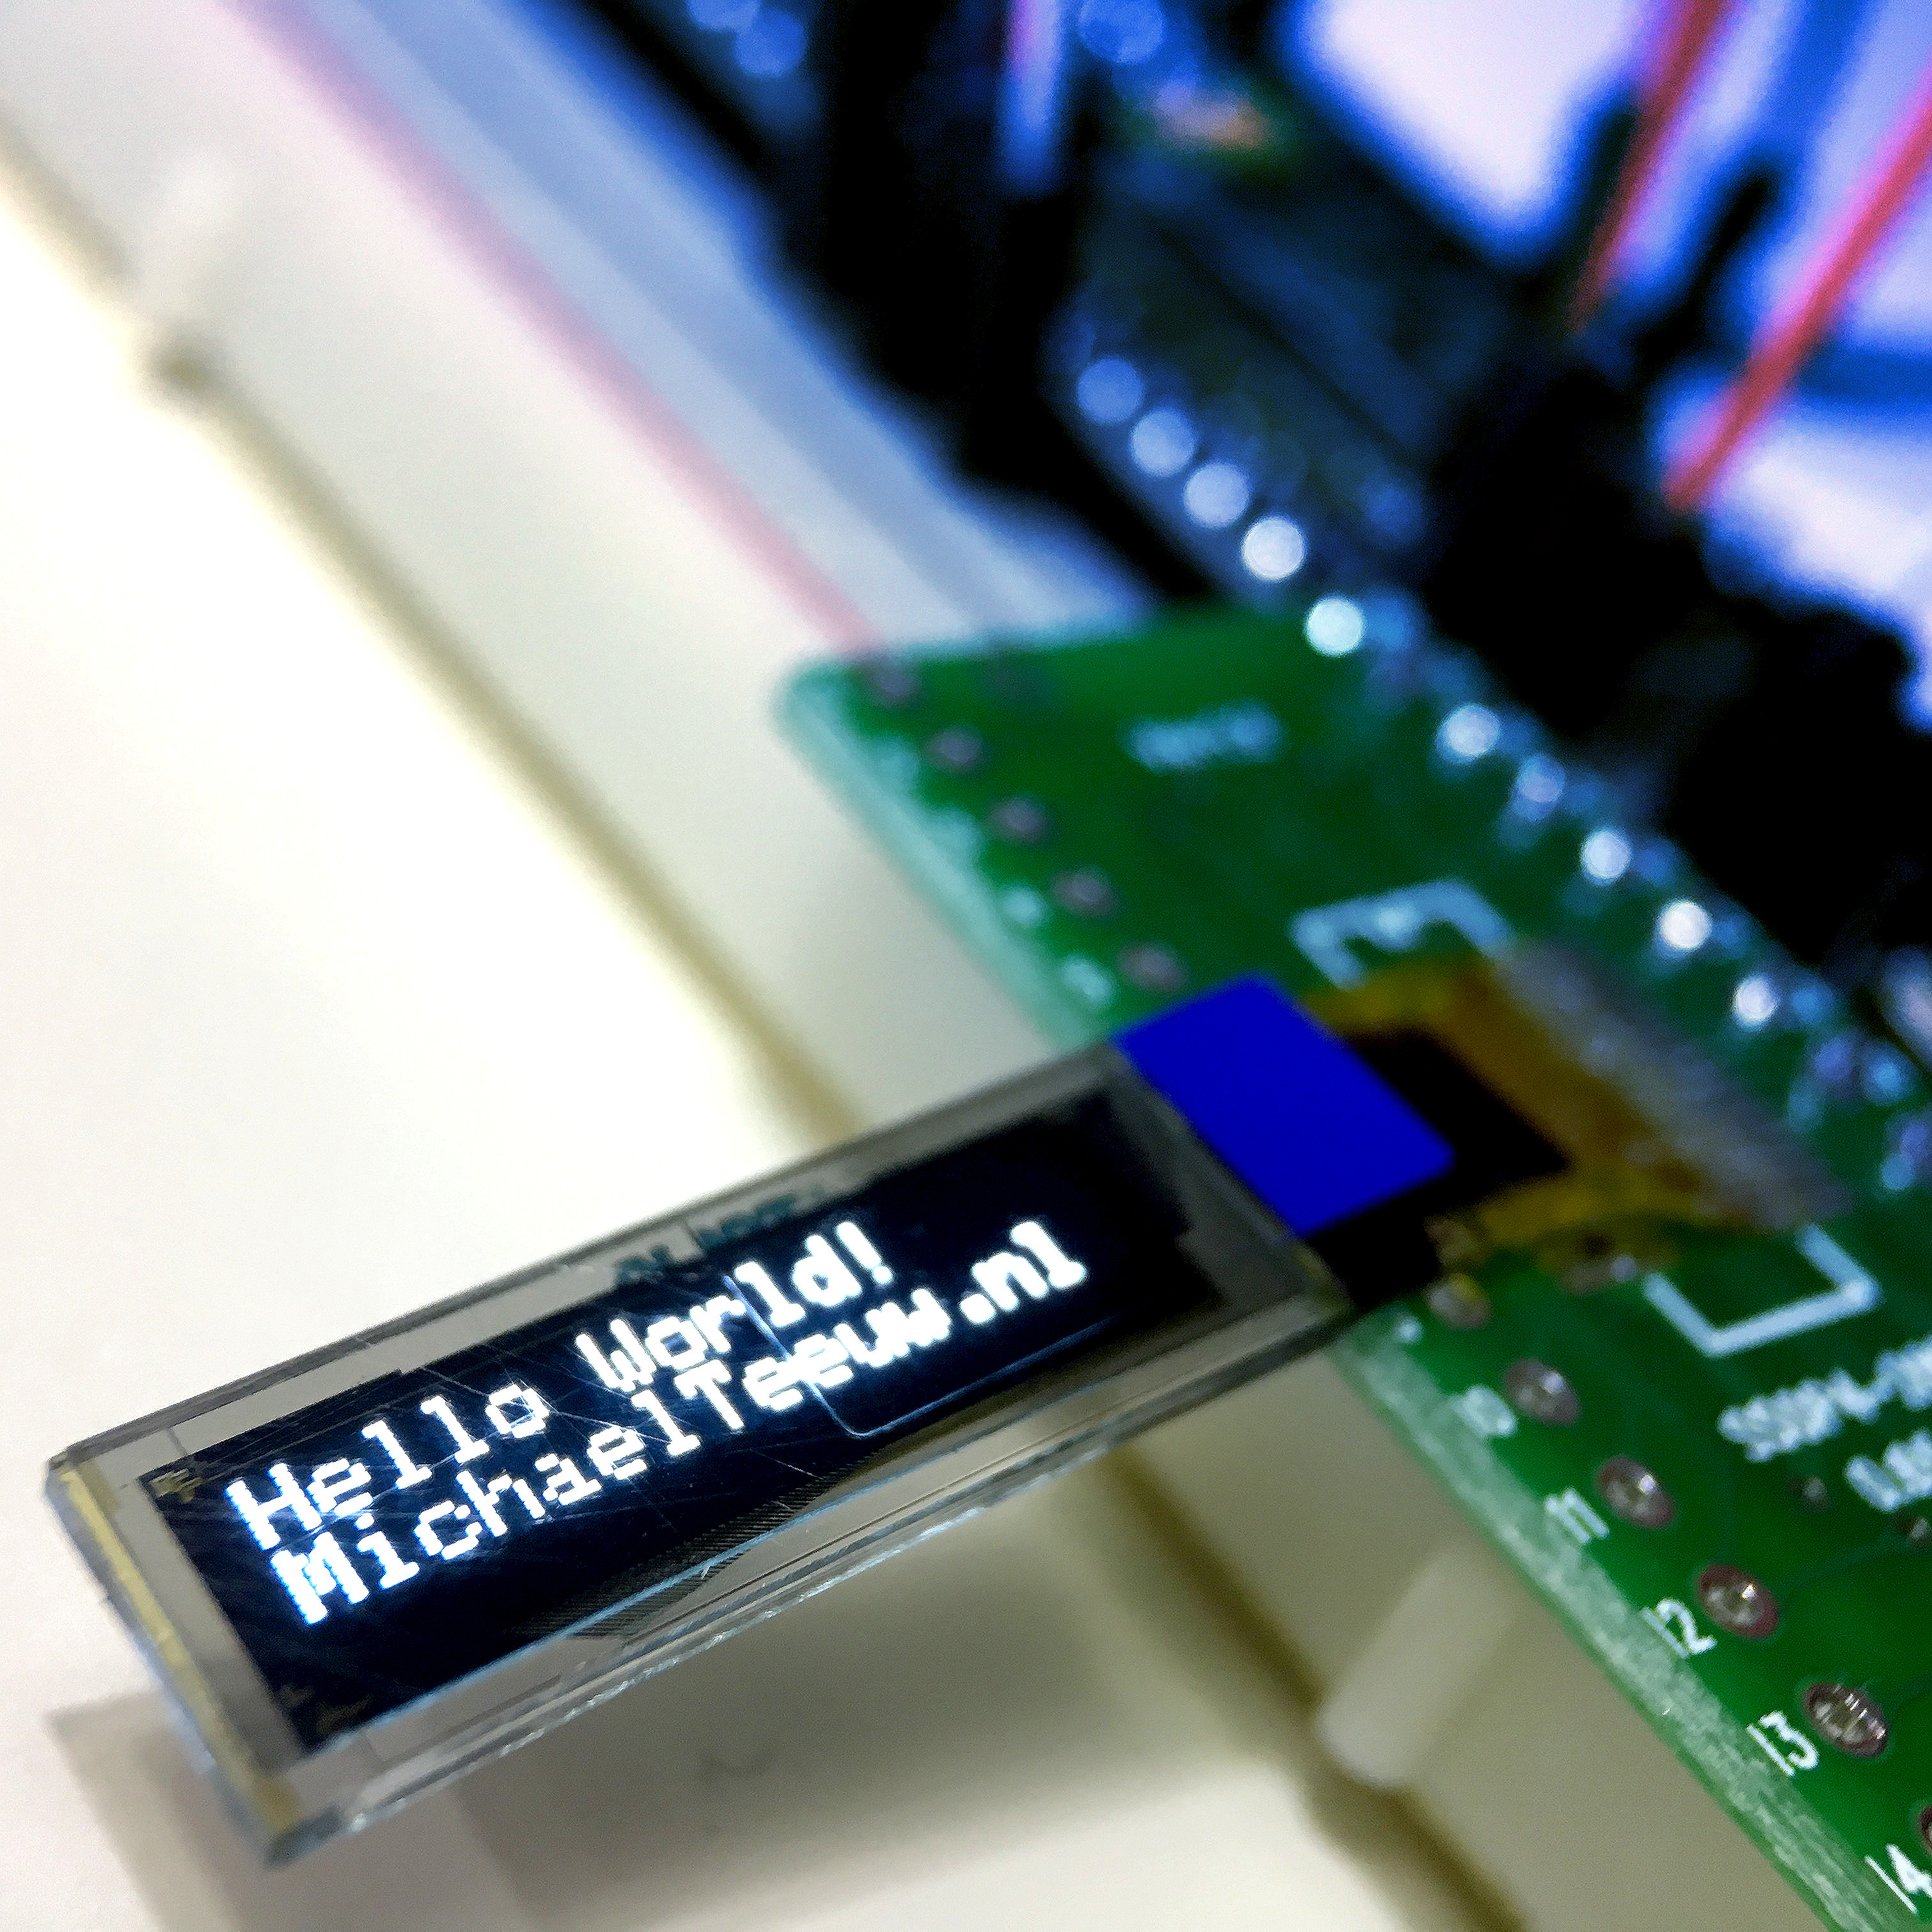
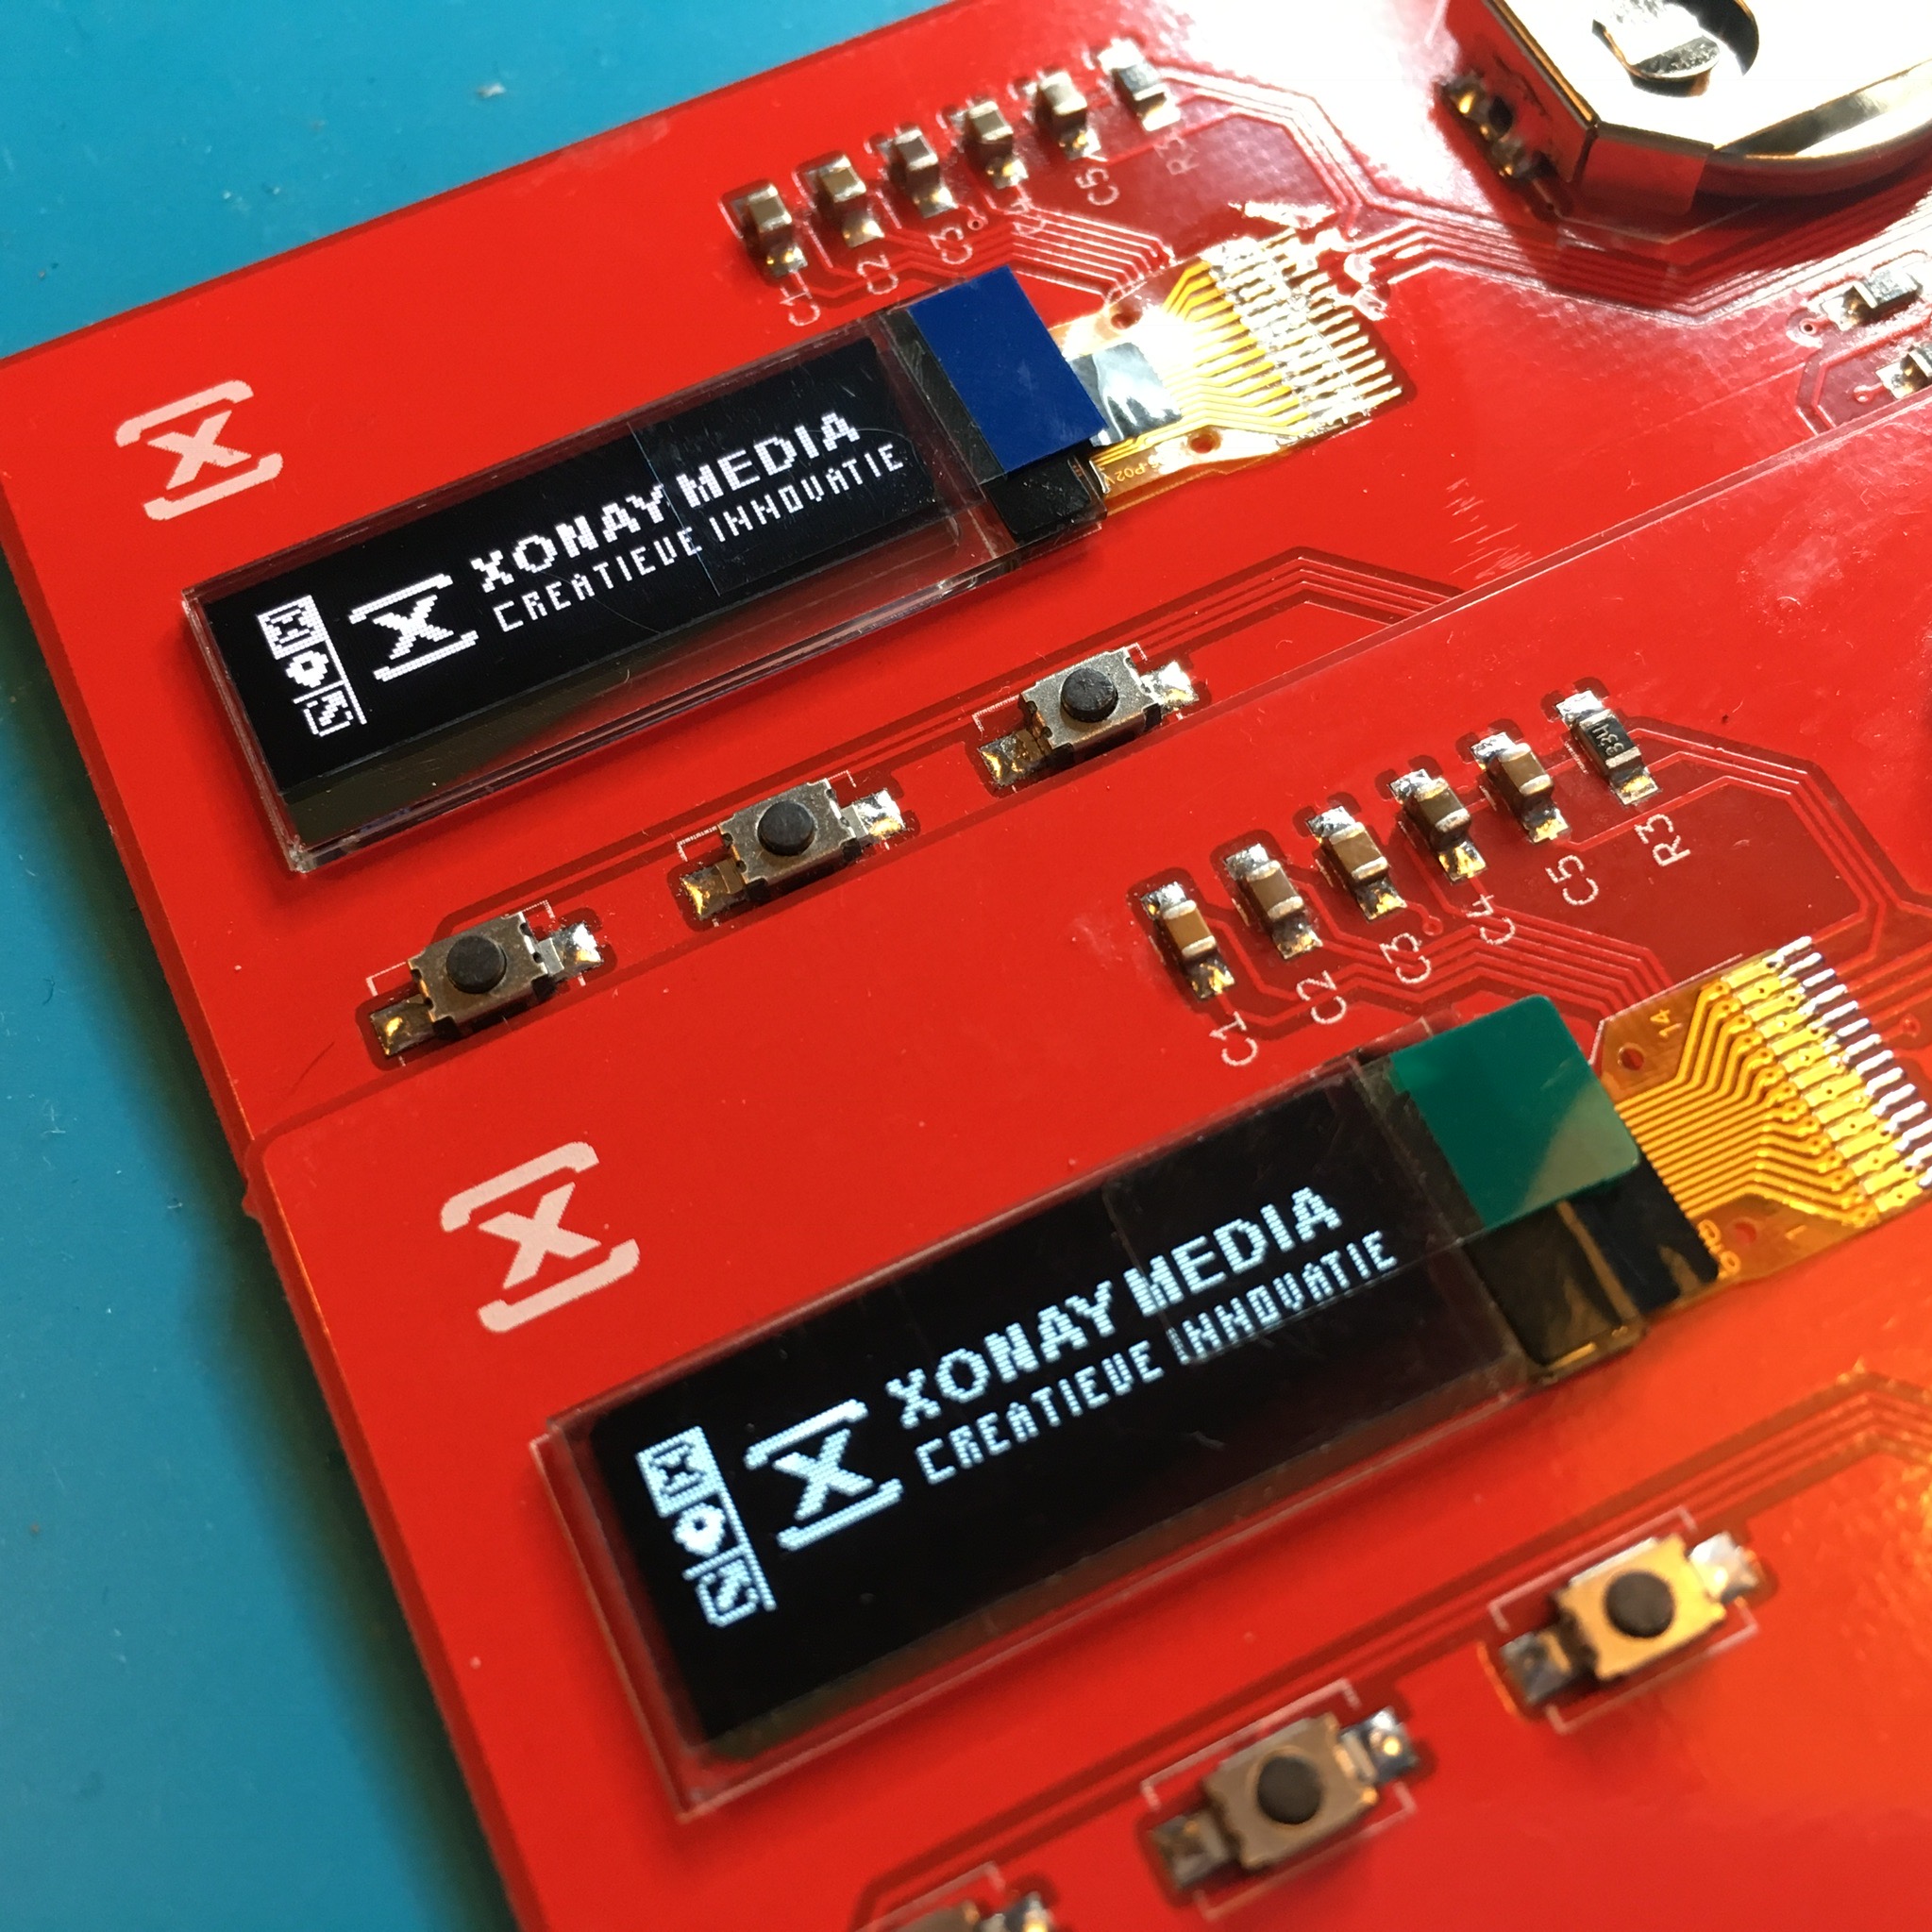
After an other soldering job, this time with my regular soldering iron, the board worked as it should. Ready to be given away to one of my customers.
And for these two innocent components?
They’ll end up in the round archive. AKA the trash bin.