A few years ago I introduced a new Christmas Dinner tradition: we play a quiz to test the attendees knowledge of the news facts of the past year. How many gold medals did we win during the Olypics? On what day did Trump win the election? And who won the Eurovision Song Contest? This year I improved the Quiz experience with the help of some maker magic …
Quiz Time: The Code Quiz
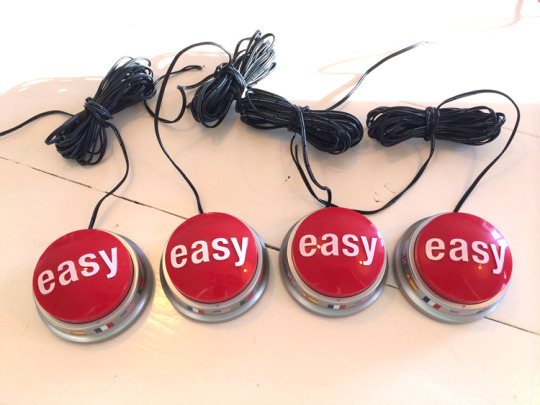
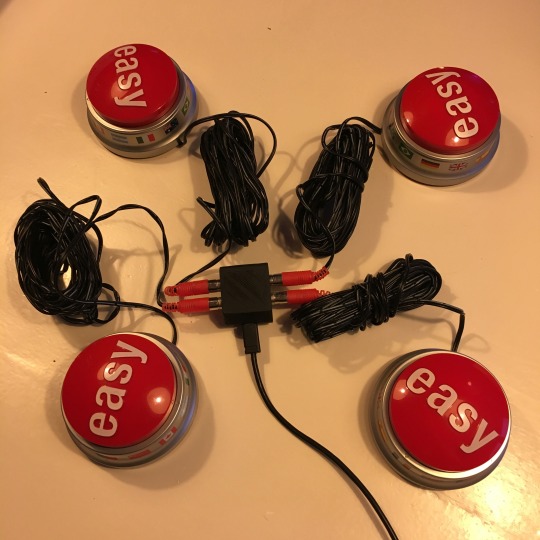
In the past years, the users had to write down their answers on a piece of paper. And at the end of the Quiz I checked who had the most correct answers. This year, I wanted to make it a bit more exciting, by using the quiz buttons I built two and a half years ago.
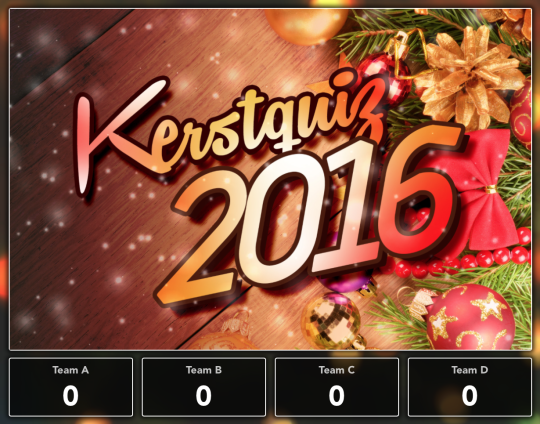
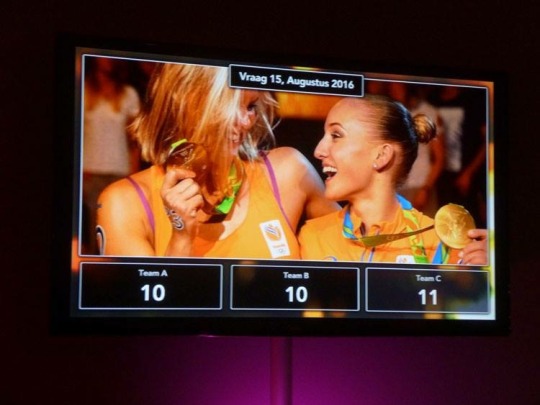
On top of that, I figured it would be fun to add some visuals to the quiz, as well as a real time score display. With the use of the beloved Vue.js framework, I created a simple tool which allows me to show questions and count the score using keyboard commands. Connecting my Laptop to the TV a running the tool in a full screen Chrome browser, was all that is needed for a real tv like quiz experience. As an added bonus, I’ve added some sound effects.
To make sure the buttons can interact with the quiz tool directly, I needed the buttons to emulate a keyboard. Luckily this is pretty simple when using an Arduino Pro Micro which has an ATmega32U4 processor, and is able to accomplish the keyboard emulation using a few lines of code:
#include <Arduino.h>
#include <Keyboard.h>

#define BUTTON_A 3
#define BUTTON_B 4
#define BUTTON_C 5
#define BUTTON_D 6

void setup() {
    pinMode(BUTTON_A, INPUT_PULLUP);
    pinMode(BUTTON_B, INPUT_PULLUP);
    pinMode(BUTTON_C, INPUT_PULLUP);
    pinMode(BUTTON_D, INPUT_PULLUP);

    Keyboard.begin();
}

void loop() {
    bool buttonA = !digitalRead(BUTTON_A);
    bool buttonB = !digitalRead(BUTTON_B);
    bool buttonC = !digitalRead(BUTTON_C);
    bool buttonD = !digitalRead(BUTTON_D);

    if (buttonA || buttonB || buttonC || buttonD) {
        if (buttonA) Keyboard.write('A');
        if (buttonB) Keyboard.write('B');
        if (buttonC) Keyboard.write('C');
        if (buttonD) Keyboard.write('D');

        delay(50);
    }
}
This sketch will make sure the Arduino sends an A, B, C or D whenever one of the buttons is pressed.
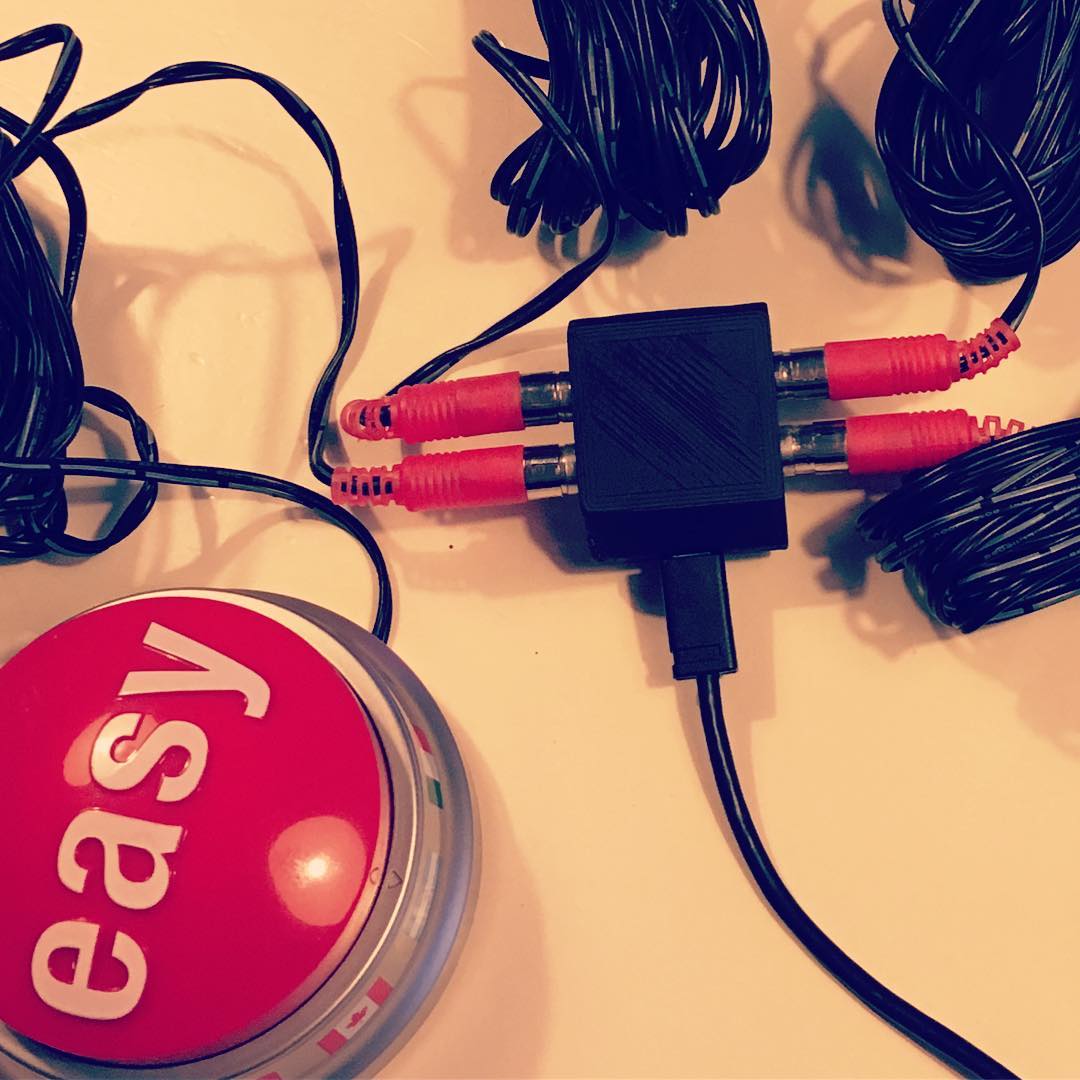
To make this Arduino solution a robust and monkey proof gadget, I used some 3d printing to give it a nice form factor. The buttons all have a male RCA connector (aka Cinch connector), so my enclosure needs to house 4 female RCA plugs and one Arduino Pro Micro …
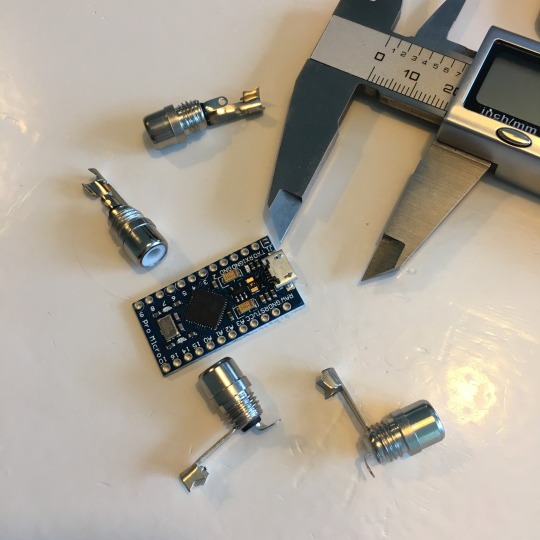
After taking the measurements, I fired up Fusion 360 and quickly drew up a compact enclosure which houses all the nessecery parts.
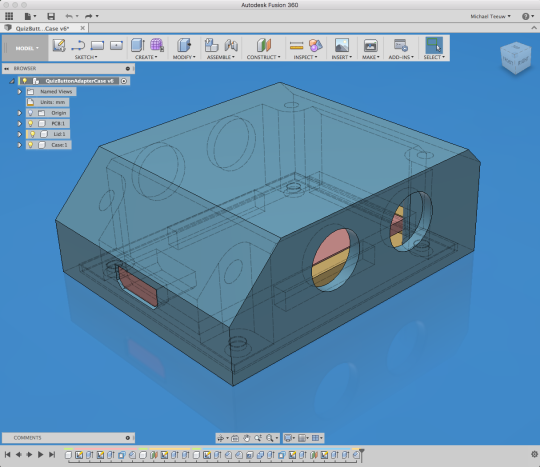
I printed the enclosure using Form Futura’s HD Glass filament, soldered 4 wires to the connectors and made sure the Arduino fitted on the lid. The Arduino will be held in place using a piece of double sided tape.
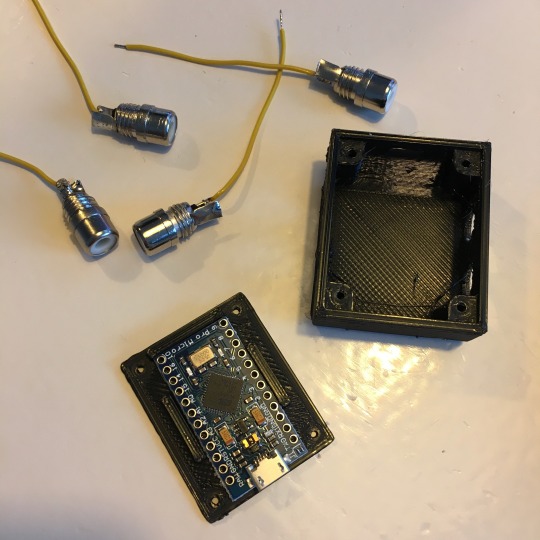
After screwing the plugs into the enclosure I soldered one ground wire to all the plugs, and soldered the 5 wires to the Arduino using pins 3, 4, 5, 6 and GND.
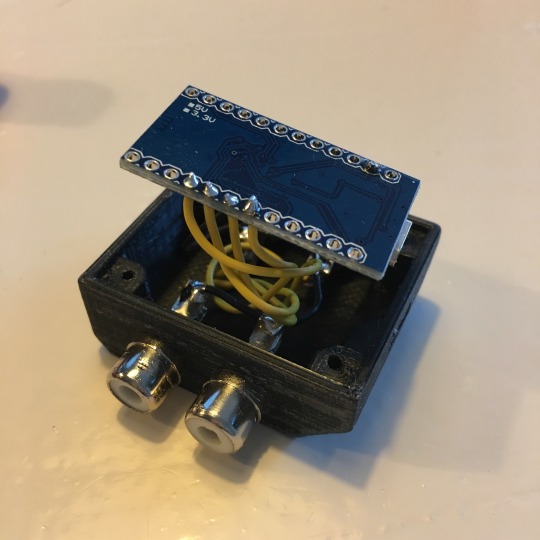
The end result is a robust, simple and good looking interface box, which connects to my laptop using a micro usb cable.
Quiz Time! How many medals did the Netherlands score during the Olypics?
This really turned out to be a nice and fun project. If you want to built something similar, feel free to reuse my Quiz tool. It’s a bit unpolished, but a great start for evenings worth of quiz fun! Check out the GitHub repository!
Happy New Year Everybody!