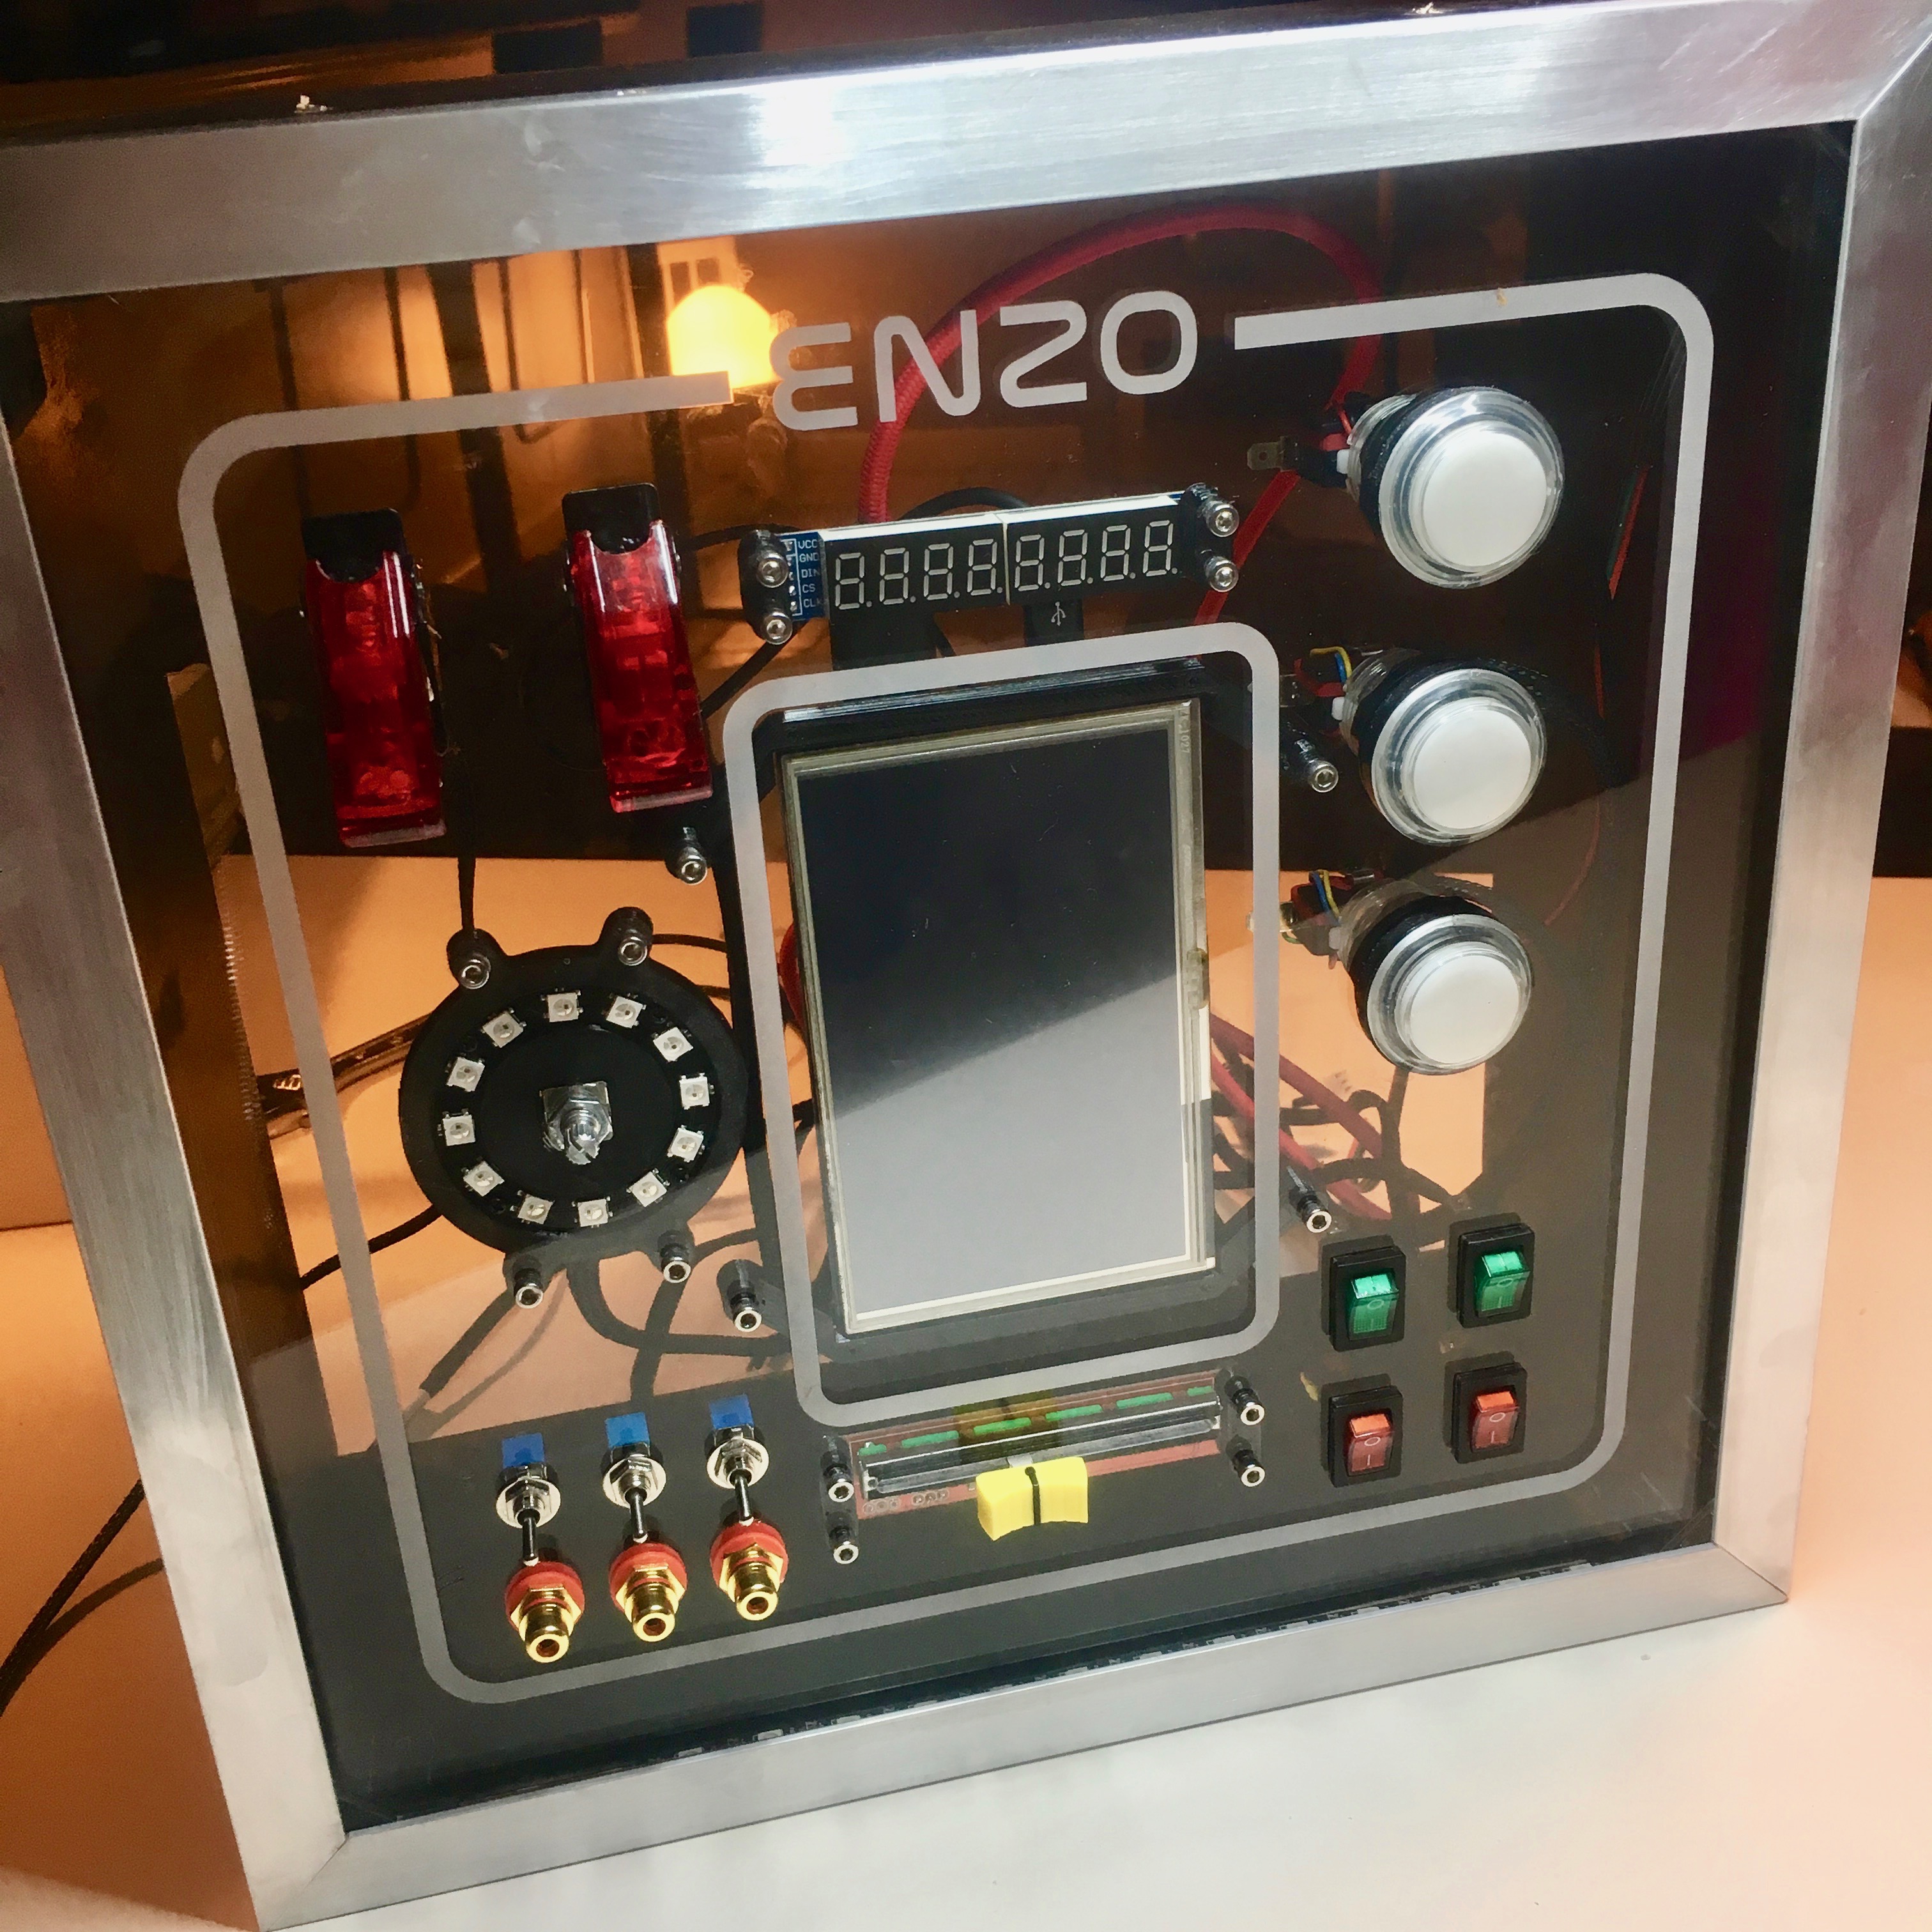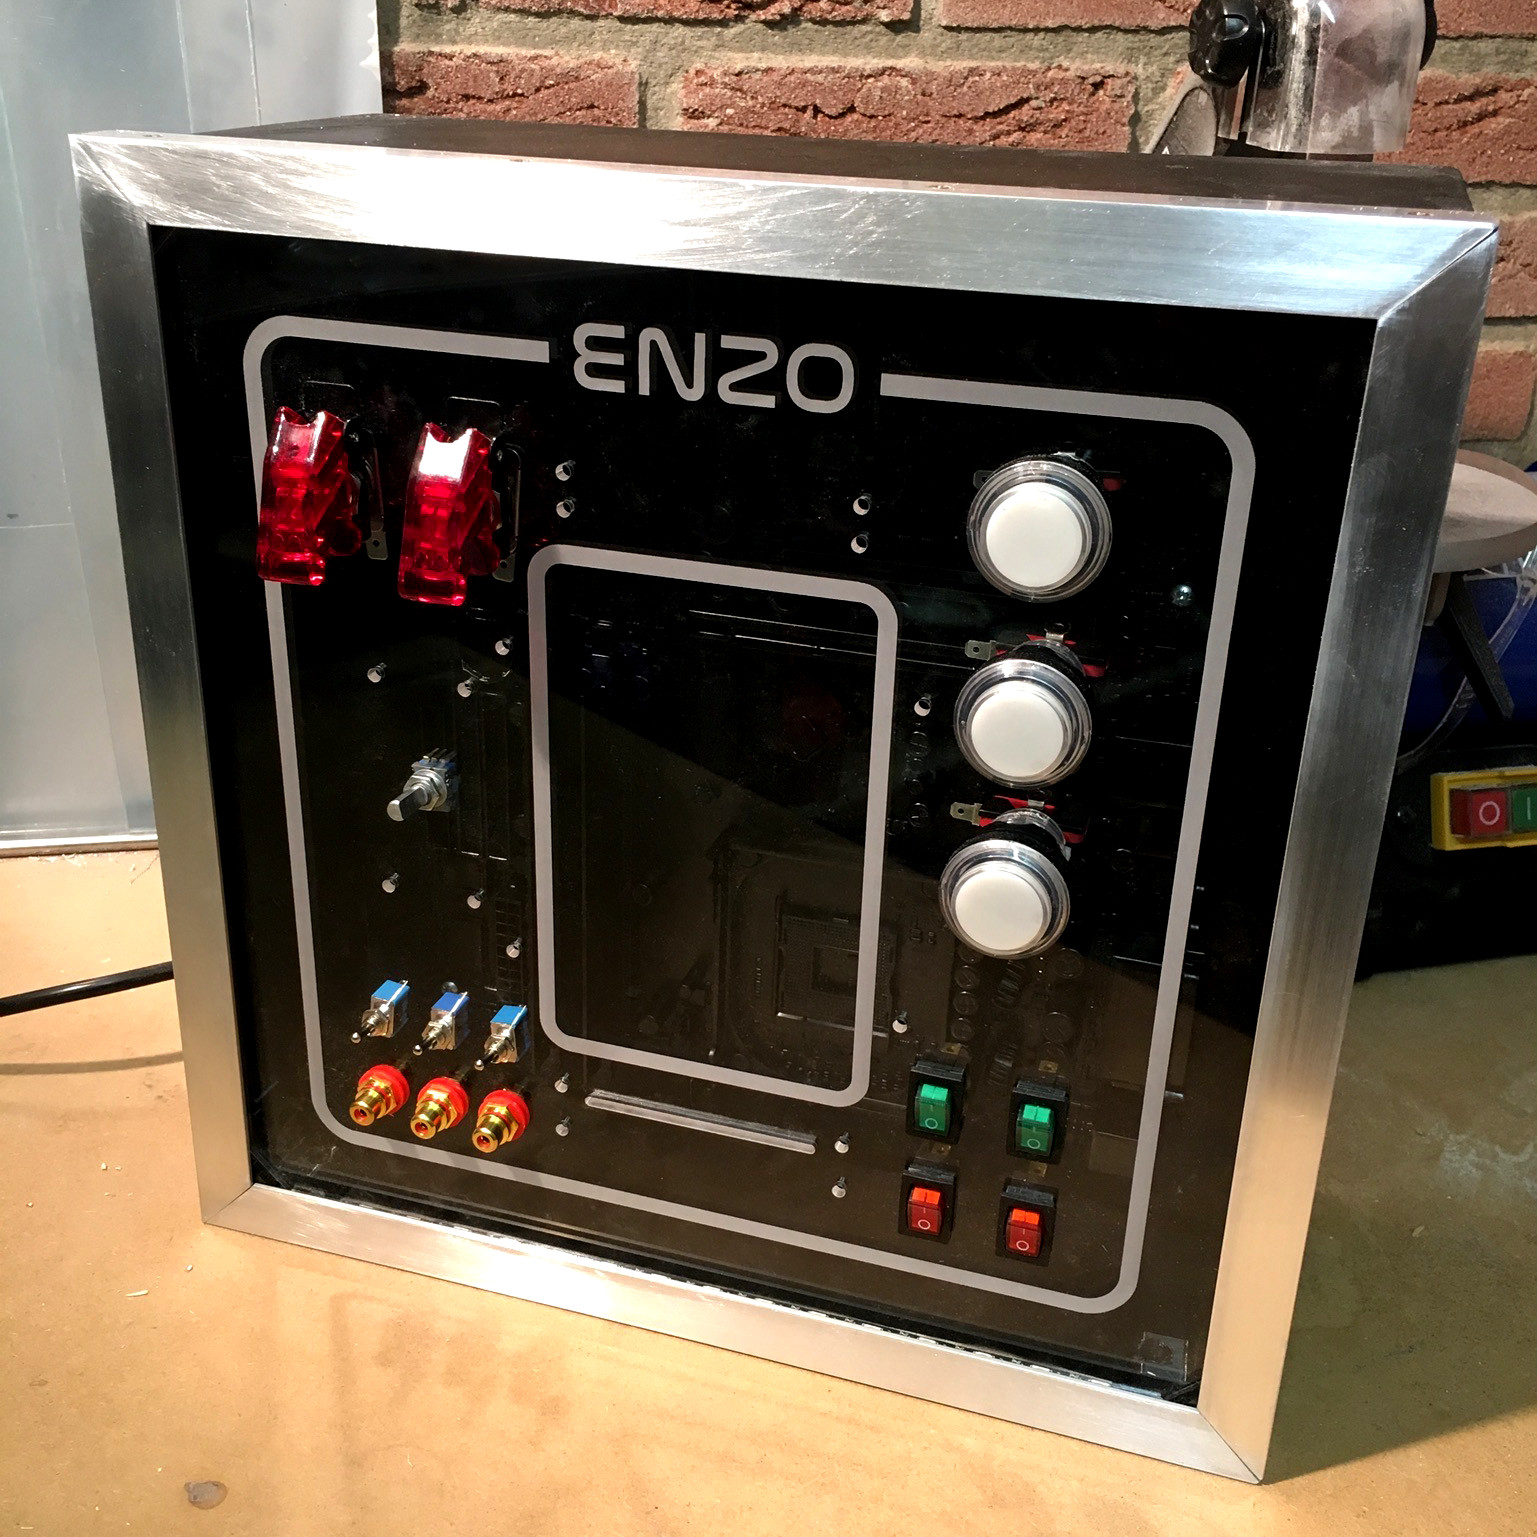
Two weeks ago, I wrote about the Activity Board I’m building for my son. Since I want this panel to use a 5 volt power supply, i needed to tweak some of the buttons I’ll be using.
Activity Board: Enzo's Control Room
The tweaks are only necessary for switches using an integrated light. Three of the switches that I’ll be using have an integrated light and require a 12v or 220v power supply.
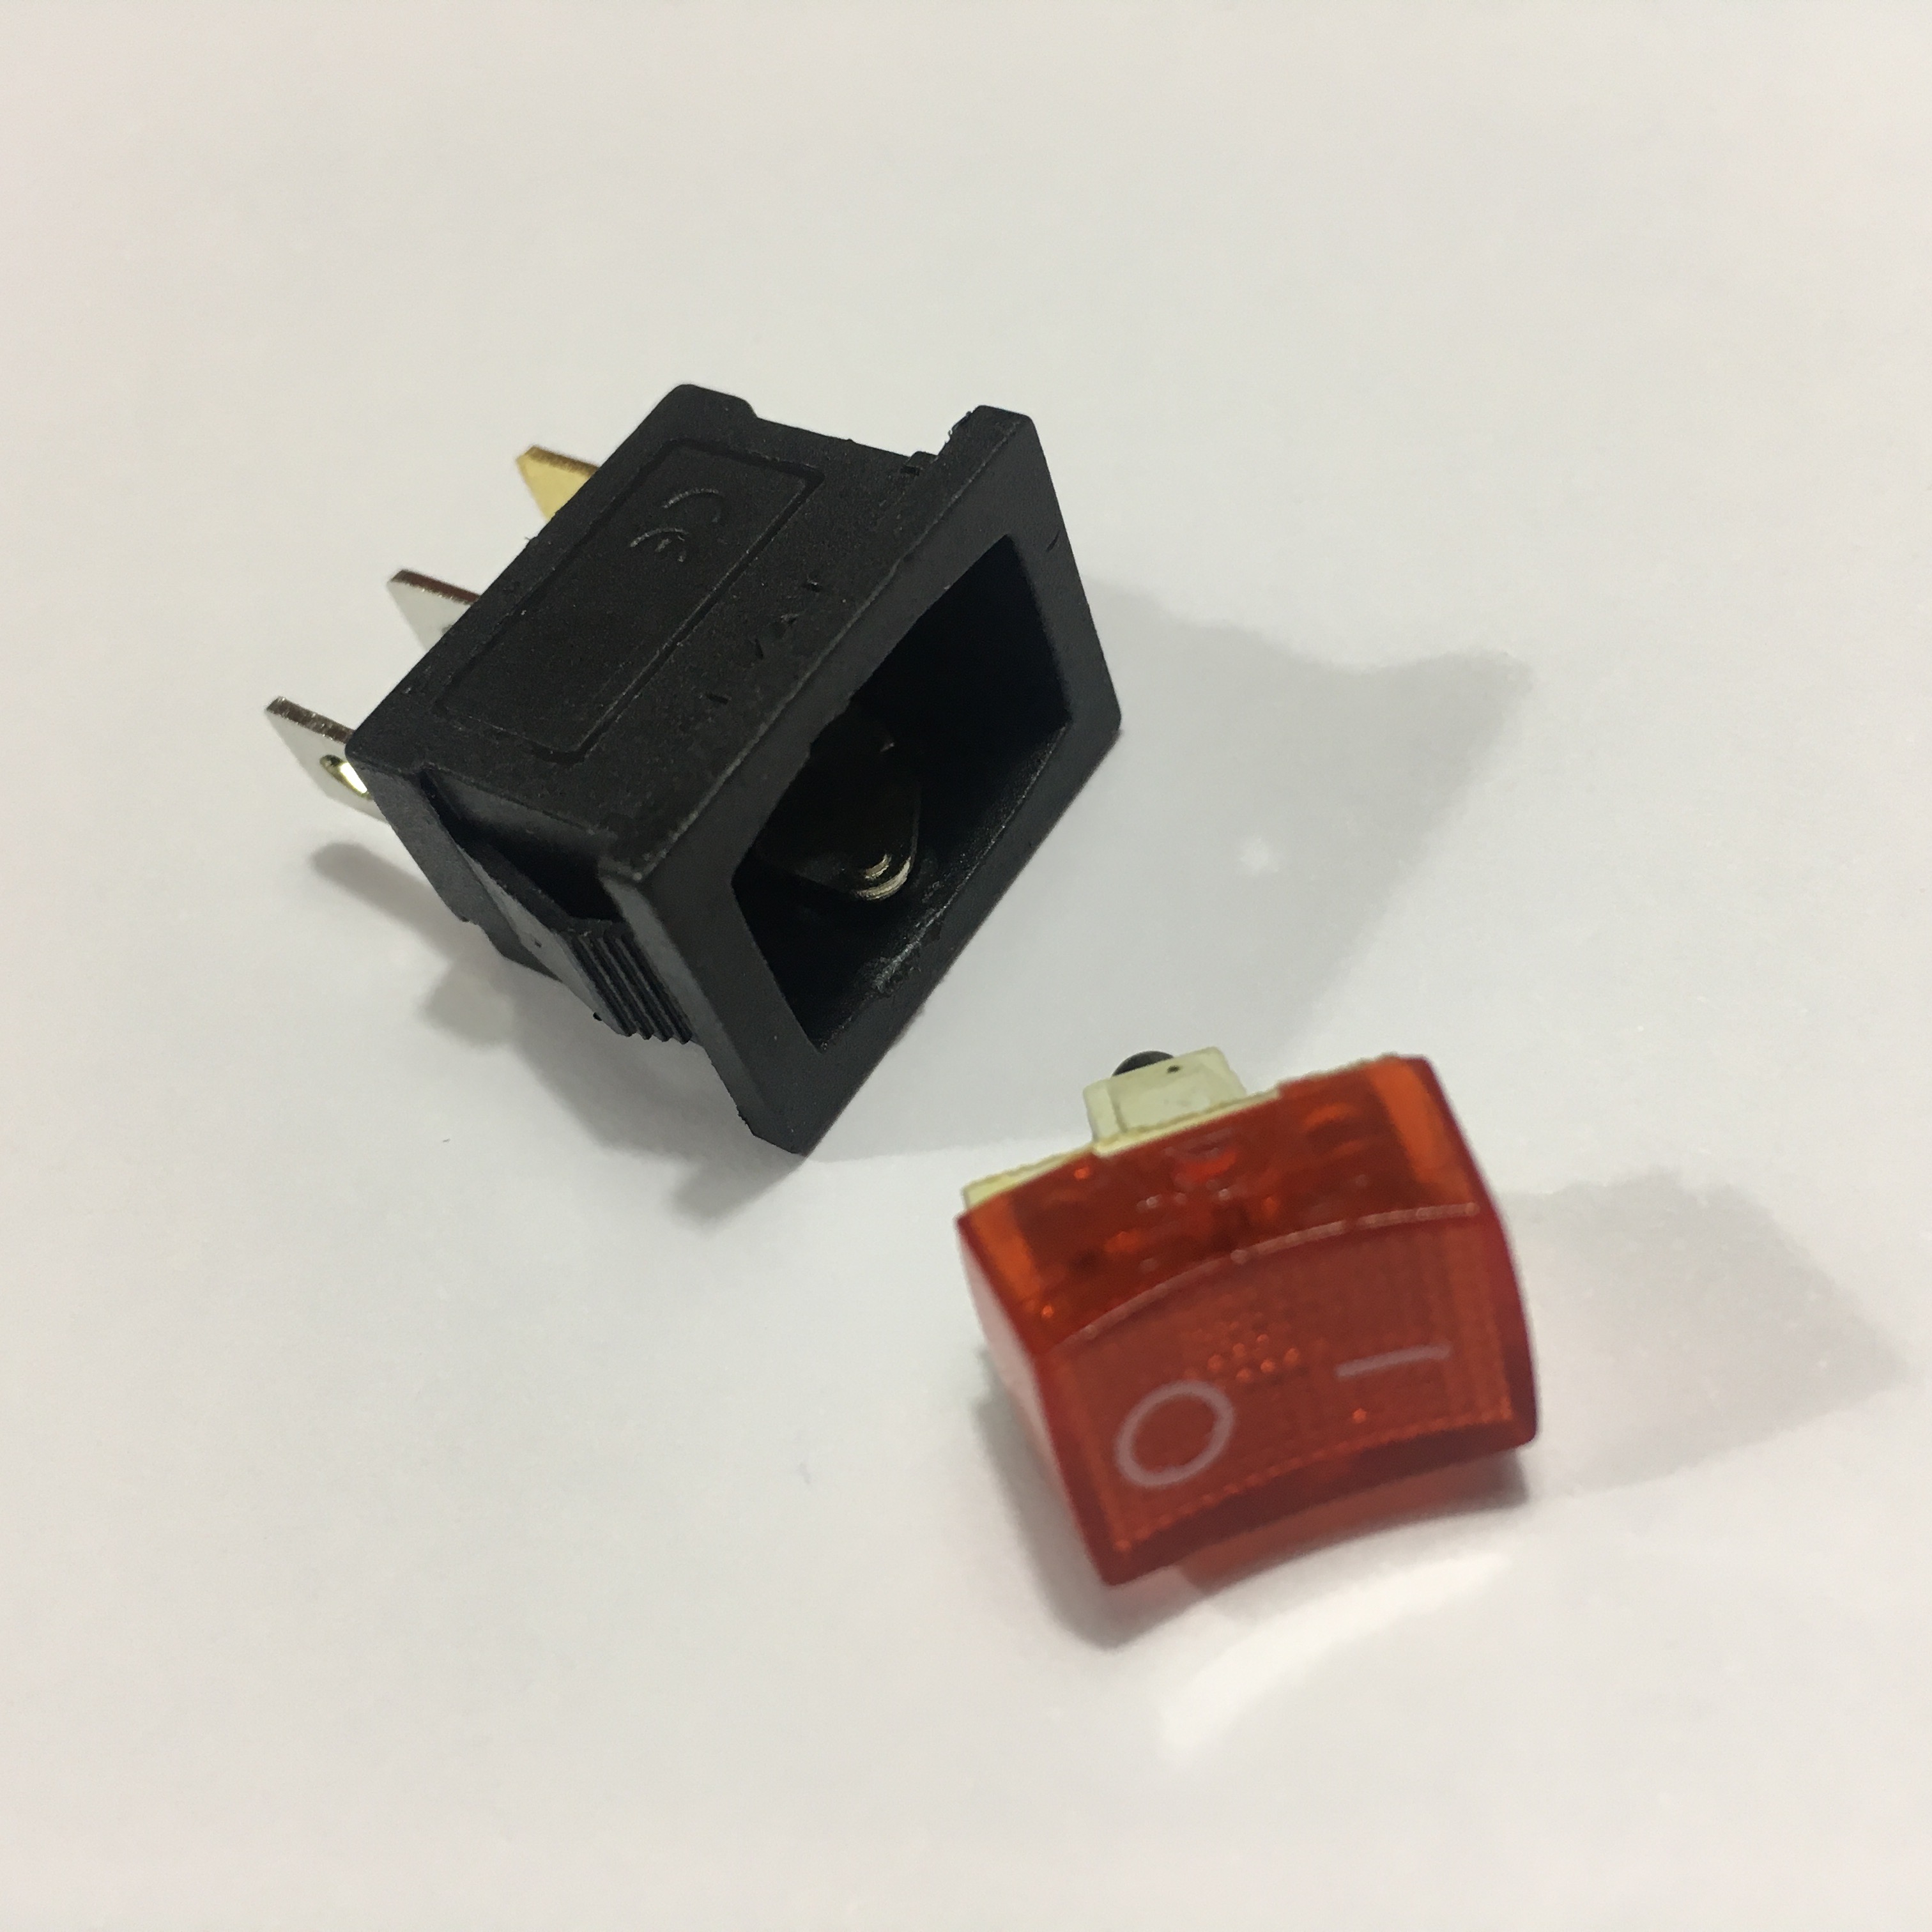
The first ones to check are the main toggle switches. It has an integrated LED in the switch lever. It officially requires a 12V power supply, but it turns out they work perfectly fine using a 5 volt power supply. Great!
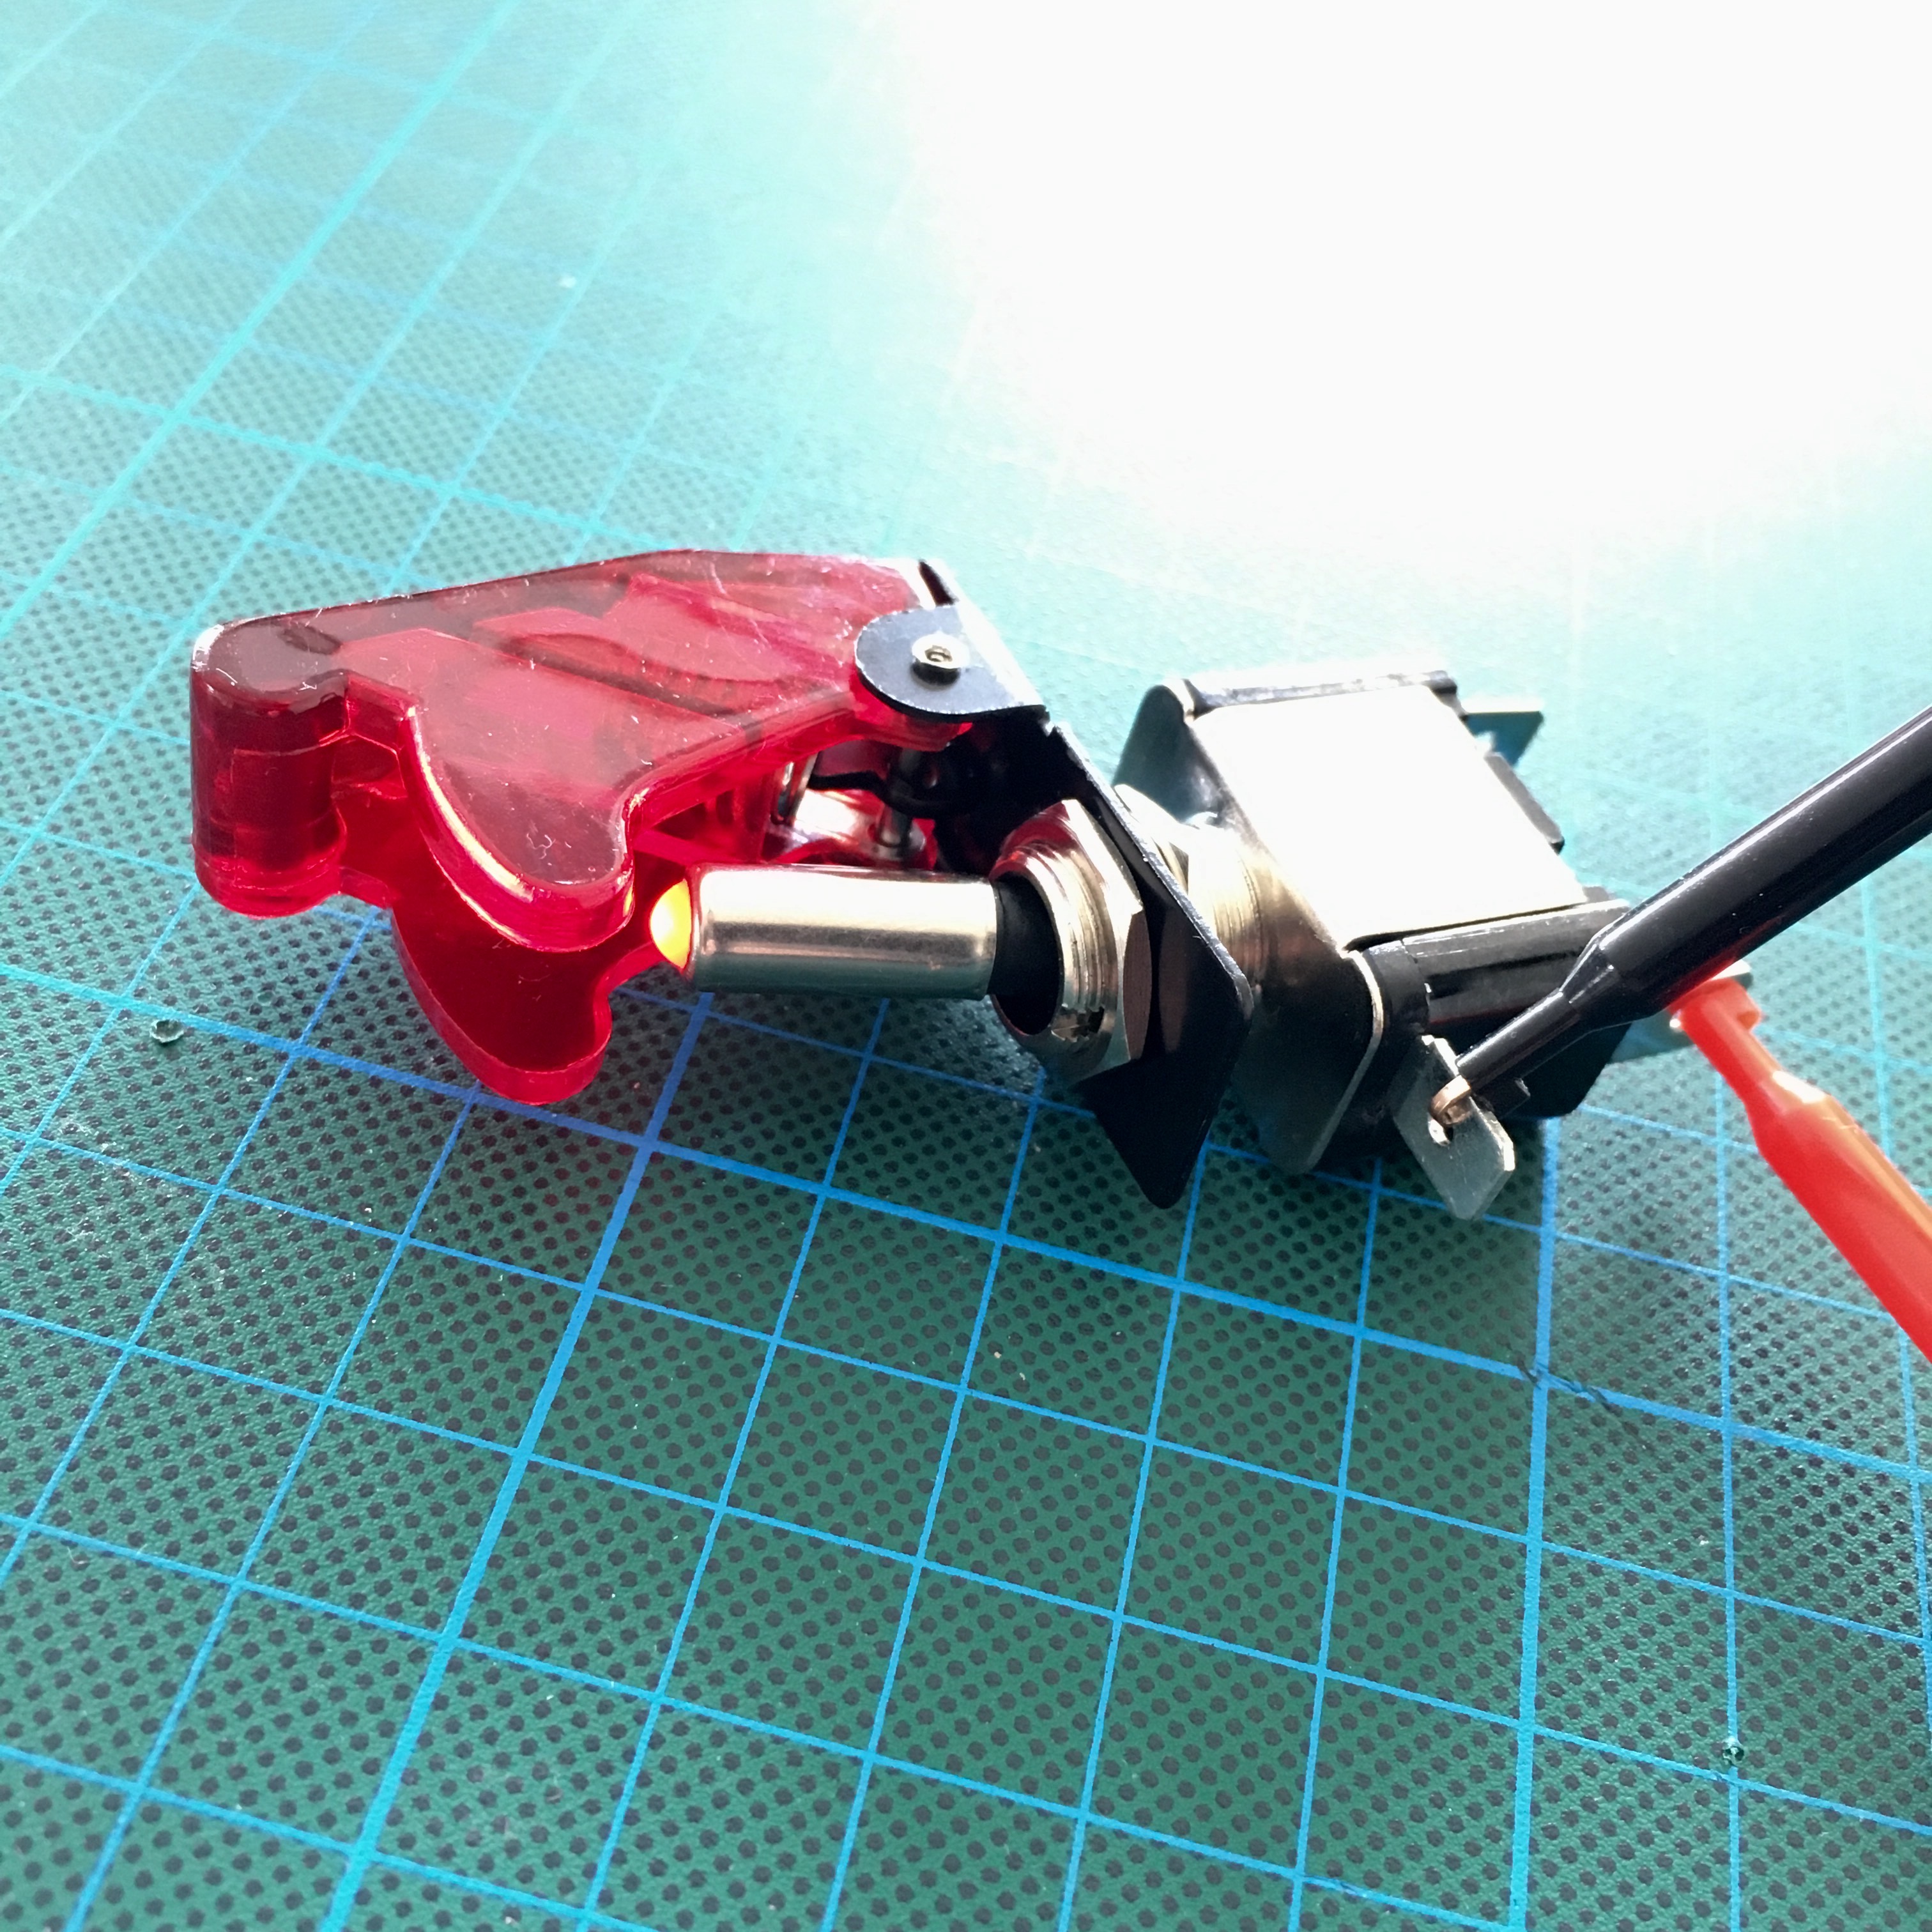
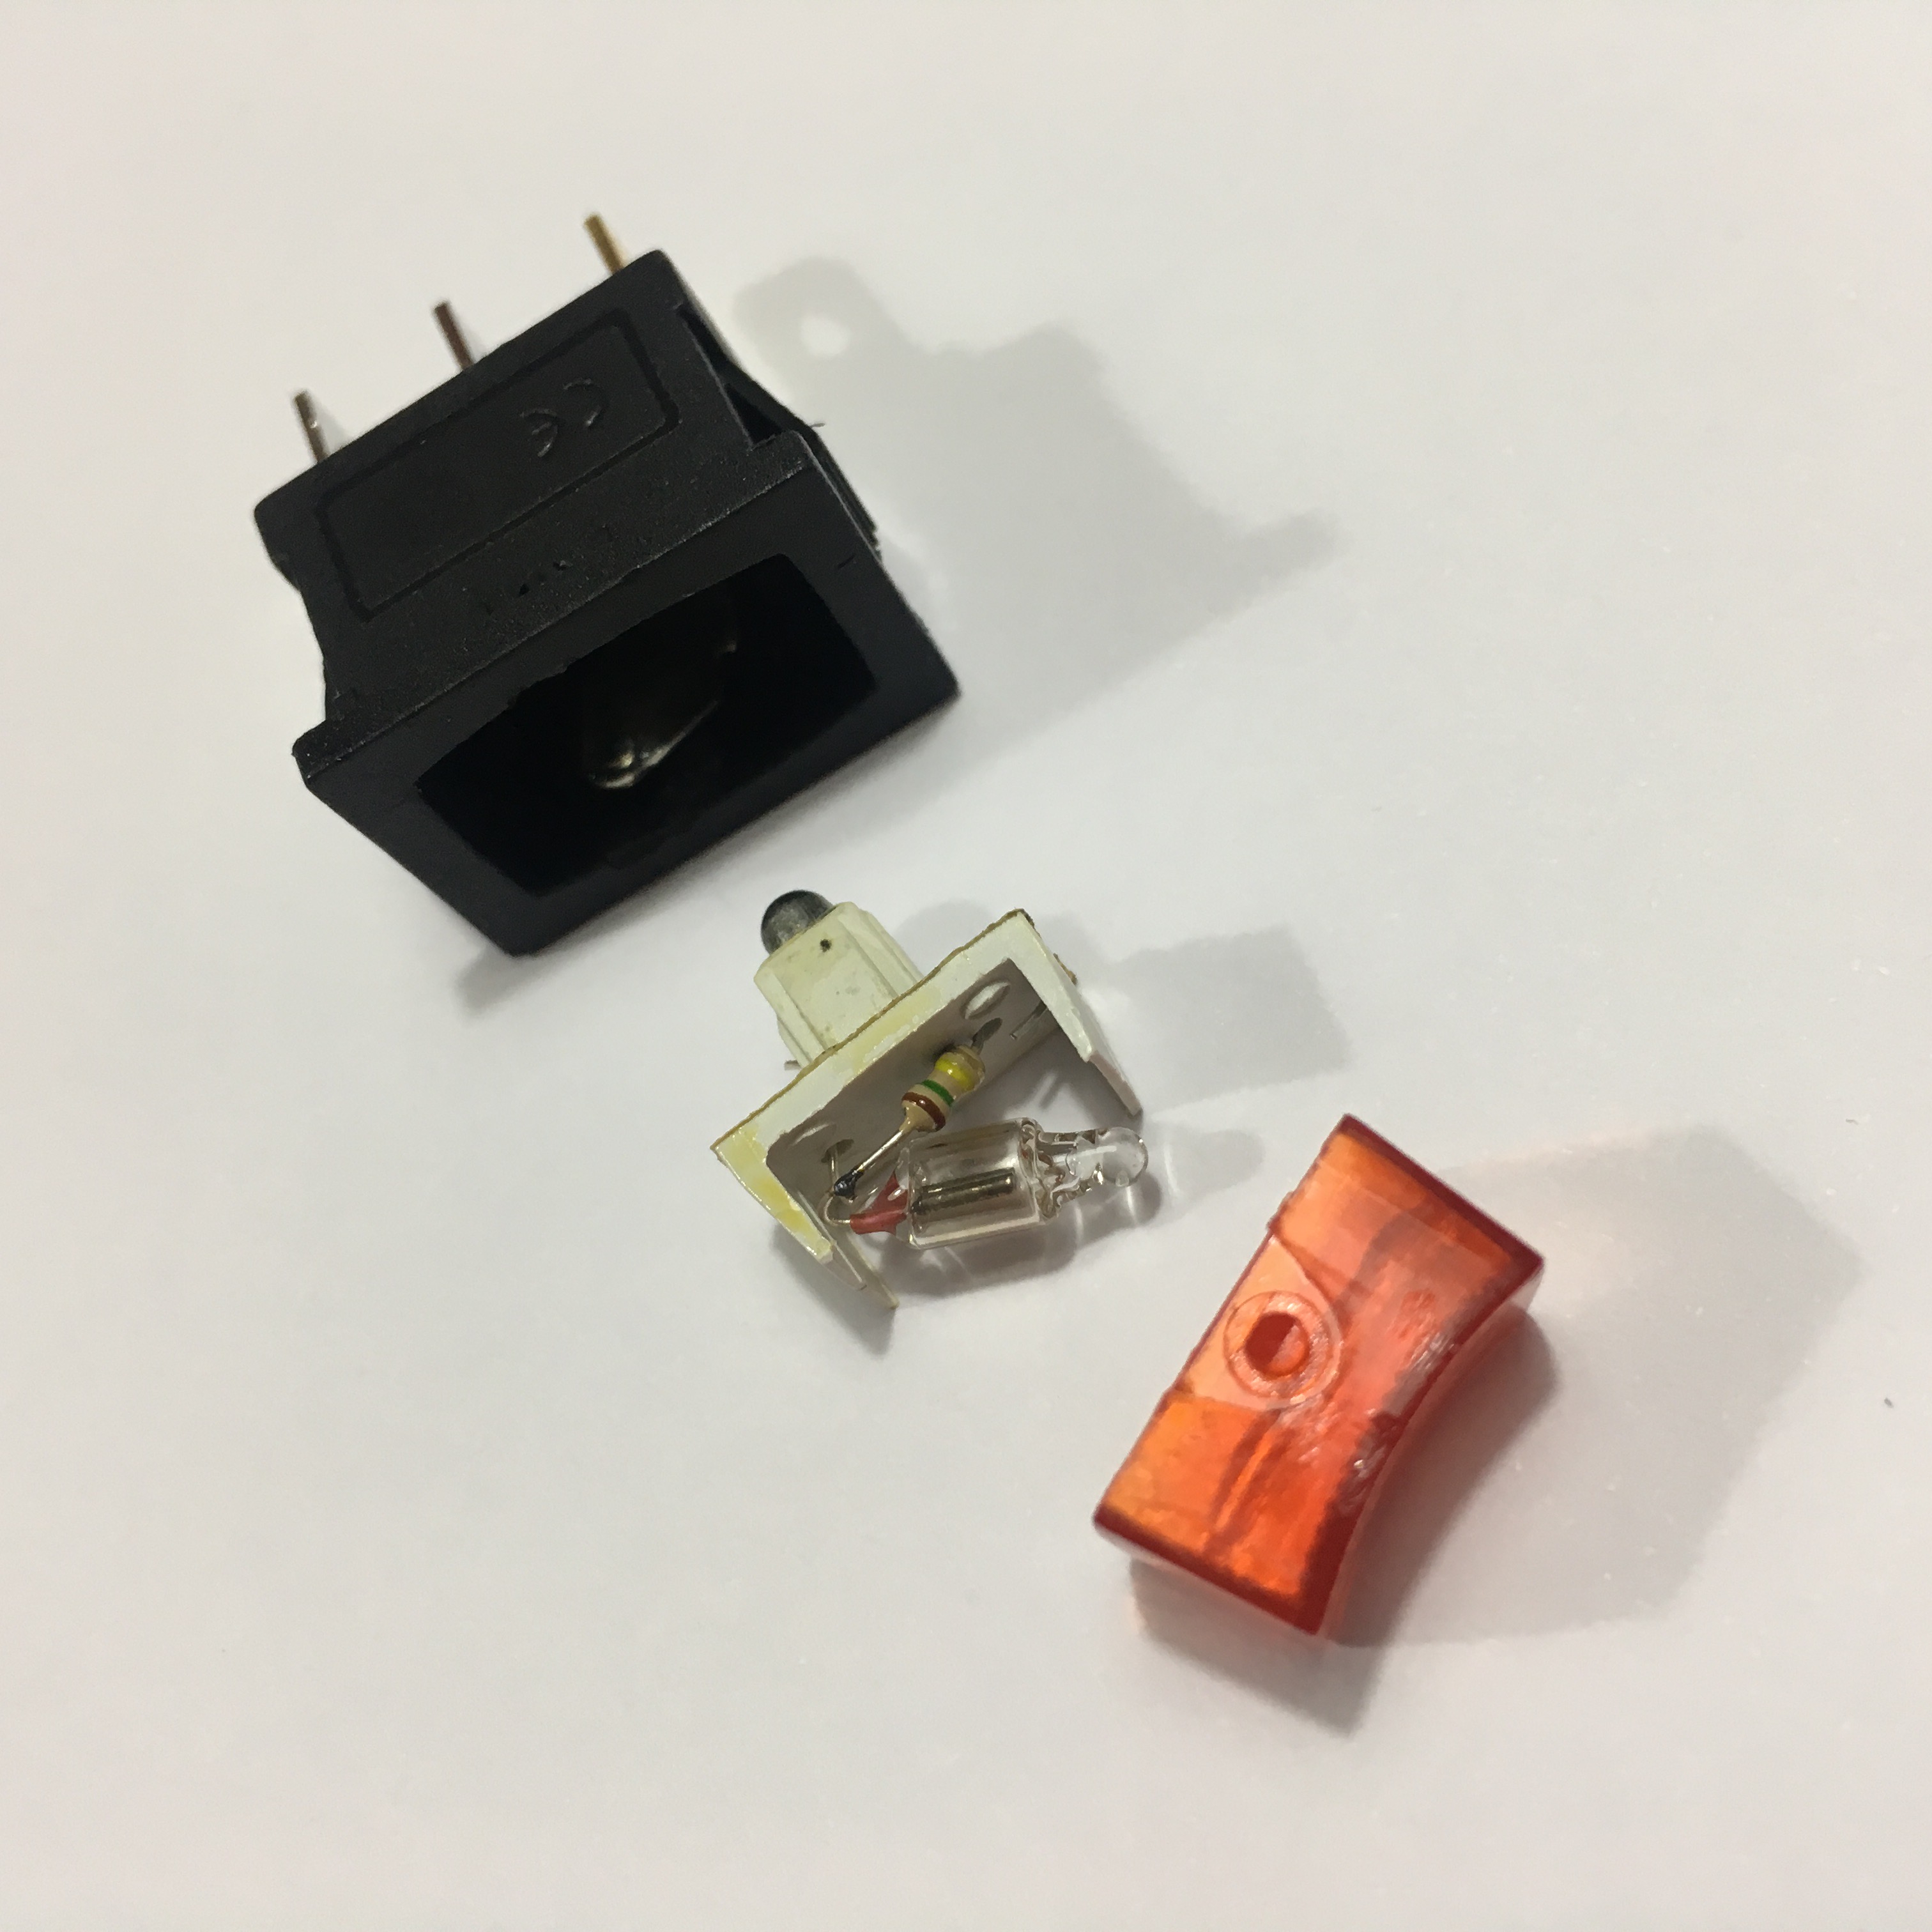
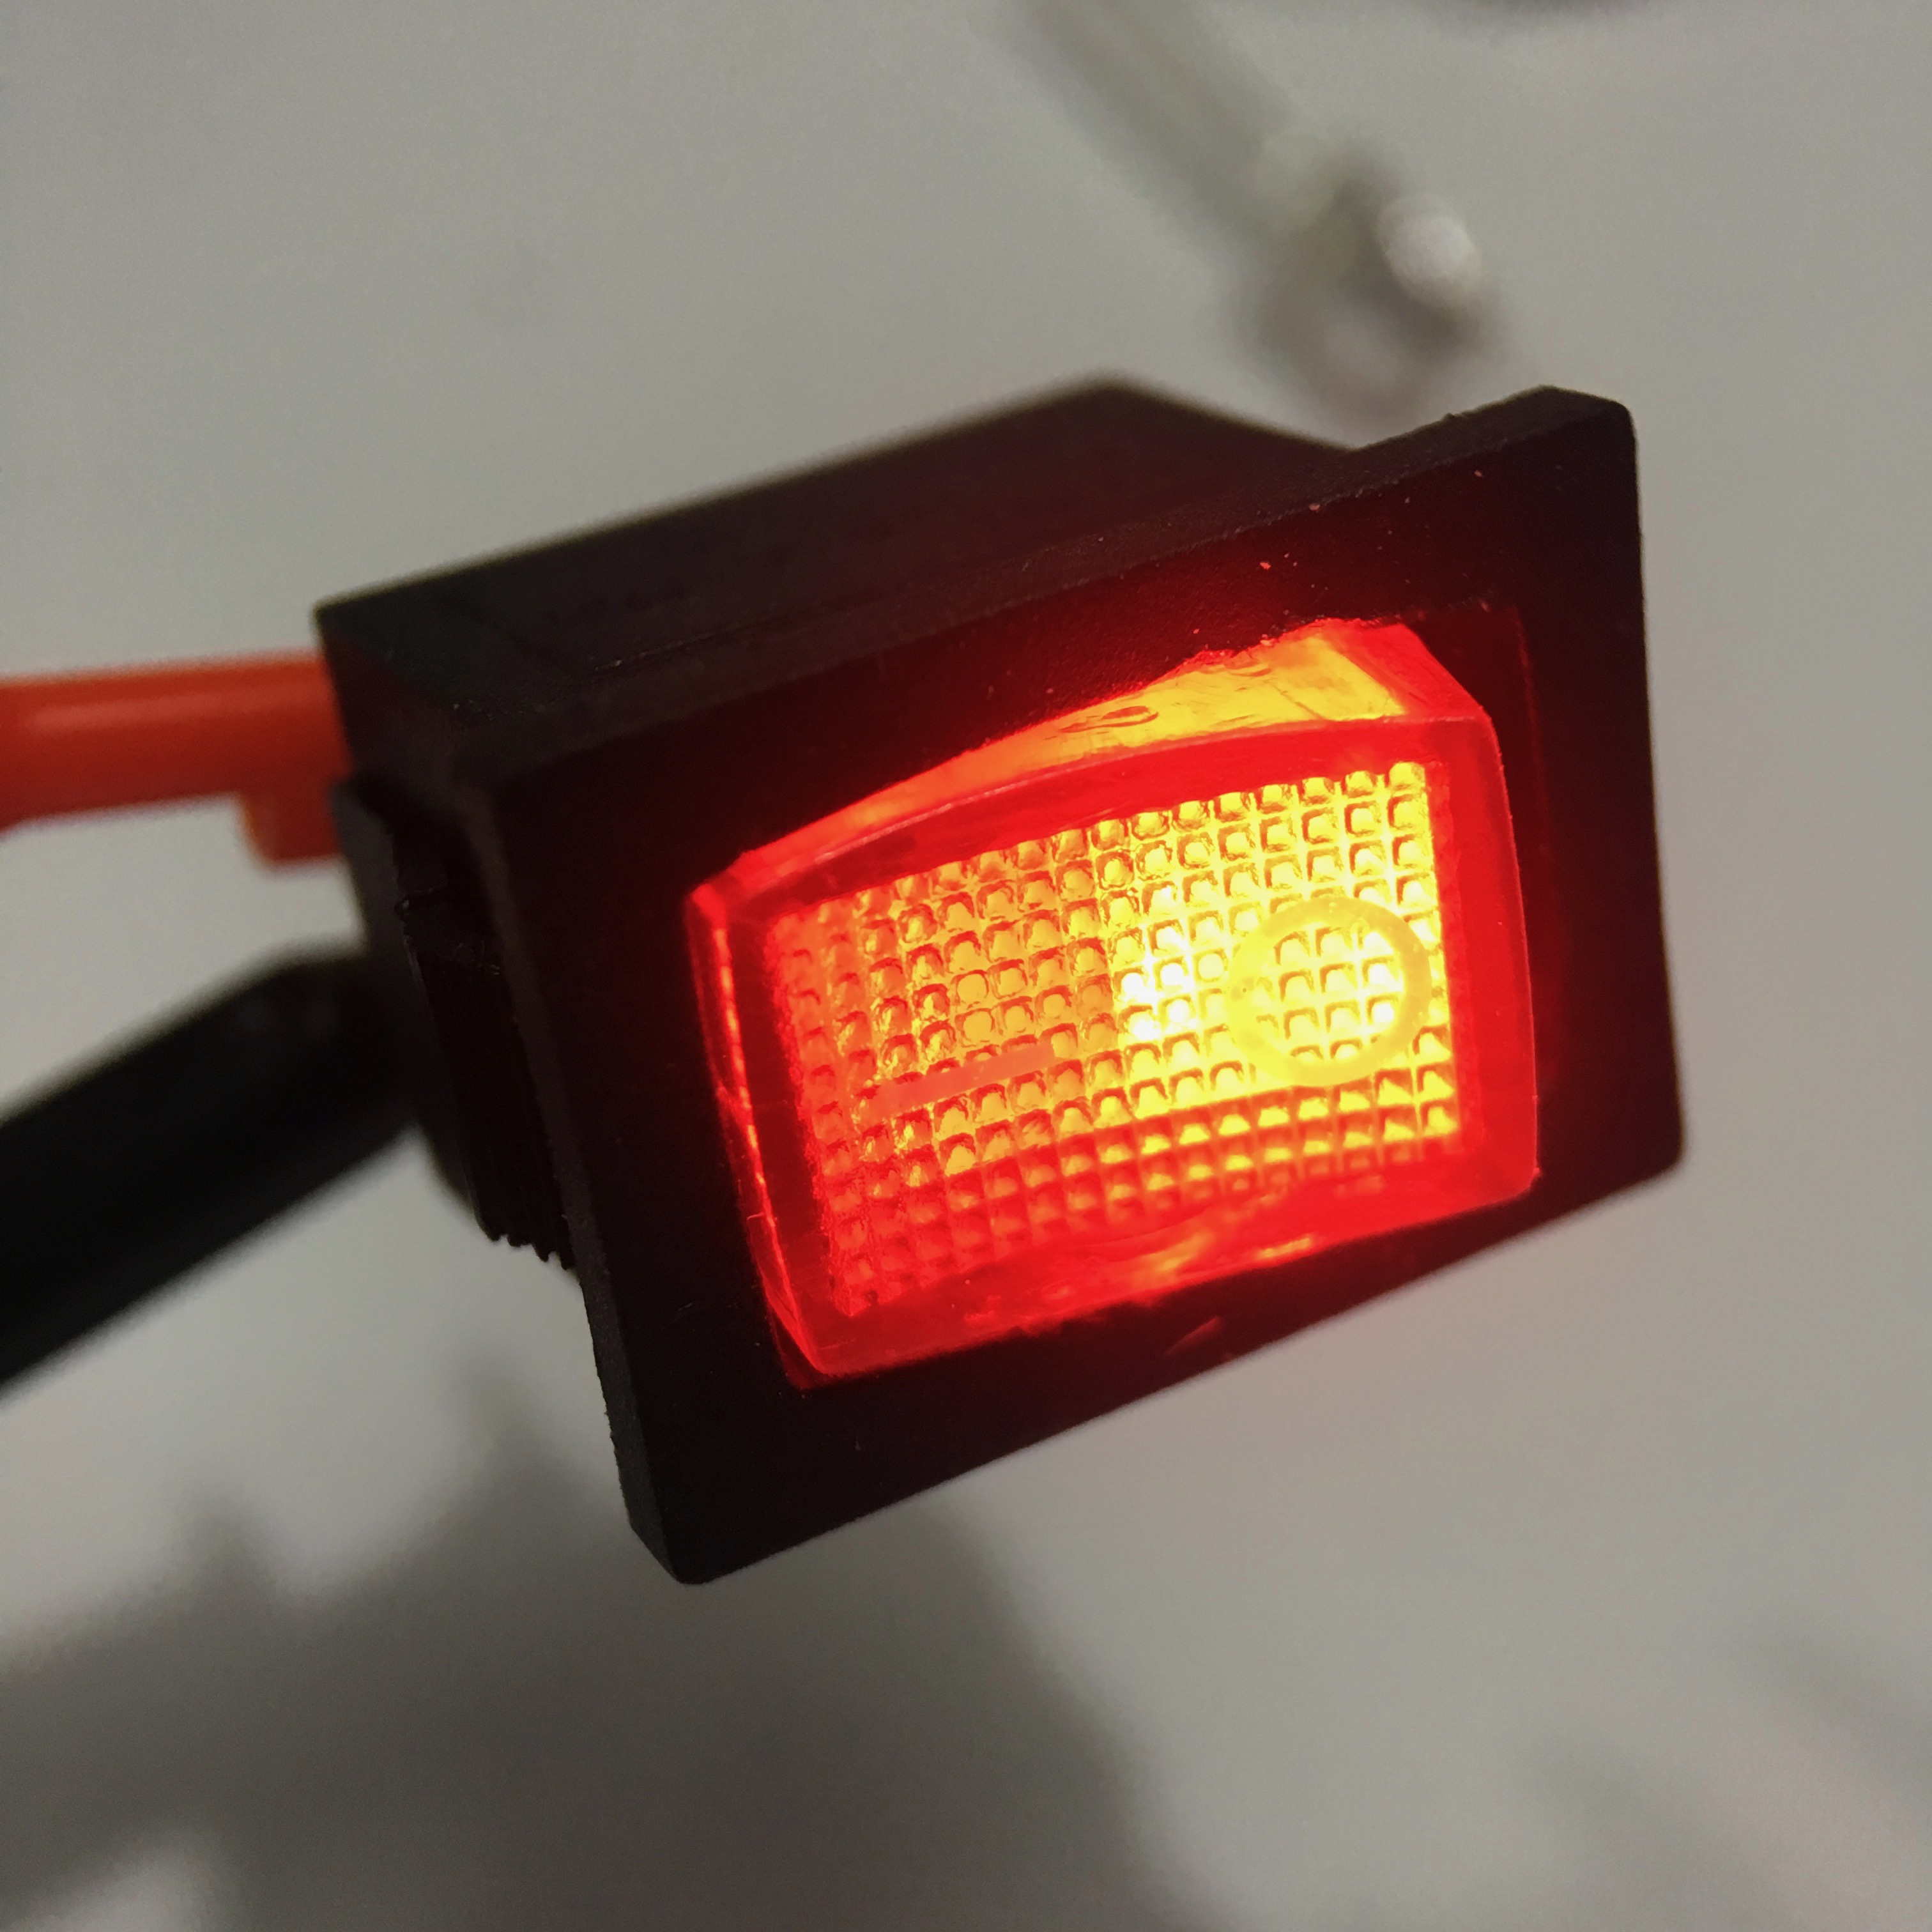
Next are the illuminated rocker switches. These require a 220V AC power, so they really need a tweak to work well with the Arduino or Raspberry setup. Luckily, they are pretty easy to pop open.
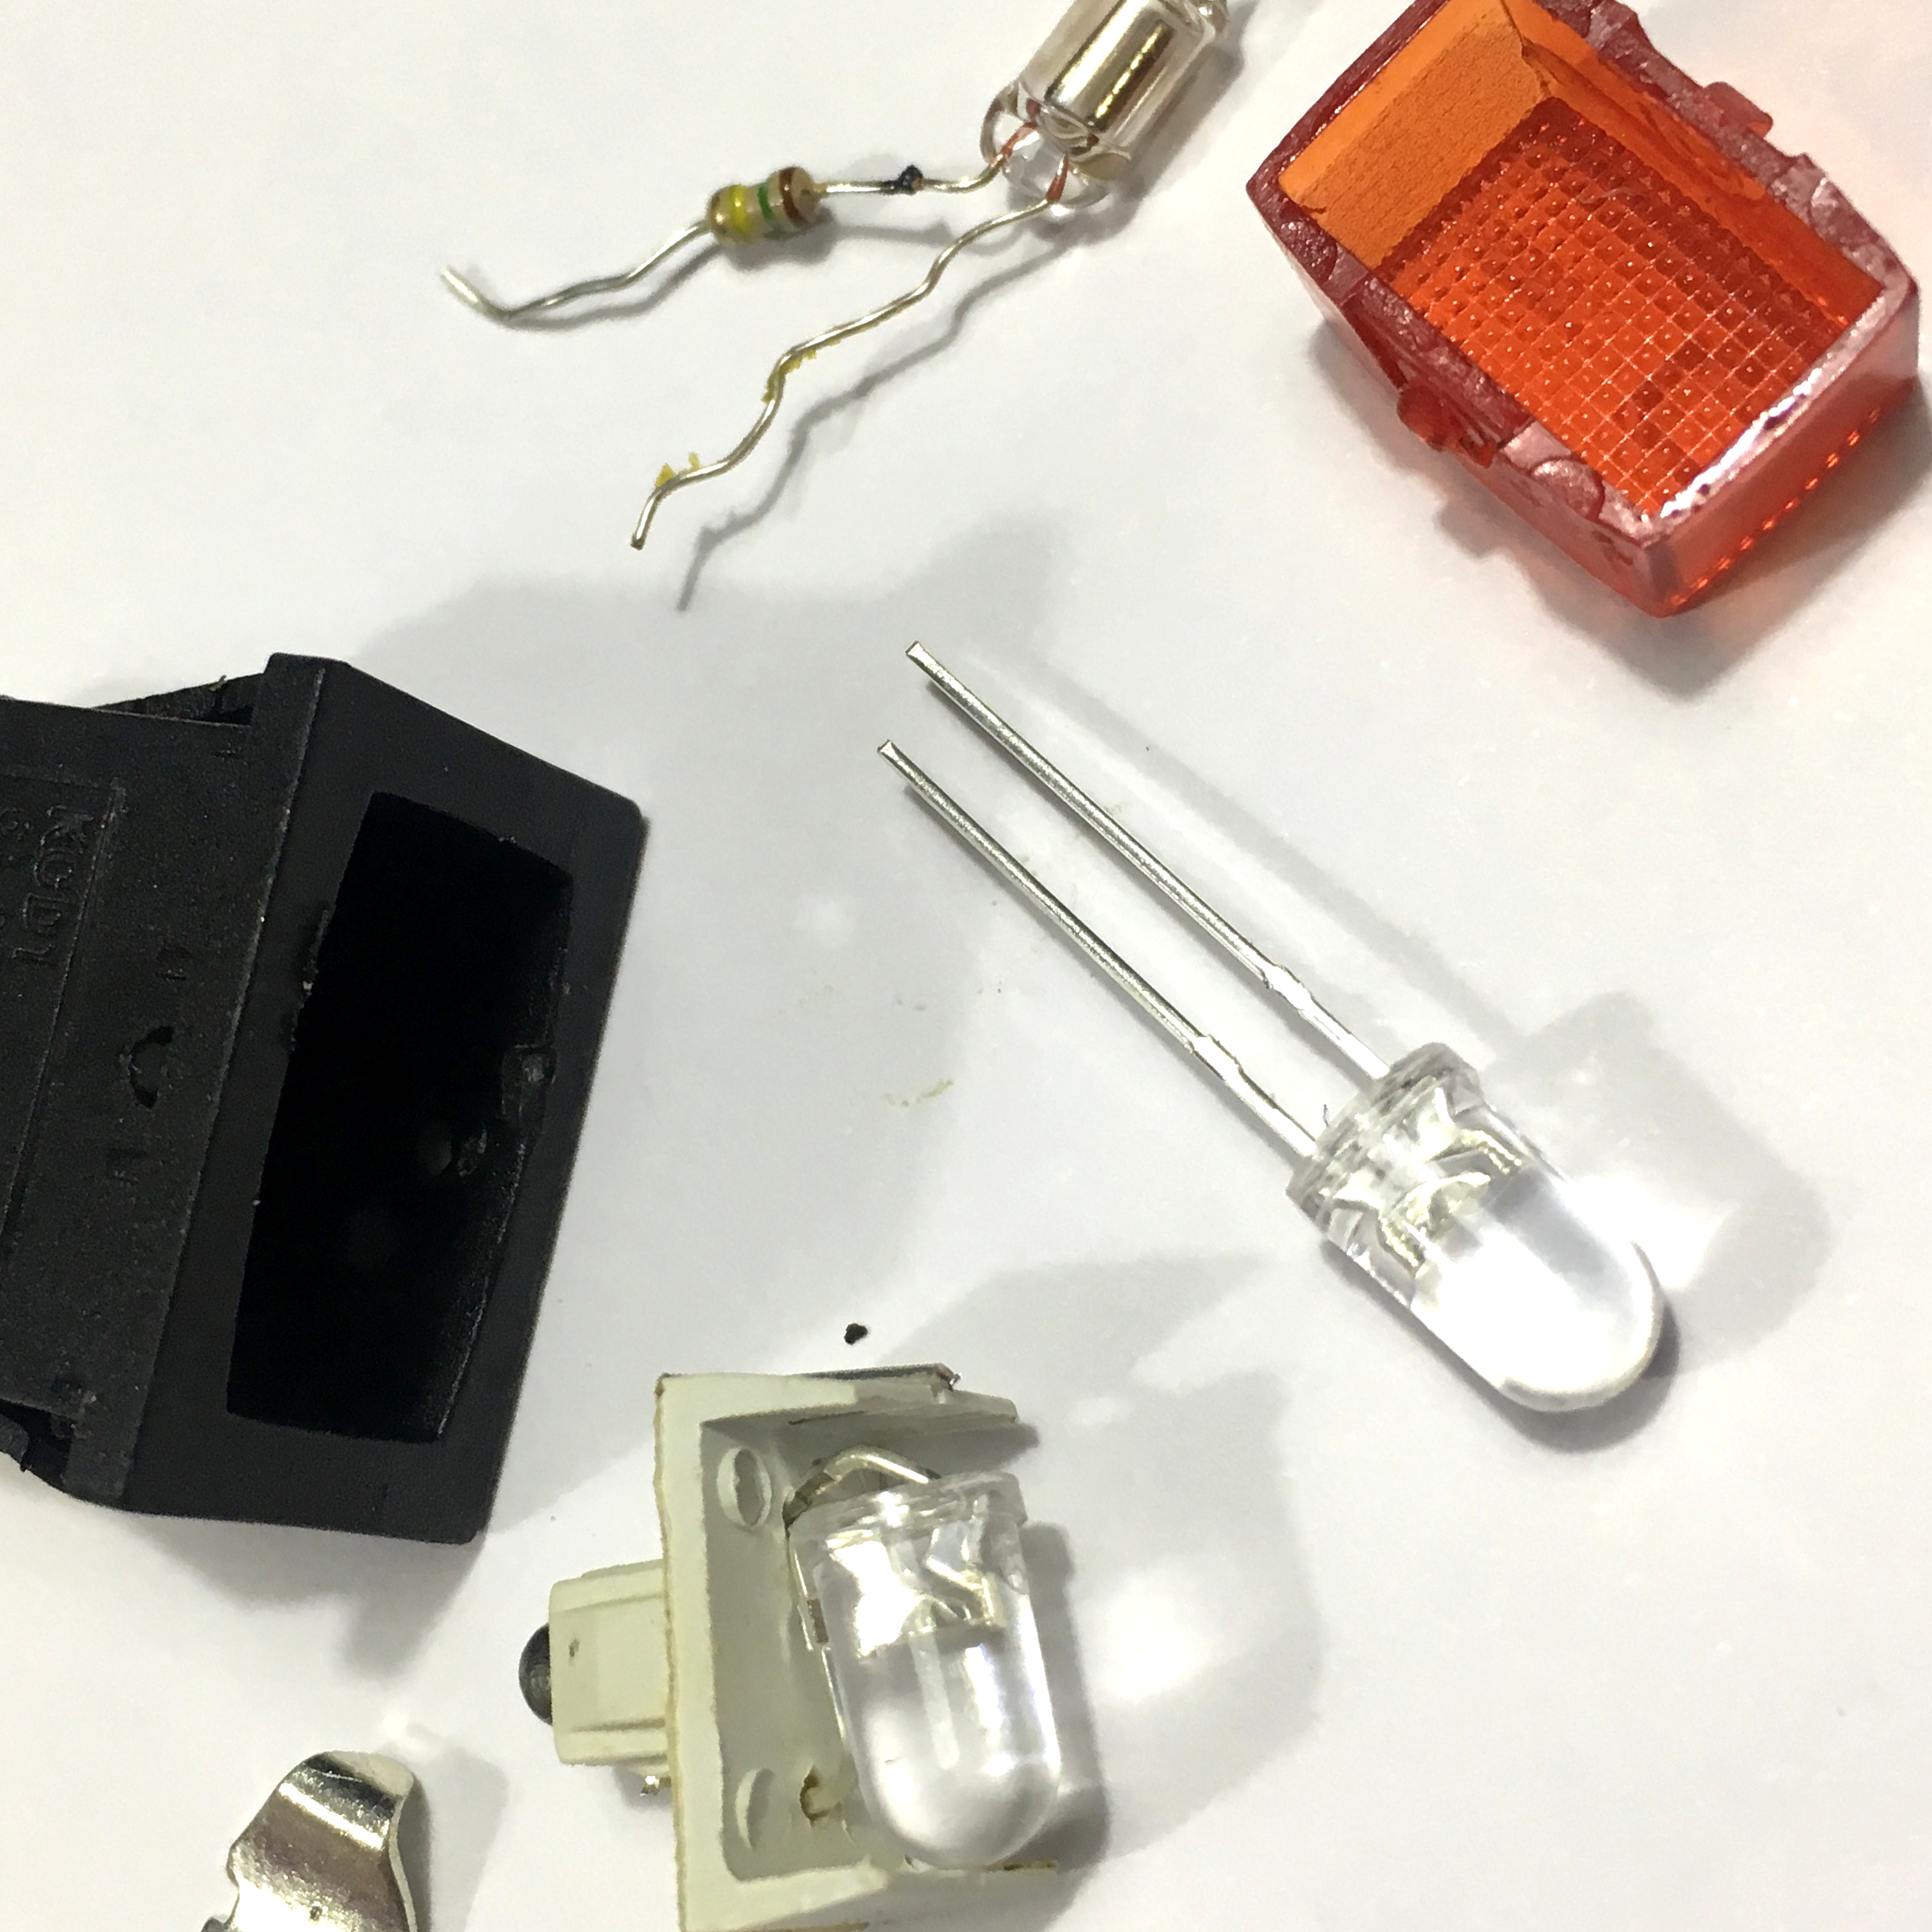
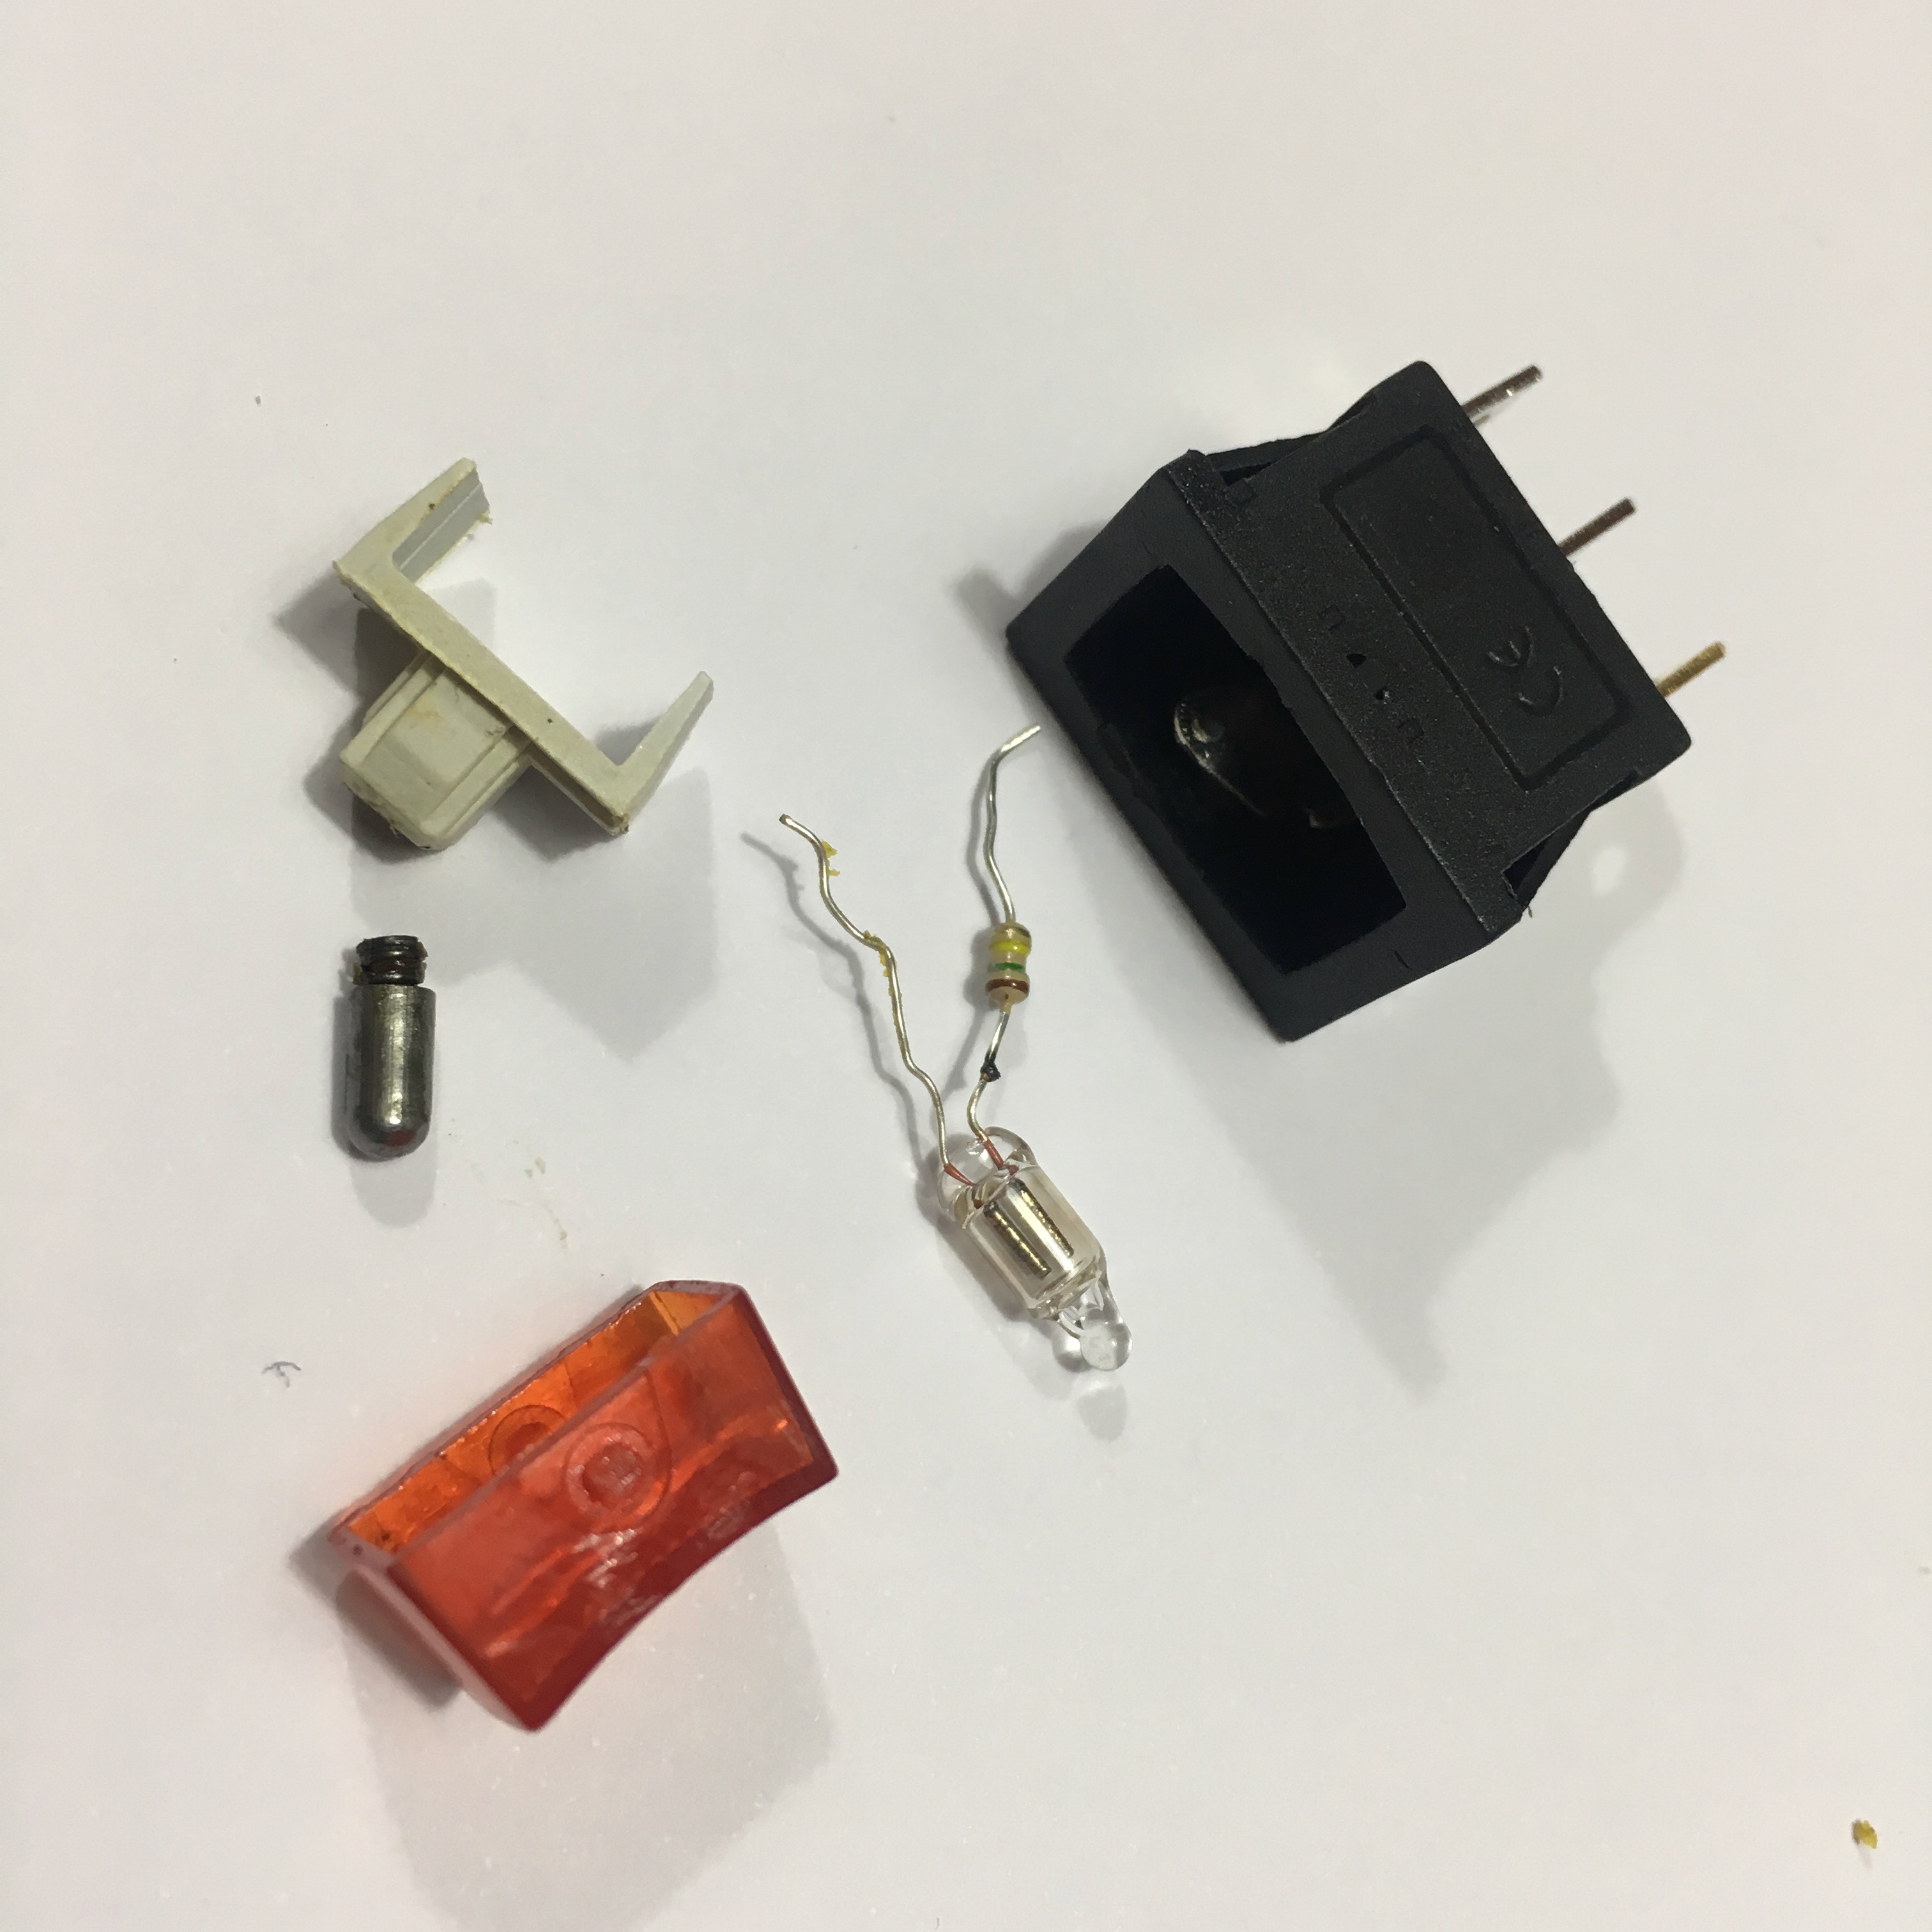
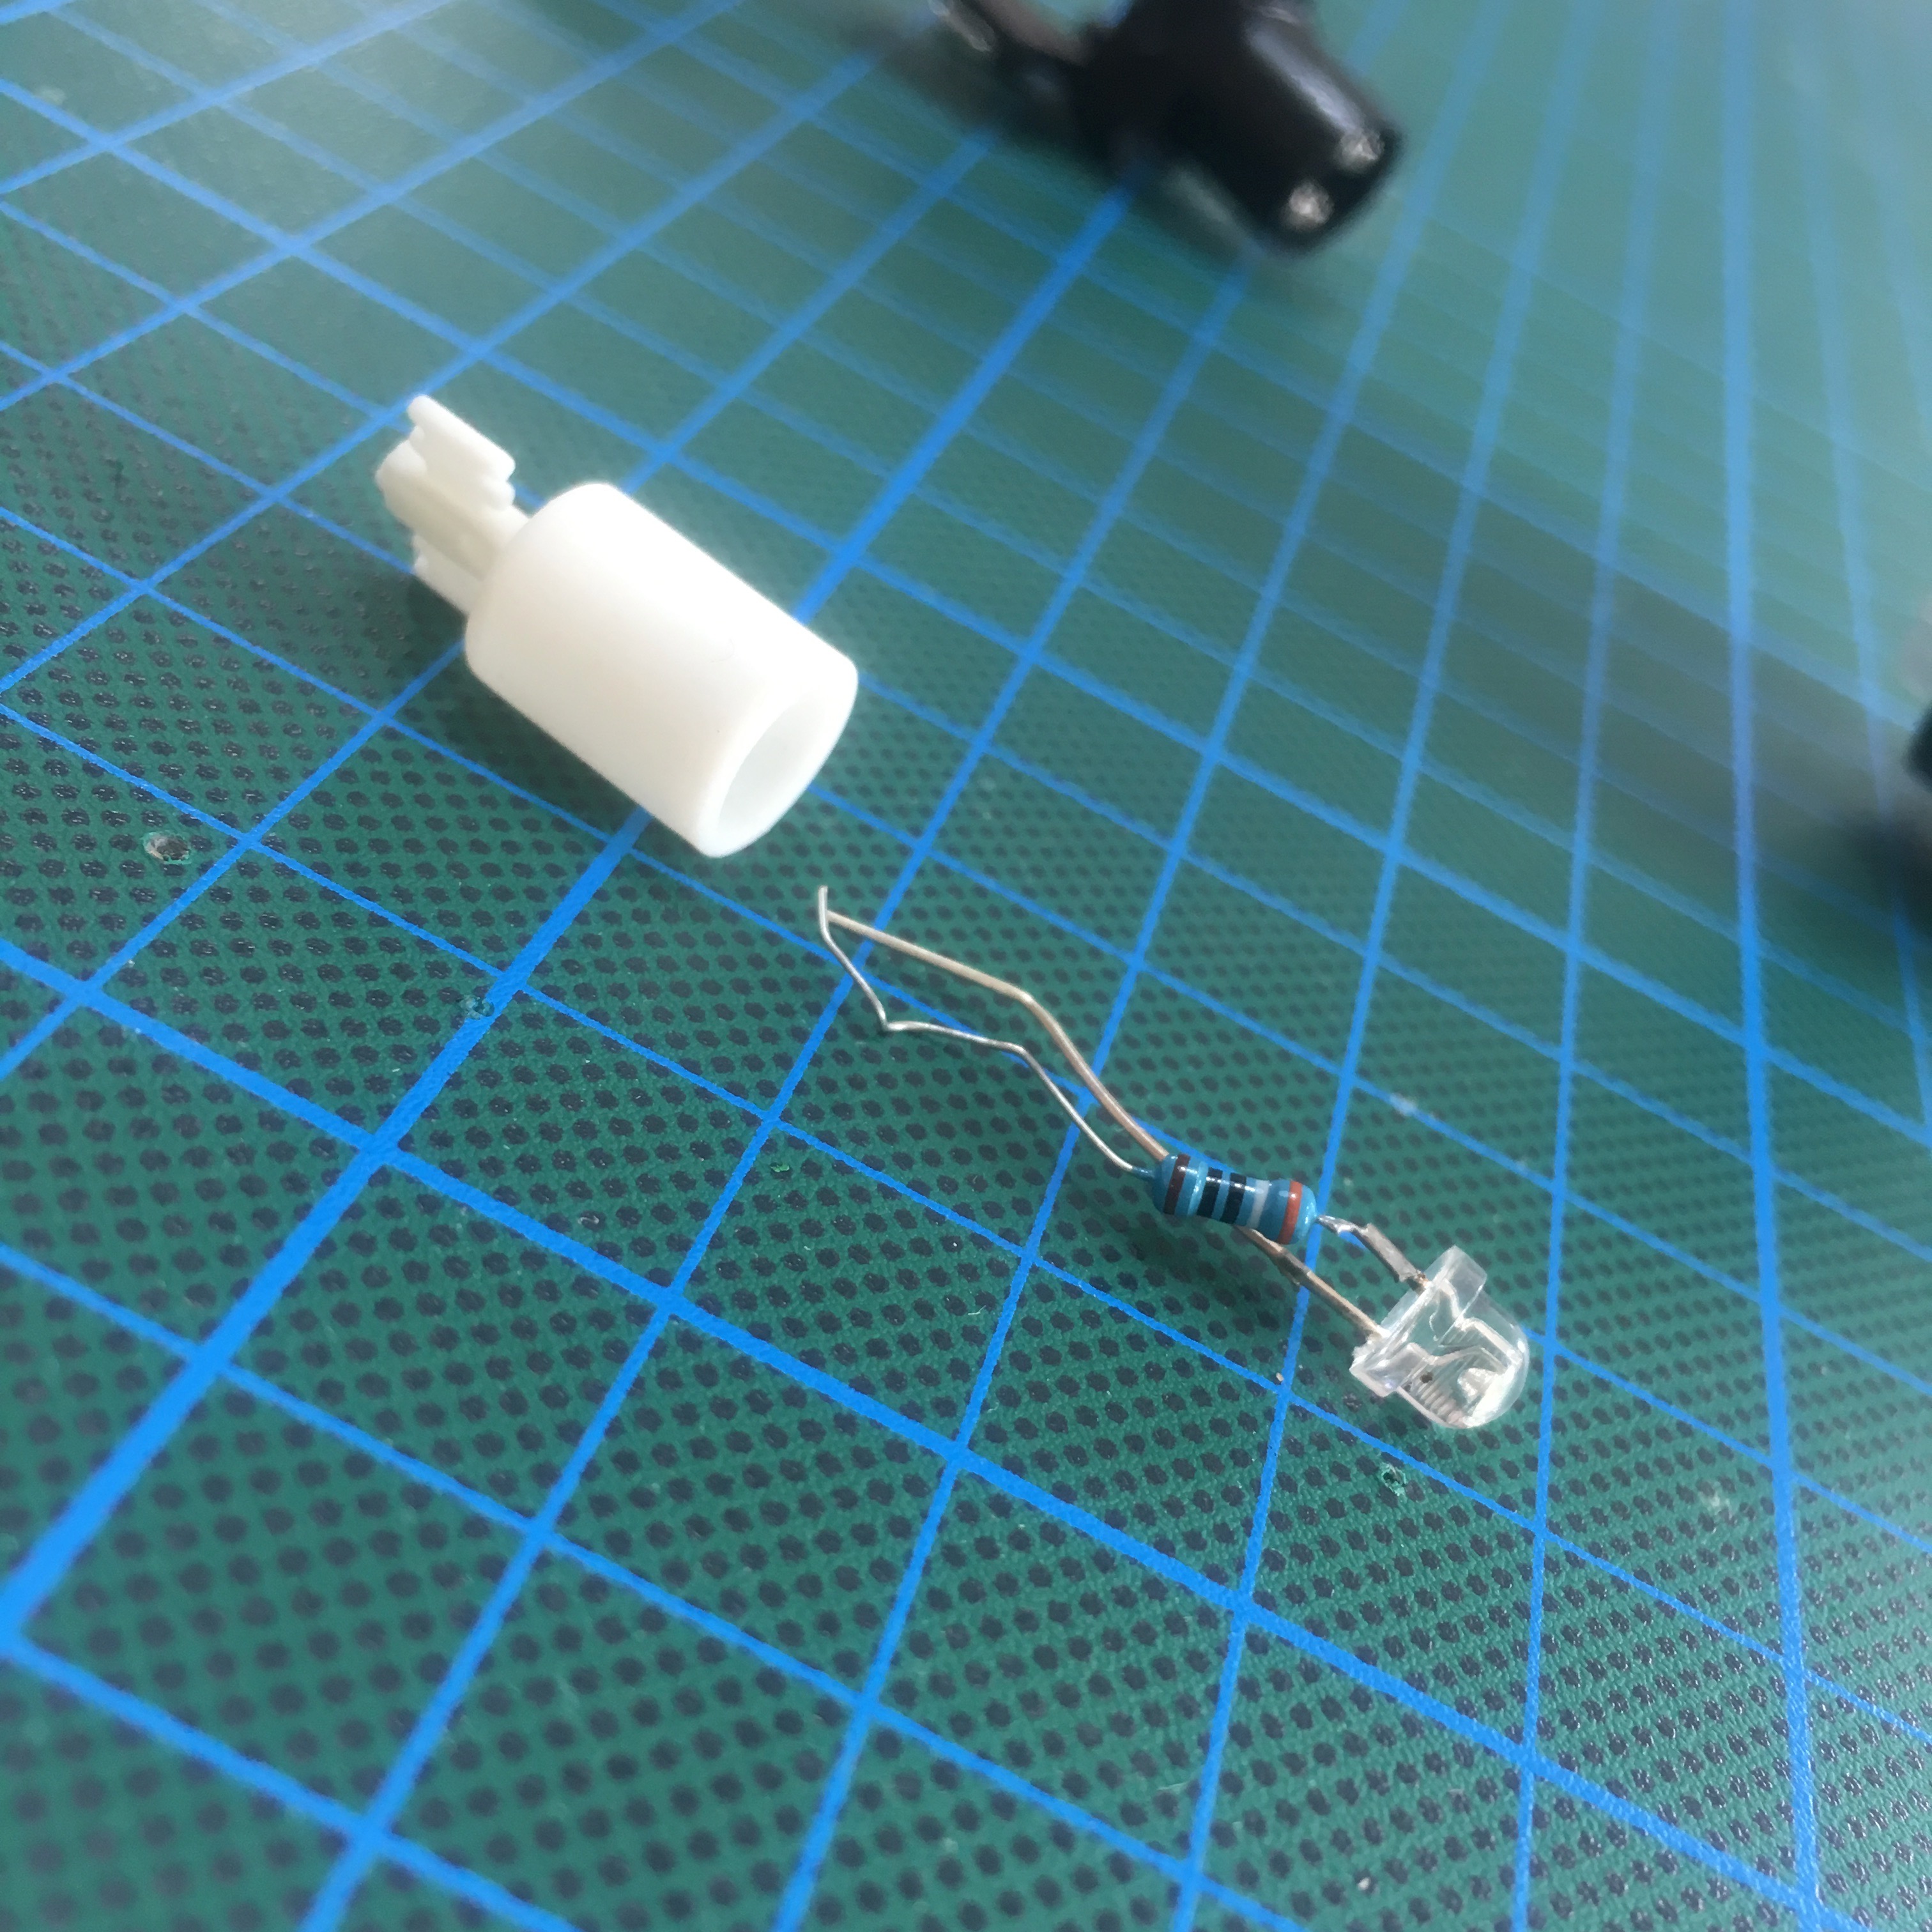
After taking of the cap, you’ll see small light bulb with a 150K Ohm transistor.
Removing the light and resistor is pretty easy. Just pop out the metal contact point and bend the bulb leads.
I’ll be replacing the light bulb with a 5mm led. It does need a bit of sanding with my Dremel Multitool to fit in the housing. But as an added benefit, this also helps a lot in the light diffusion. Of course, using a 3mm led would be a bit simpler, but since I have countless 5mm LEDs in my drawers, I take the difficult route.
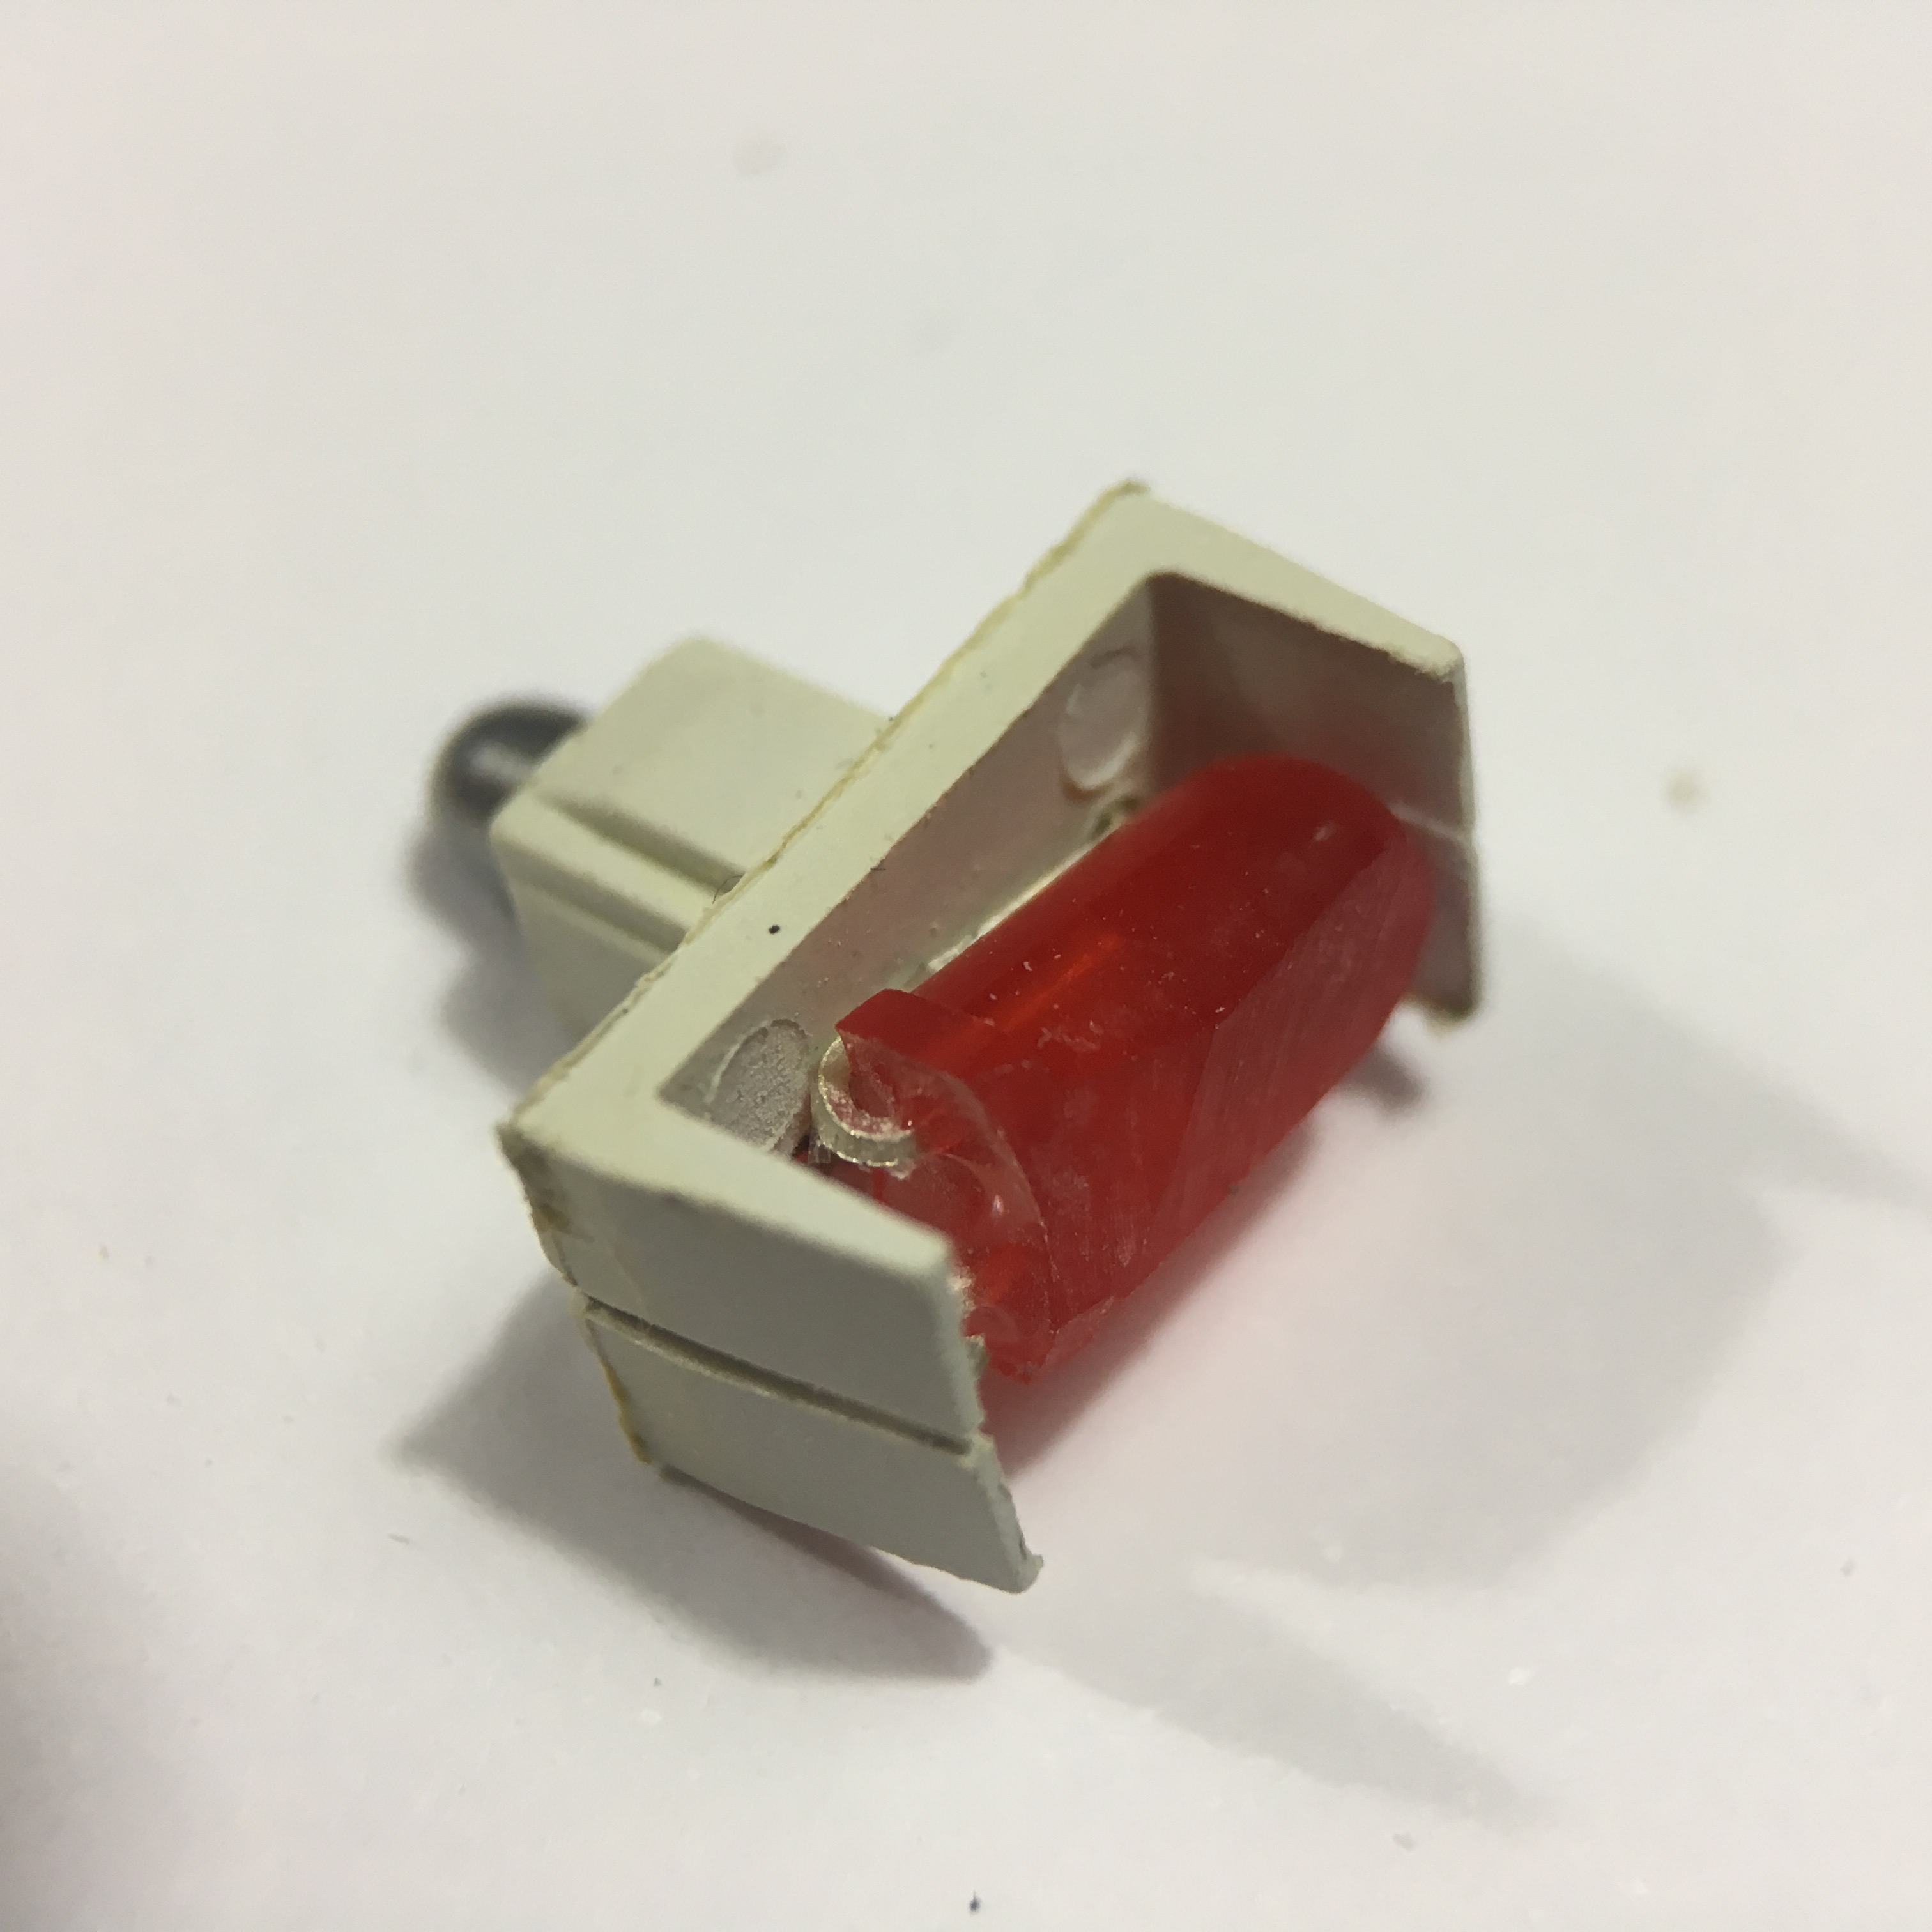
After sanding and some creative lead bending, the LED fits in the housing perfectly.
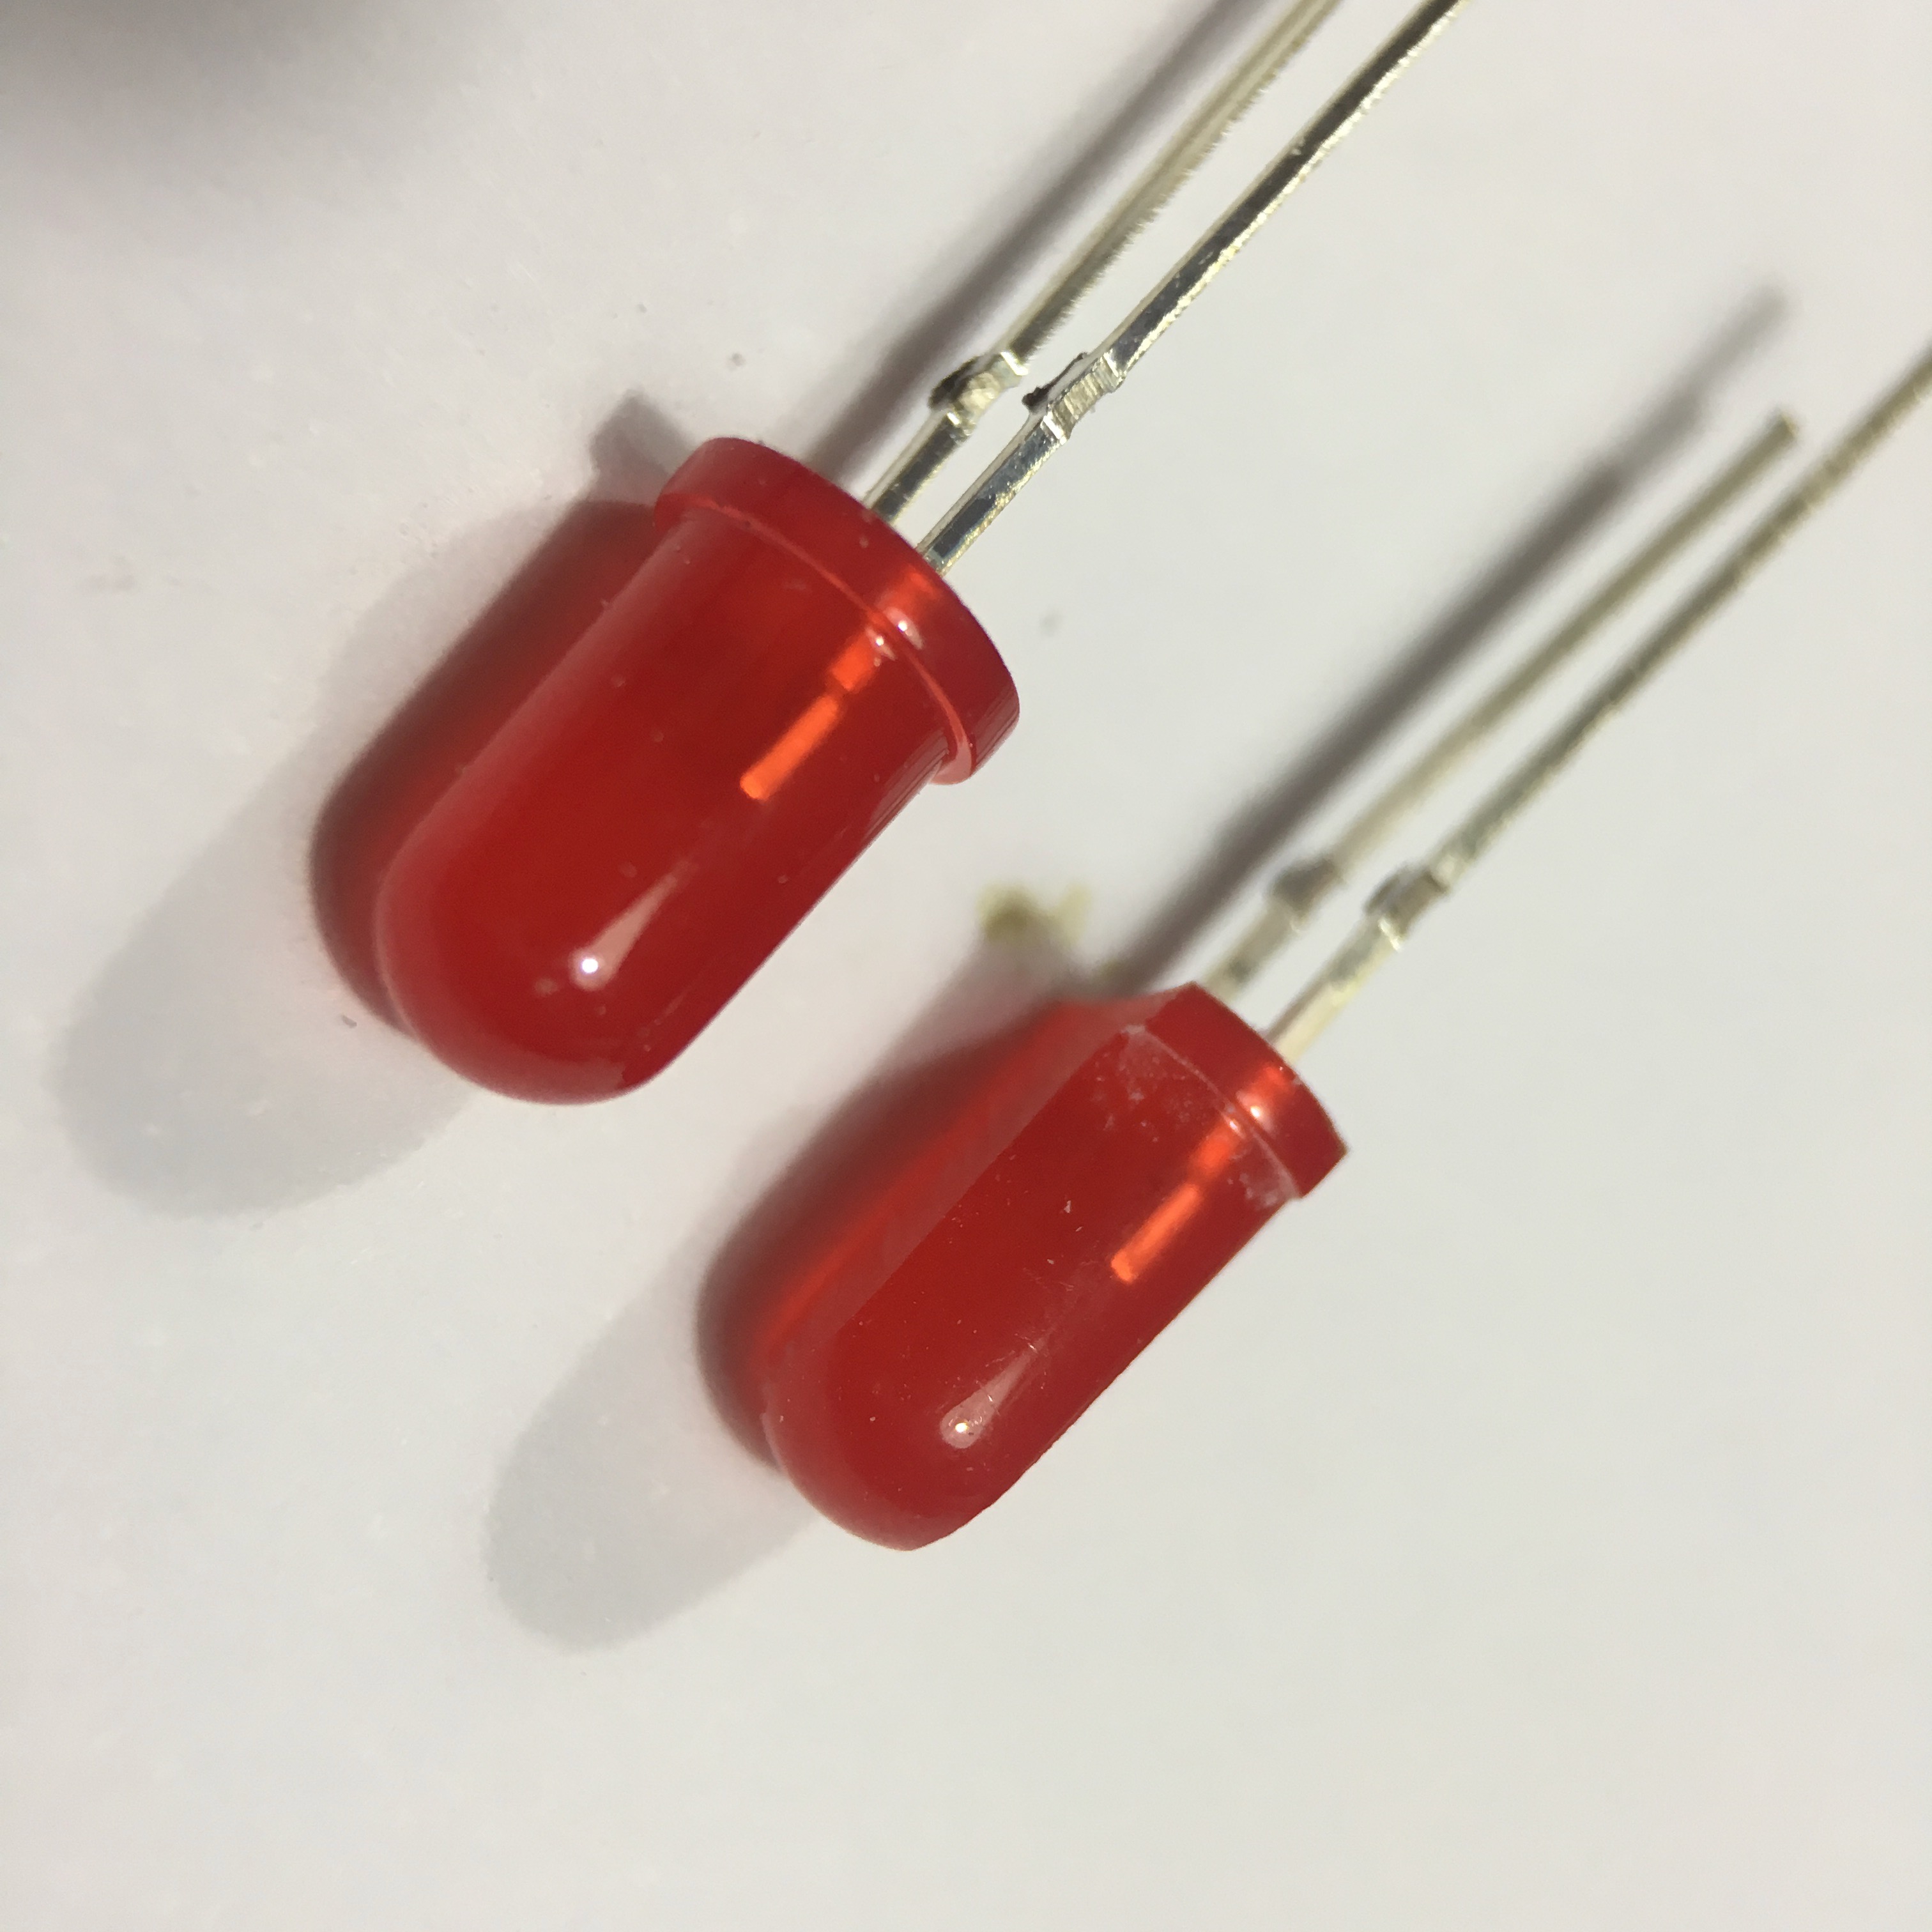
The result is quite nice! I initially tried it with a white LED (see the header image of this blog post), but it turned out the white light was too bright to keep the nice red effect using the red cap.
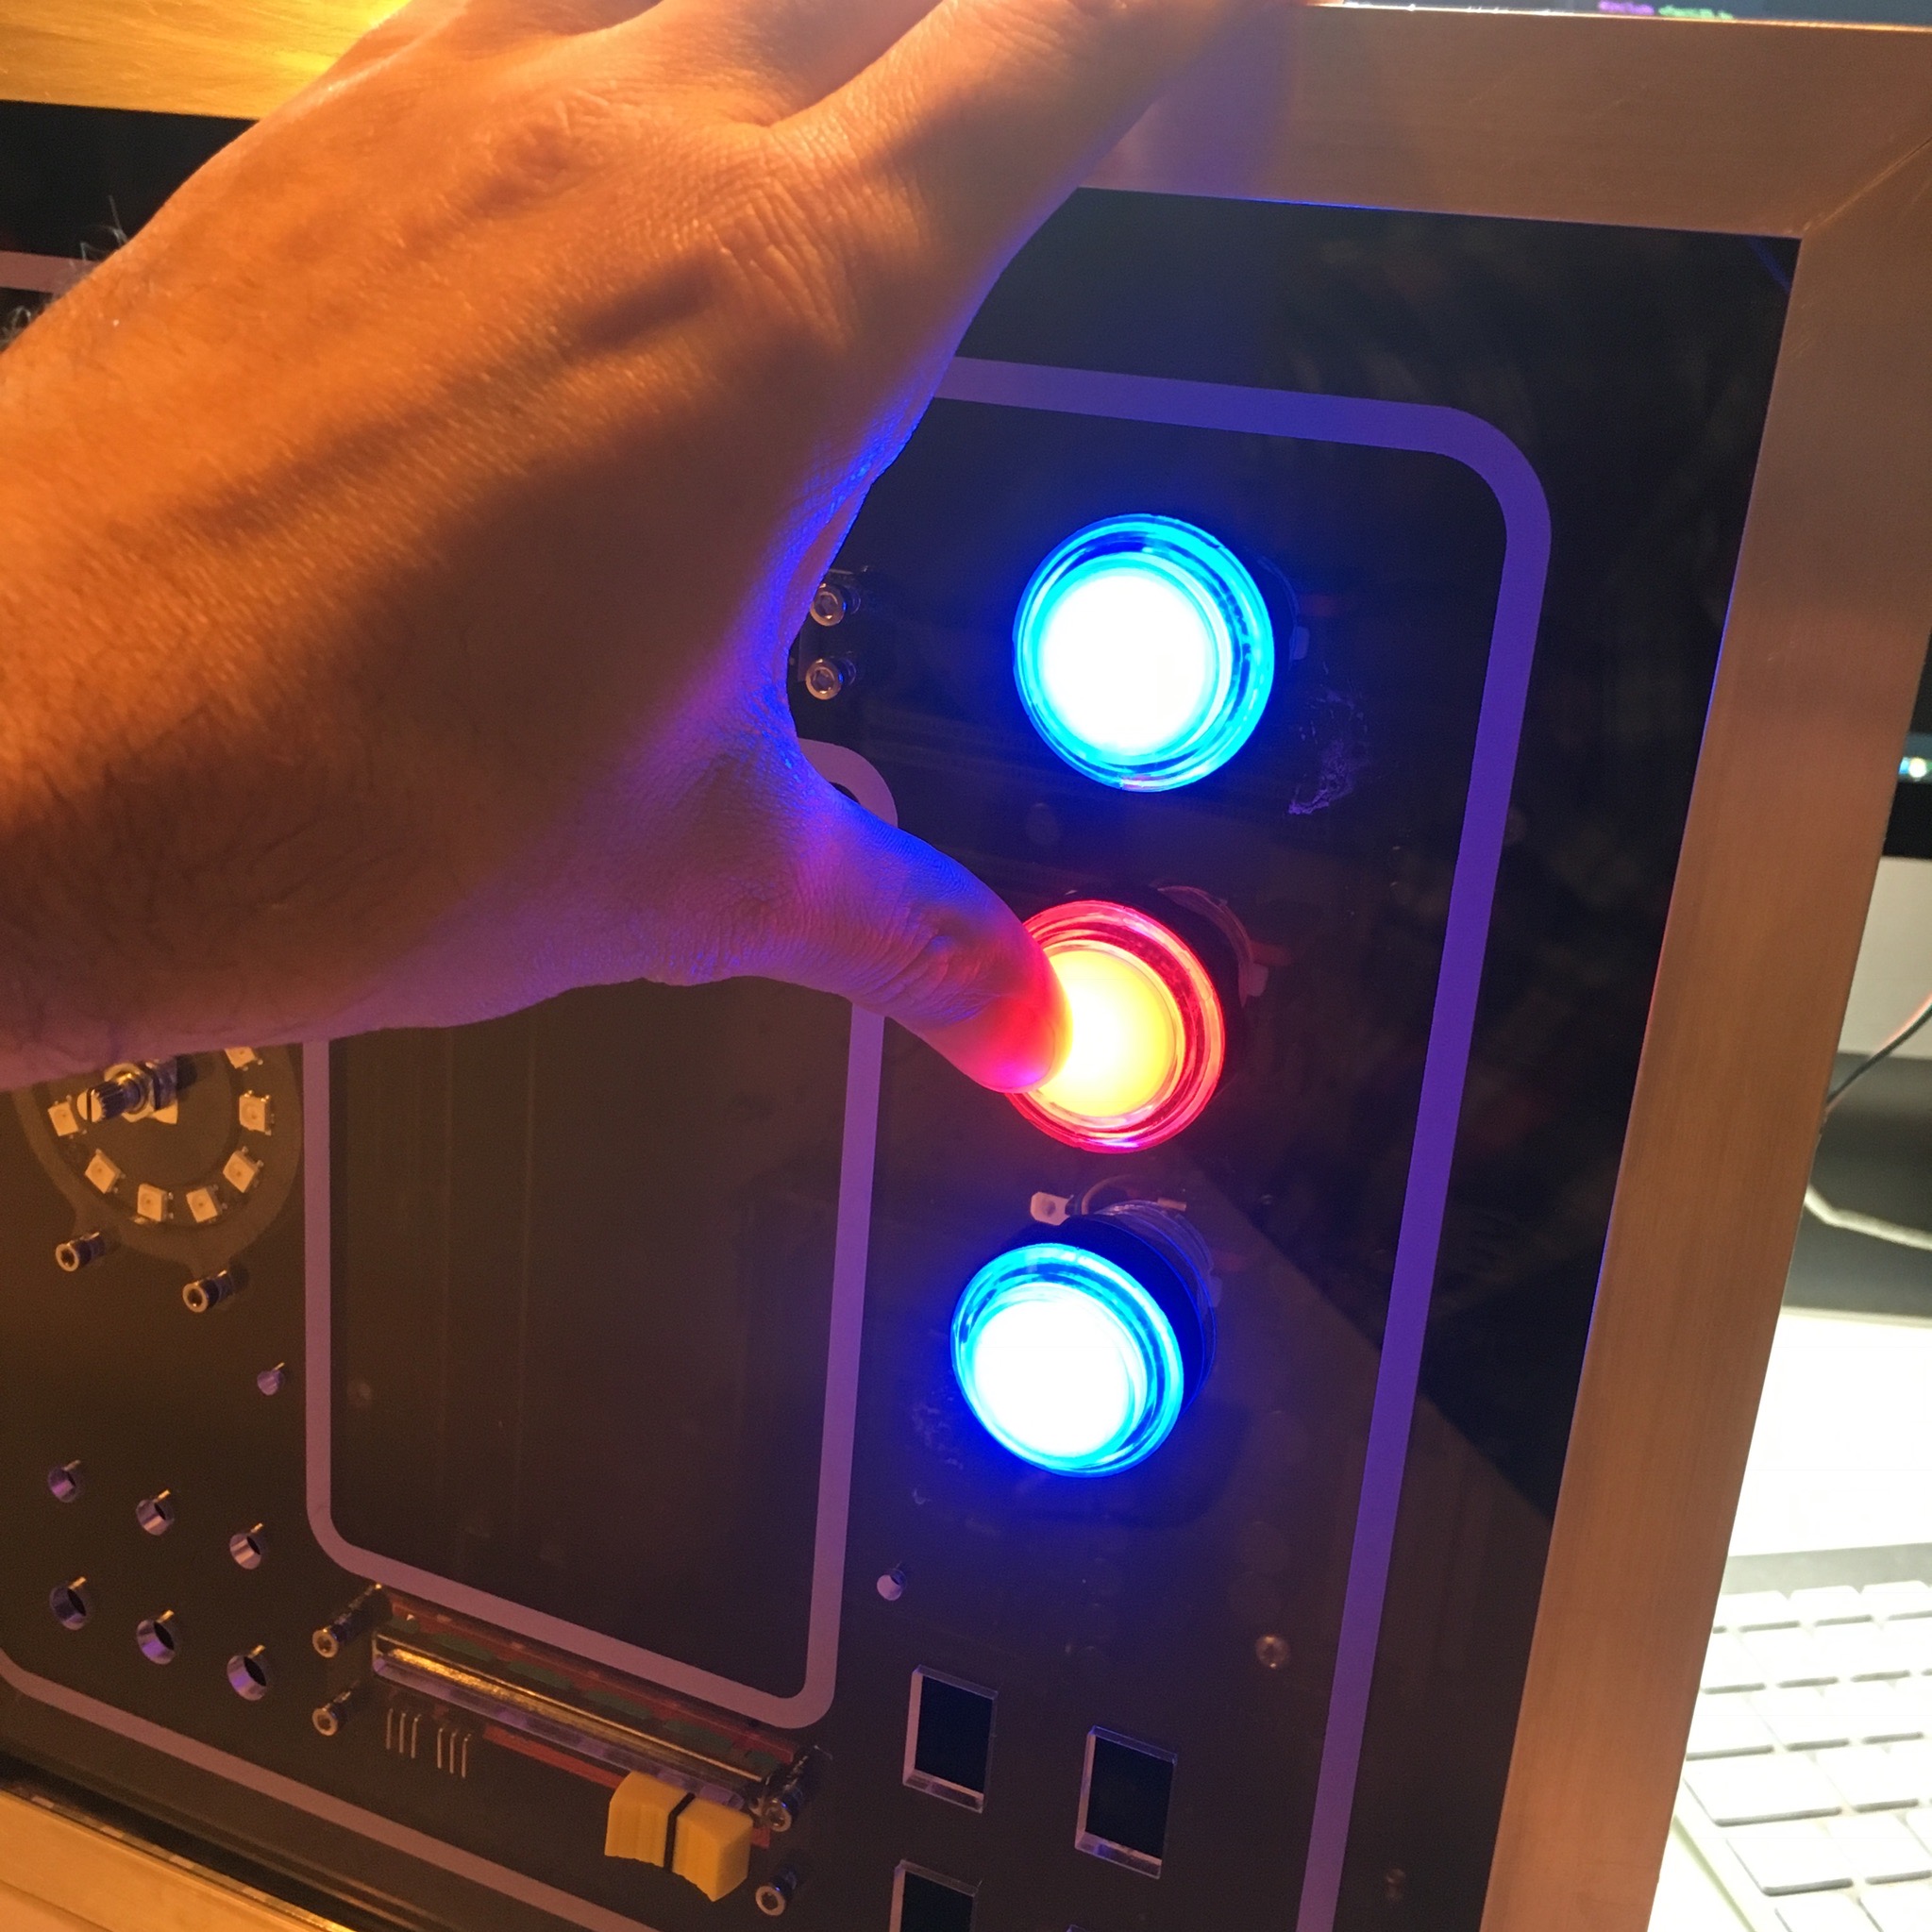
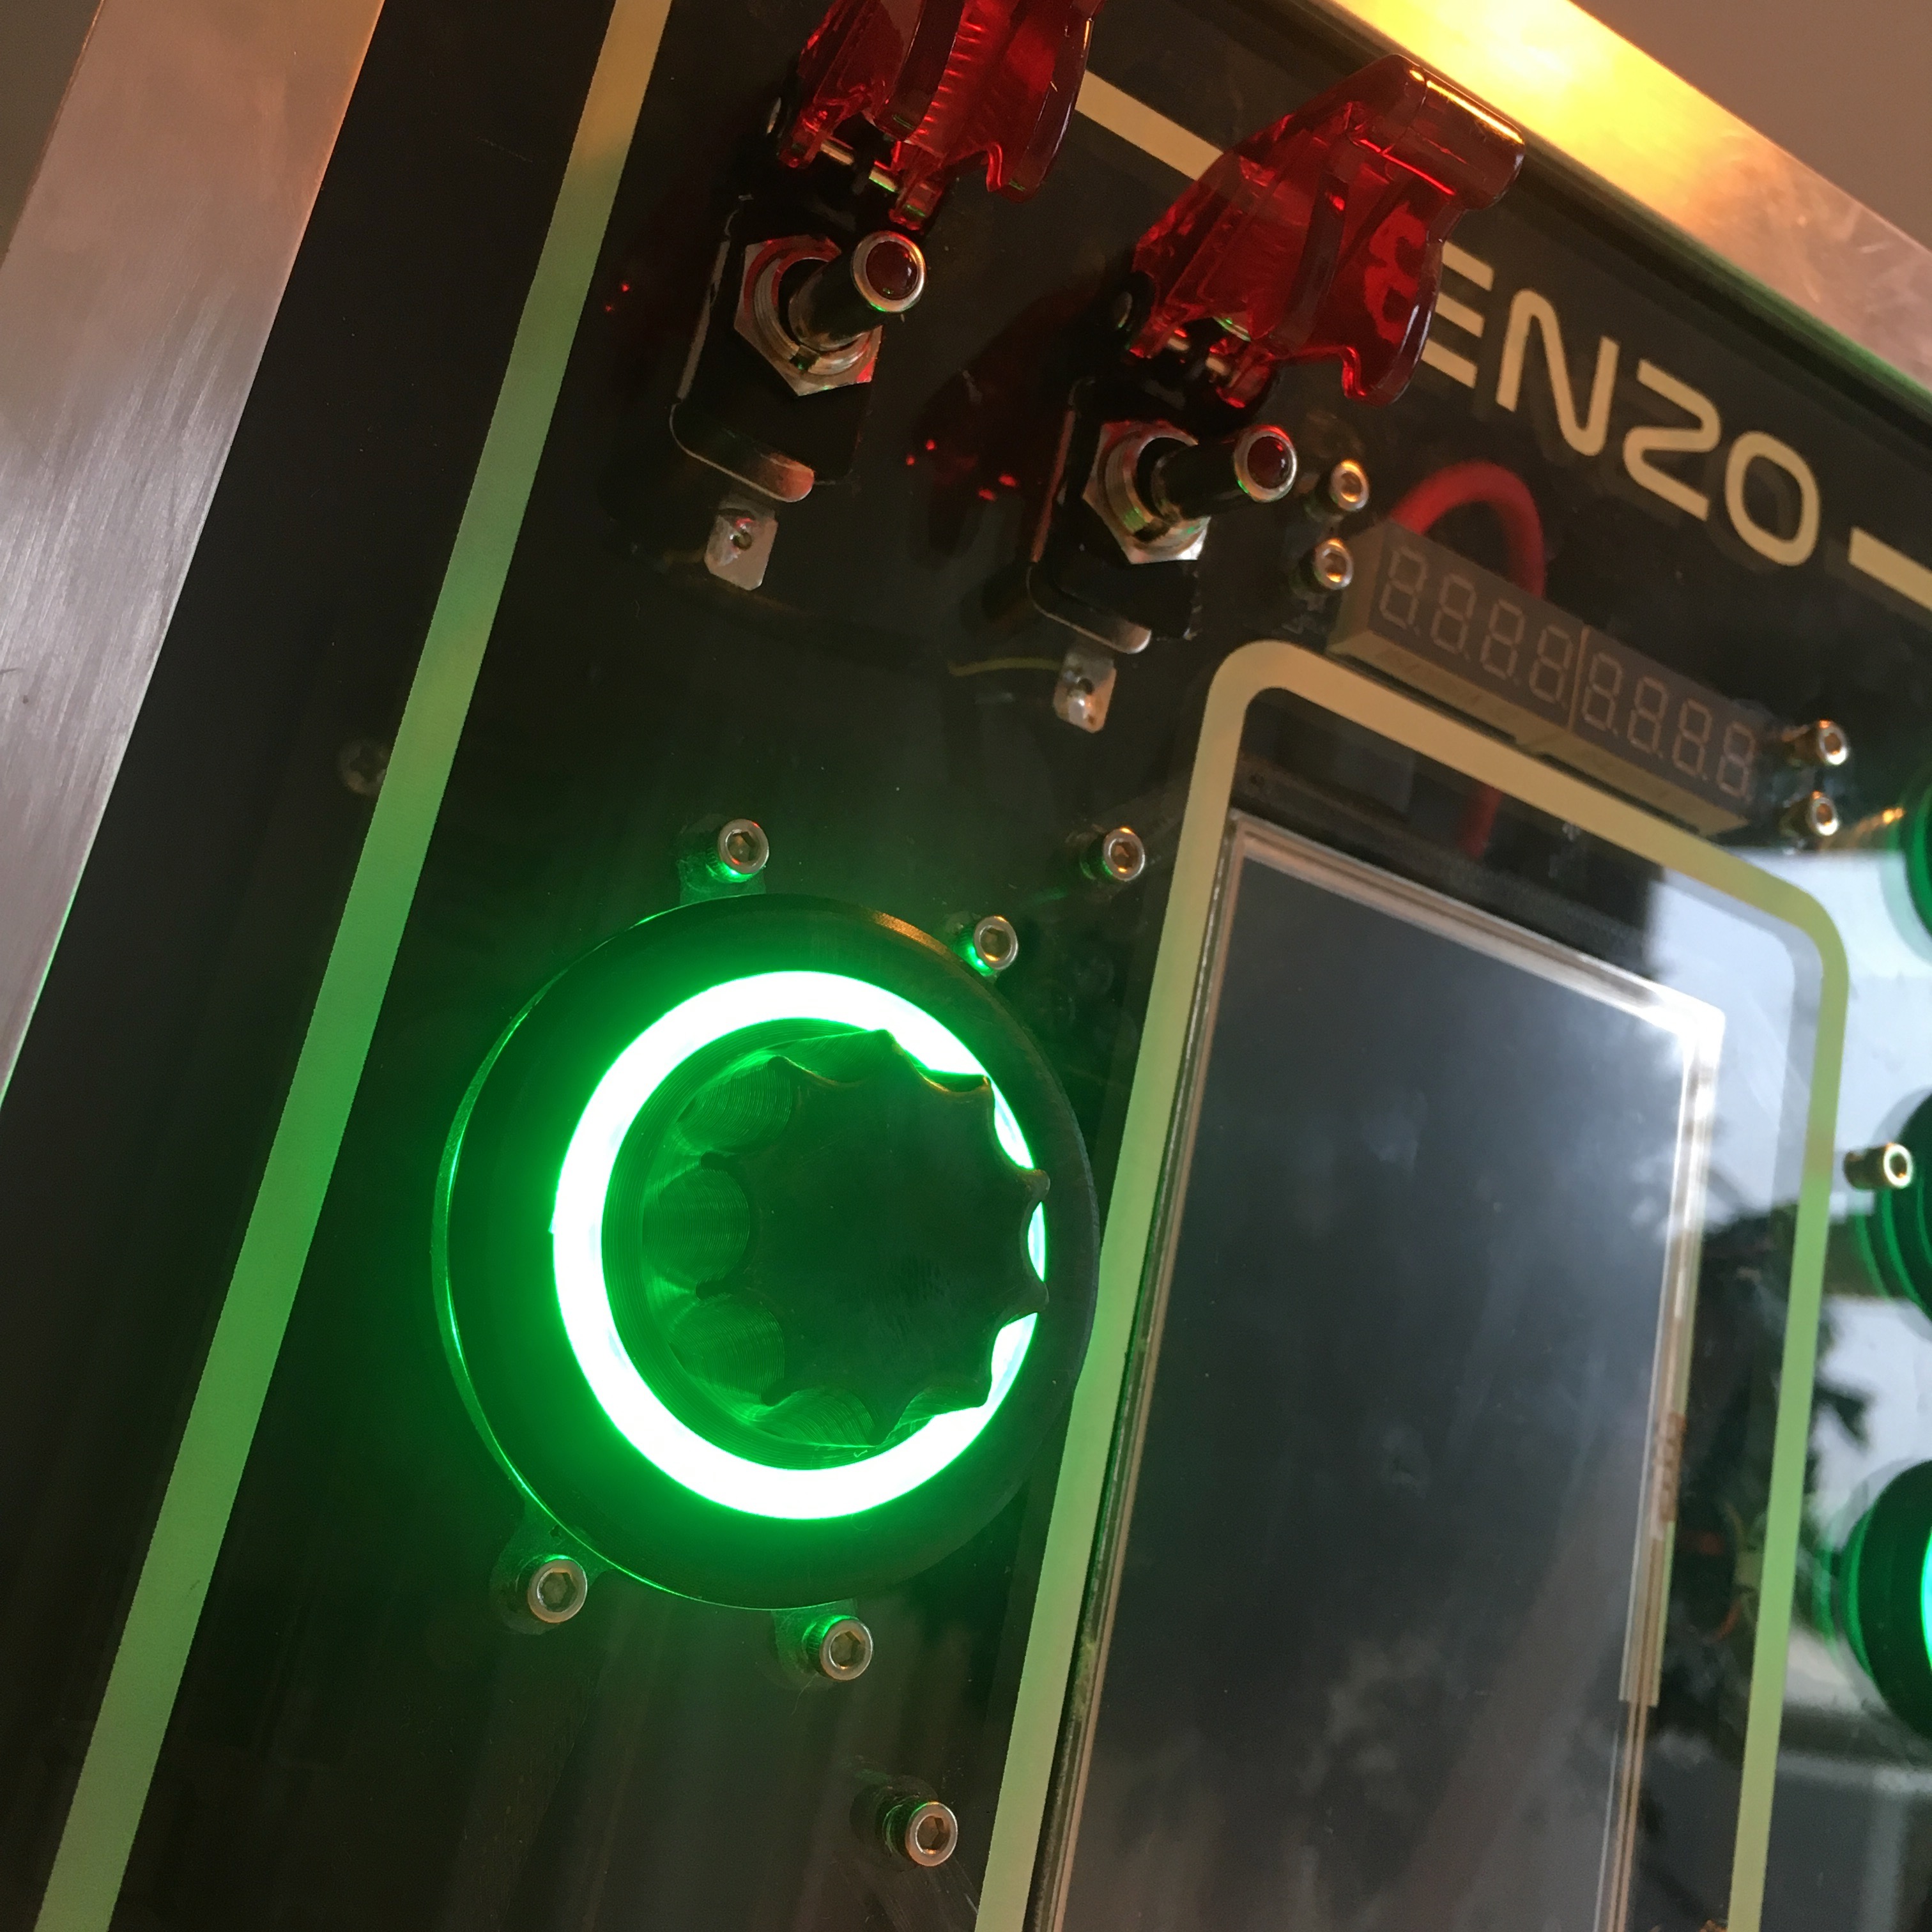
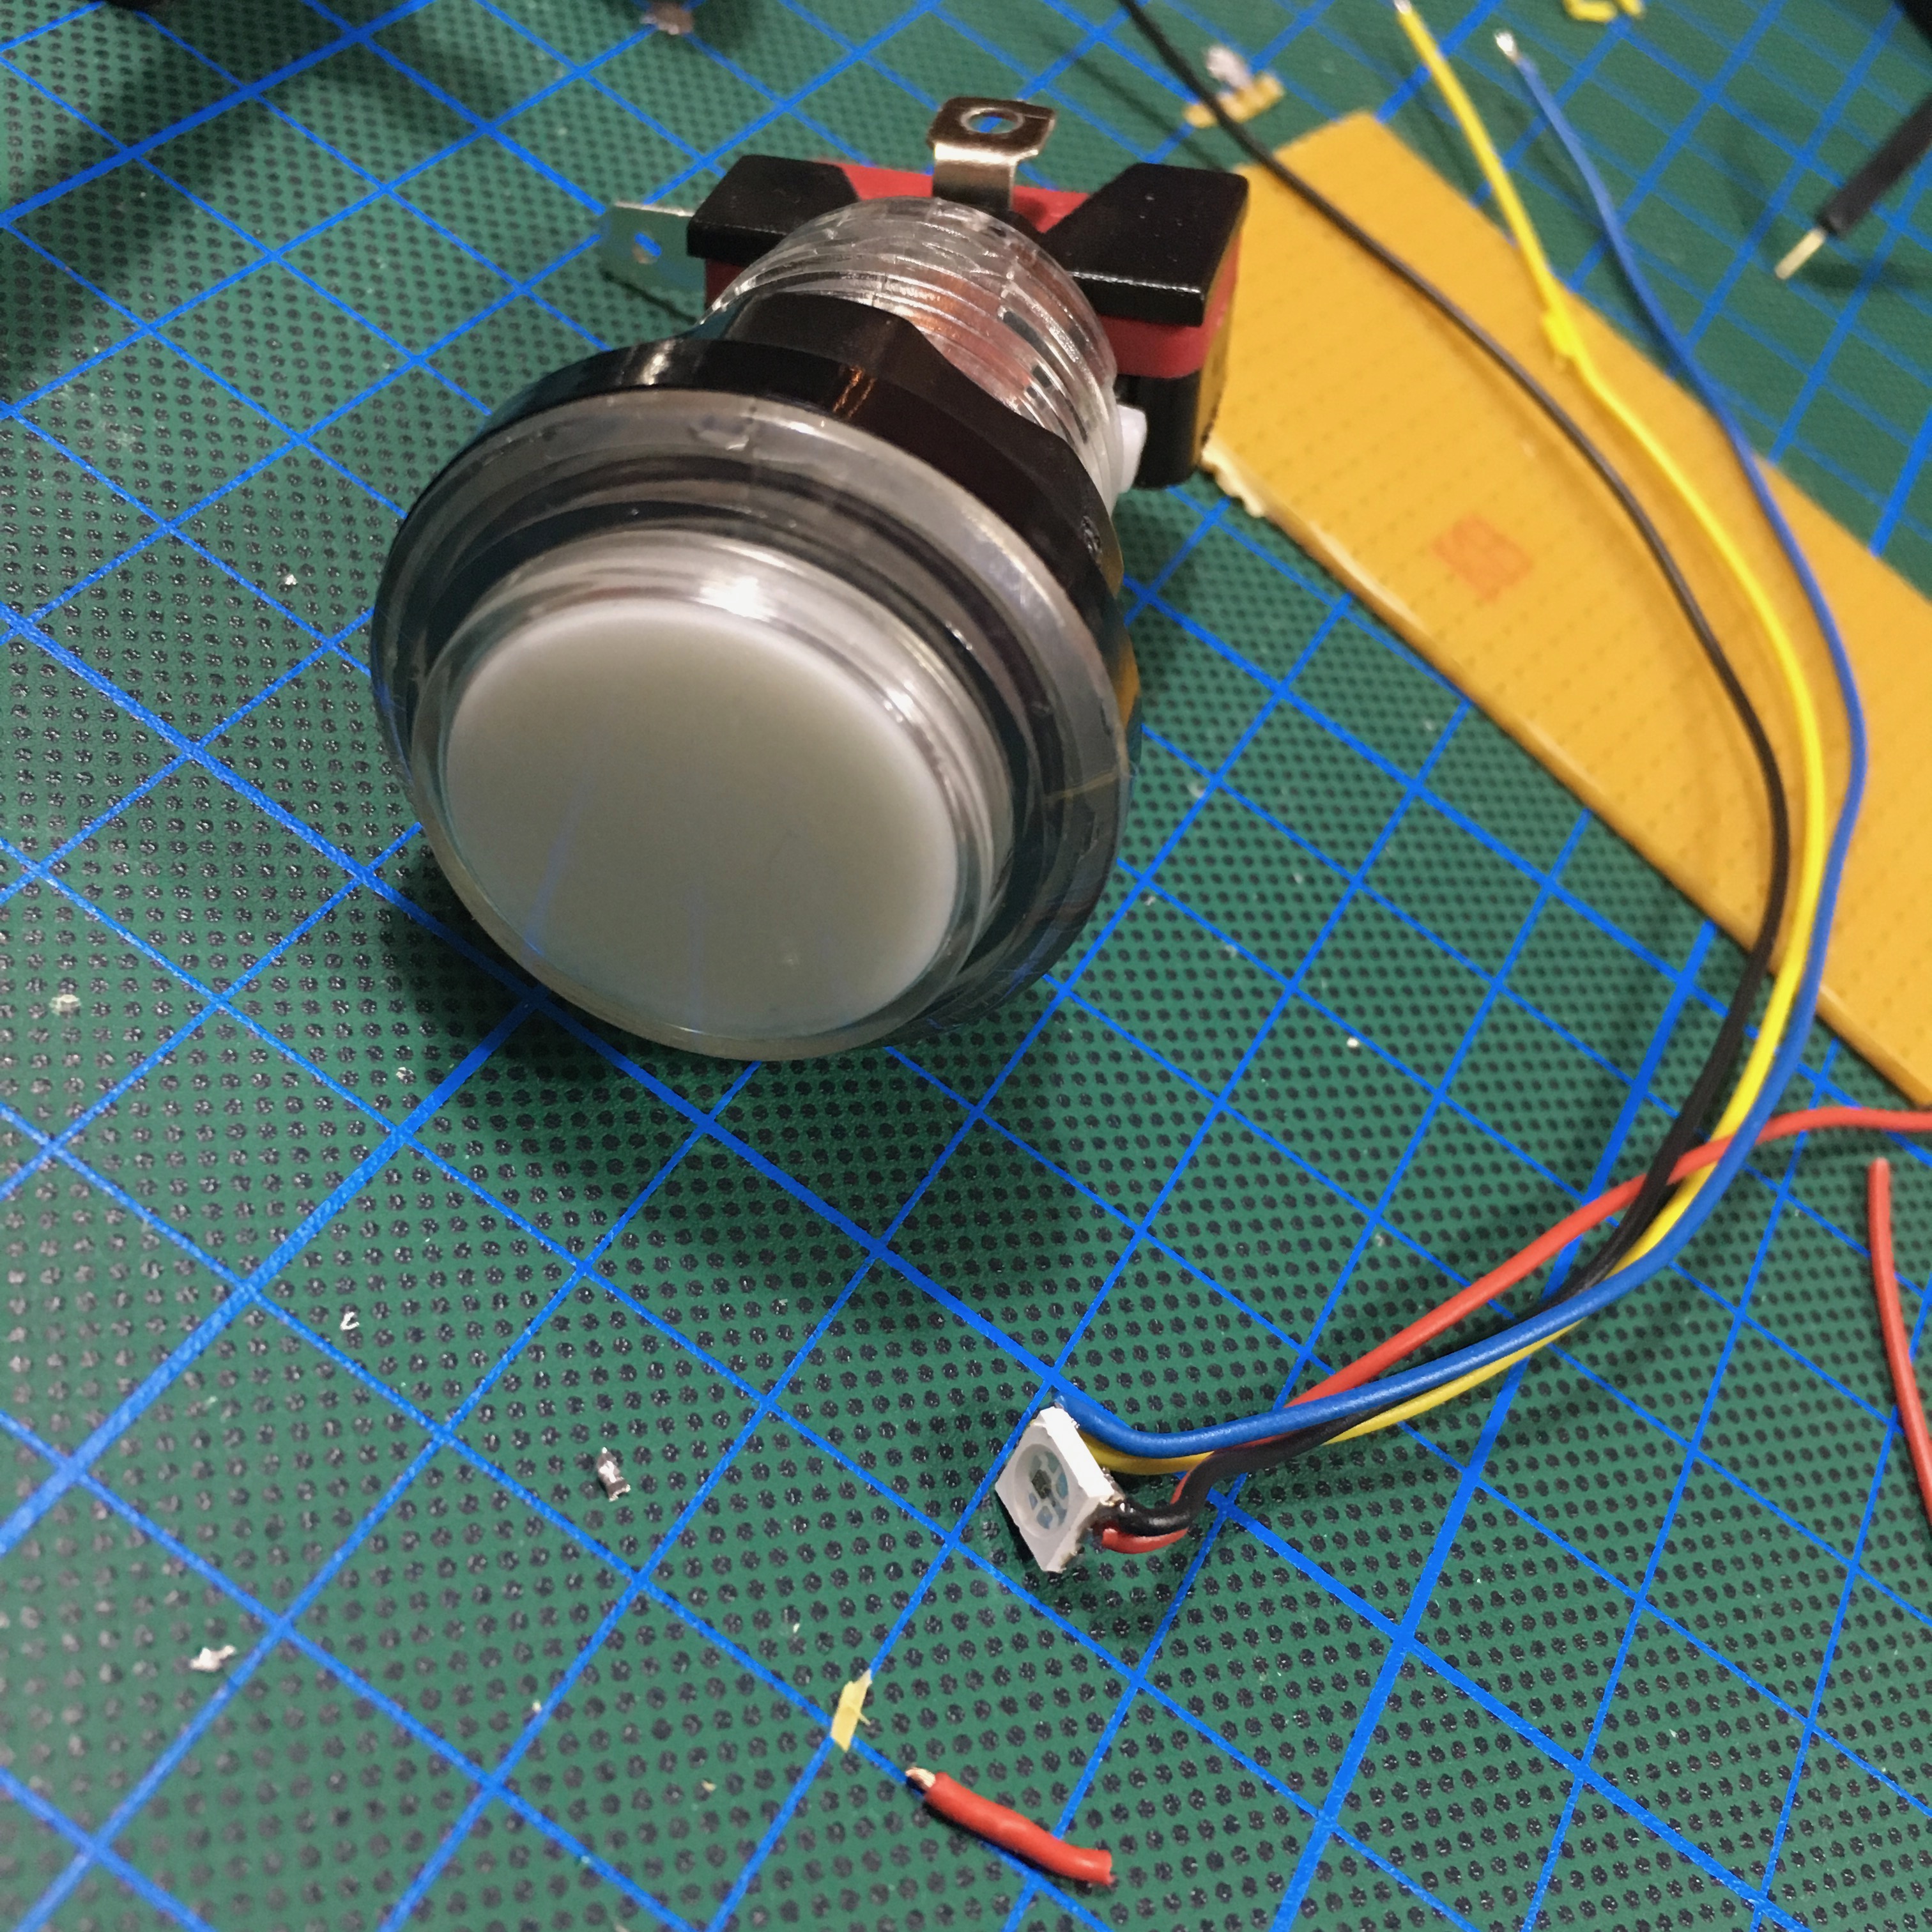
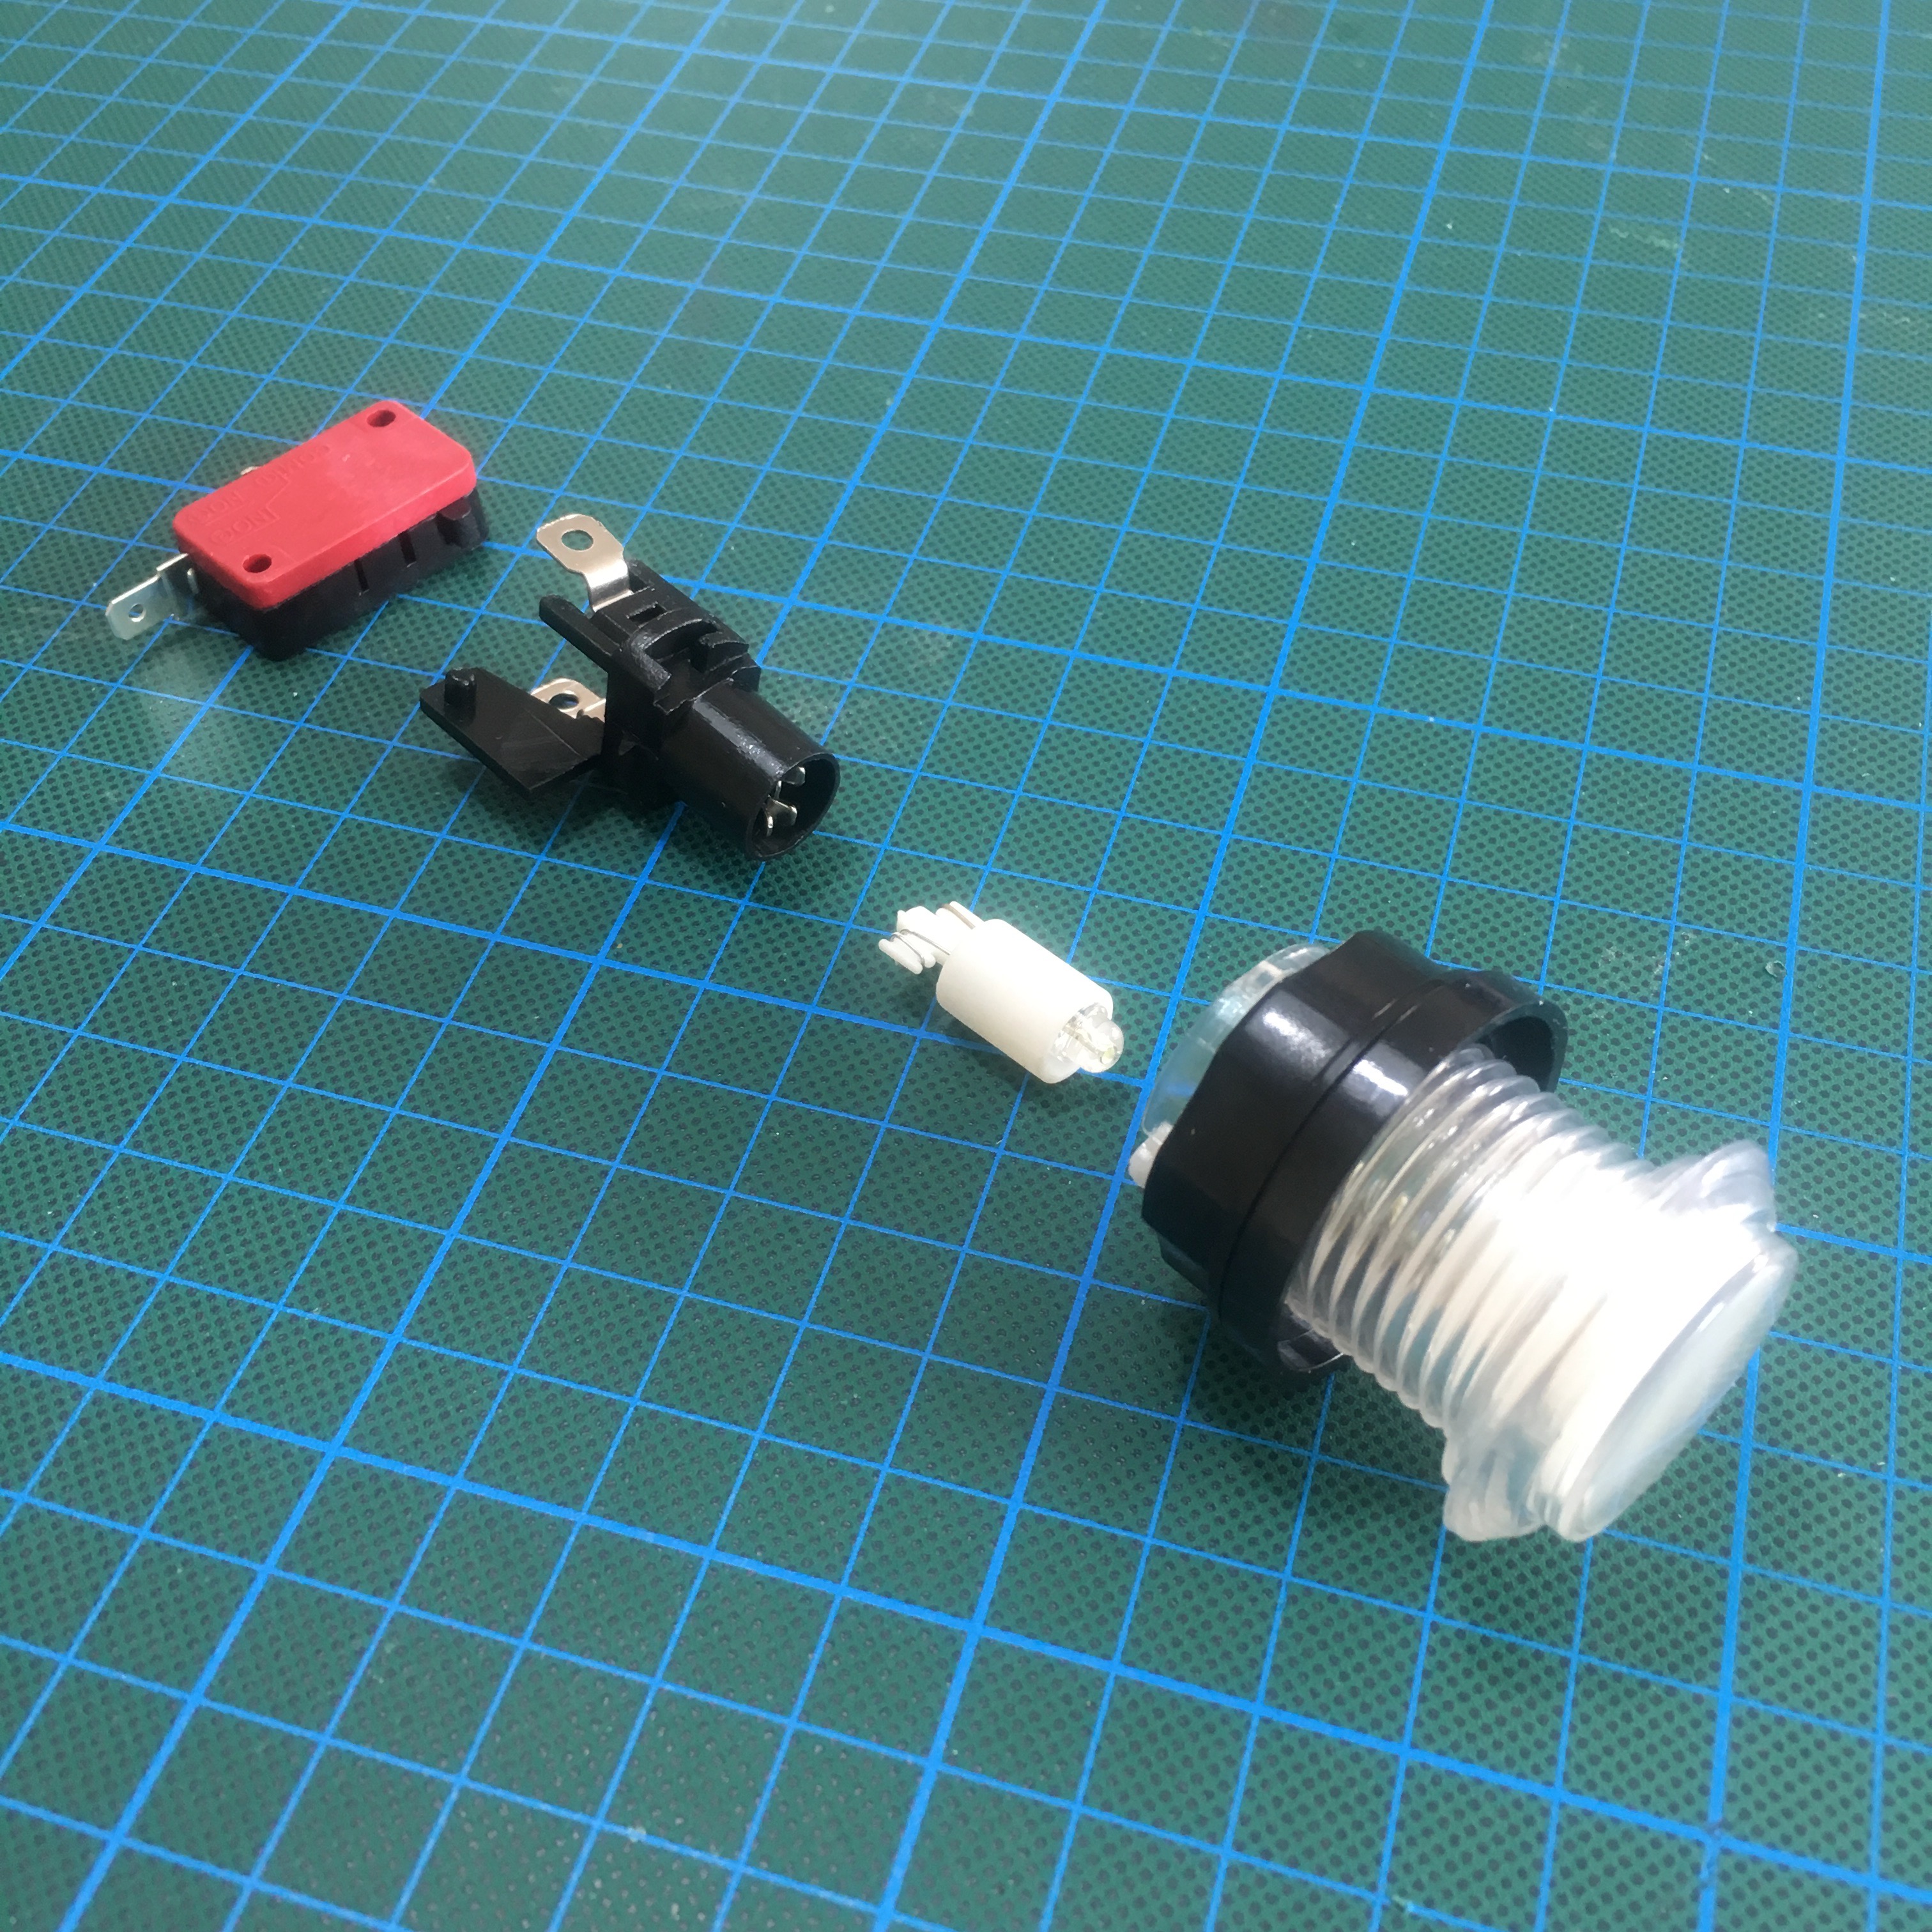
On to the last ones: the round push buttons. These are regular arcade buttons that need a 12V power supply.
The arcade buttons come in separate parts, making it very easy to swap out the light source.
The light source is a white LED using a 390 Ohm resistor. Of course I could just simply swap out the resistor, but I had a much cooler plan in mind for these buttons …
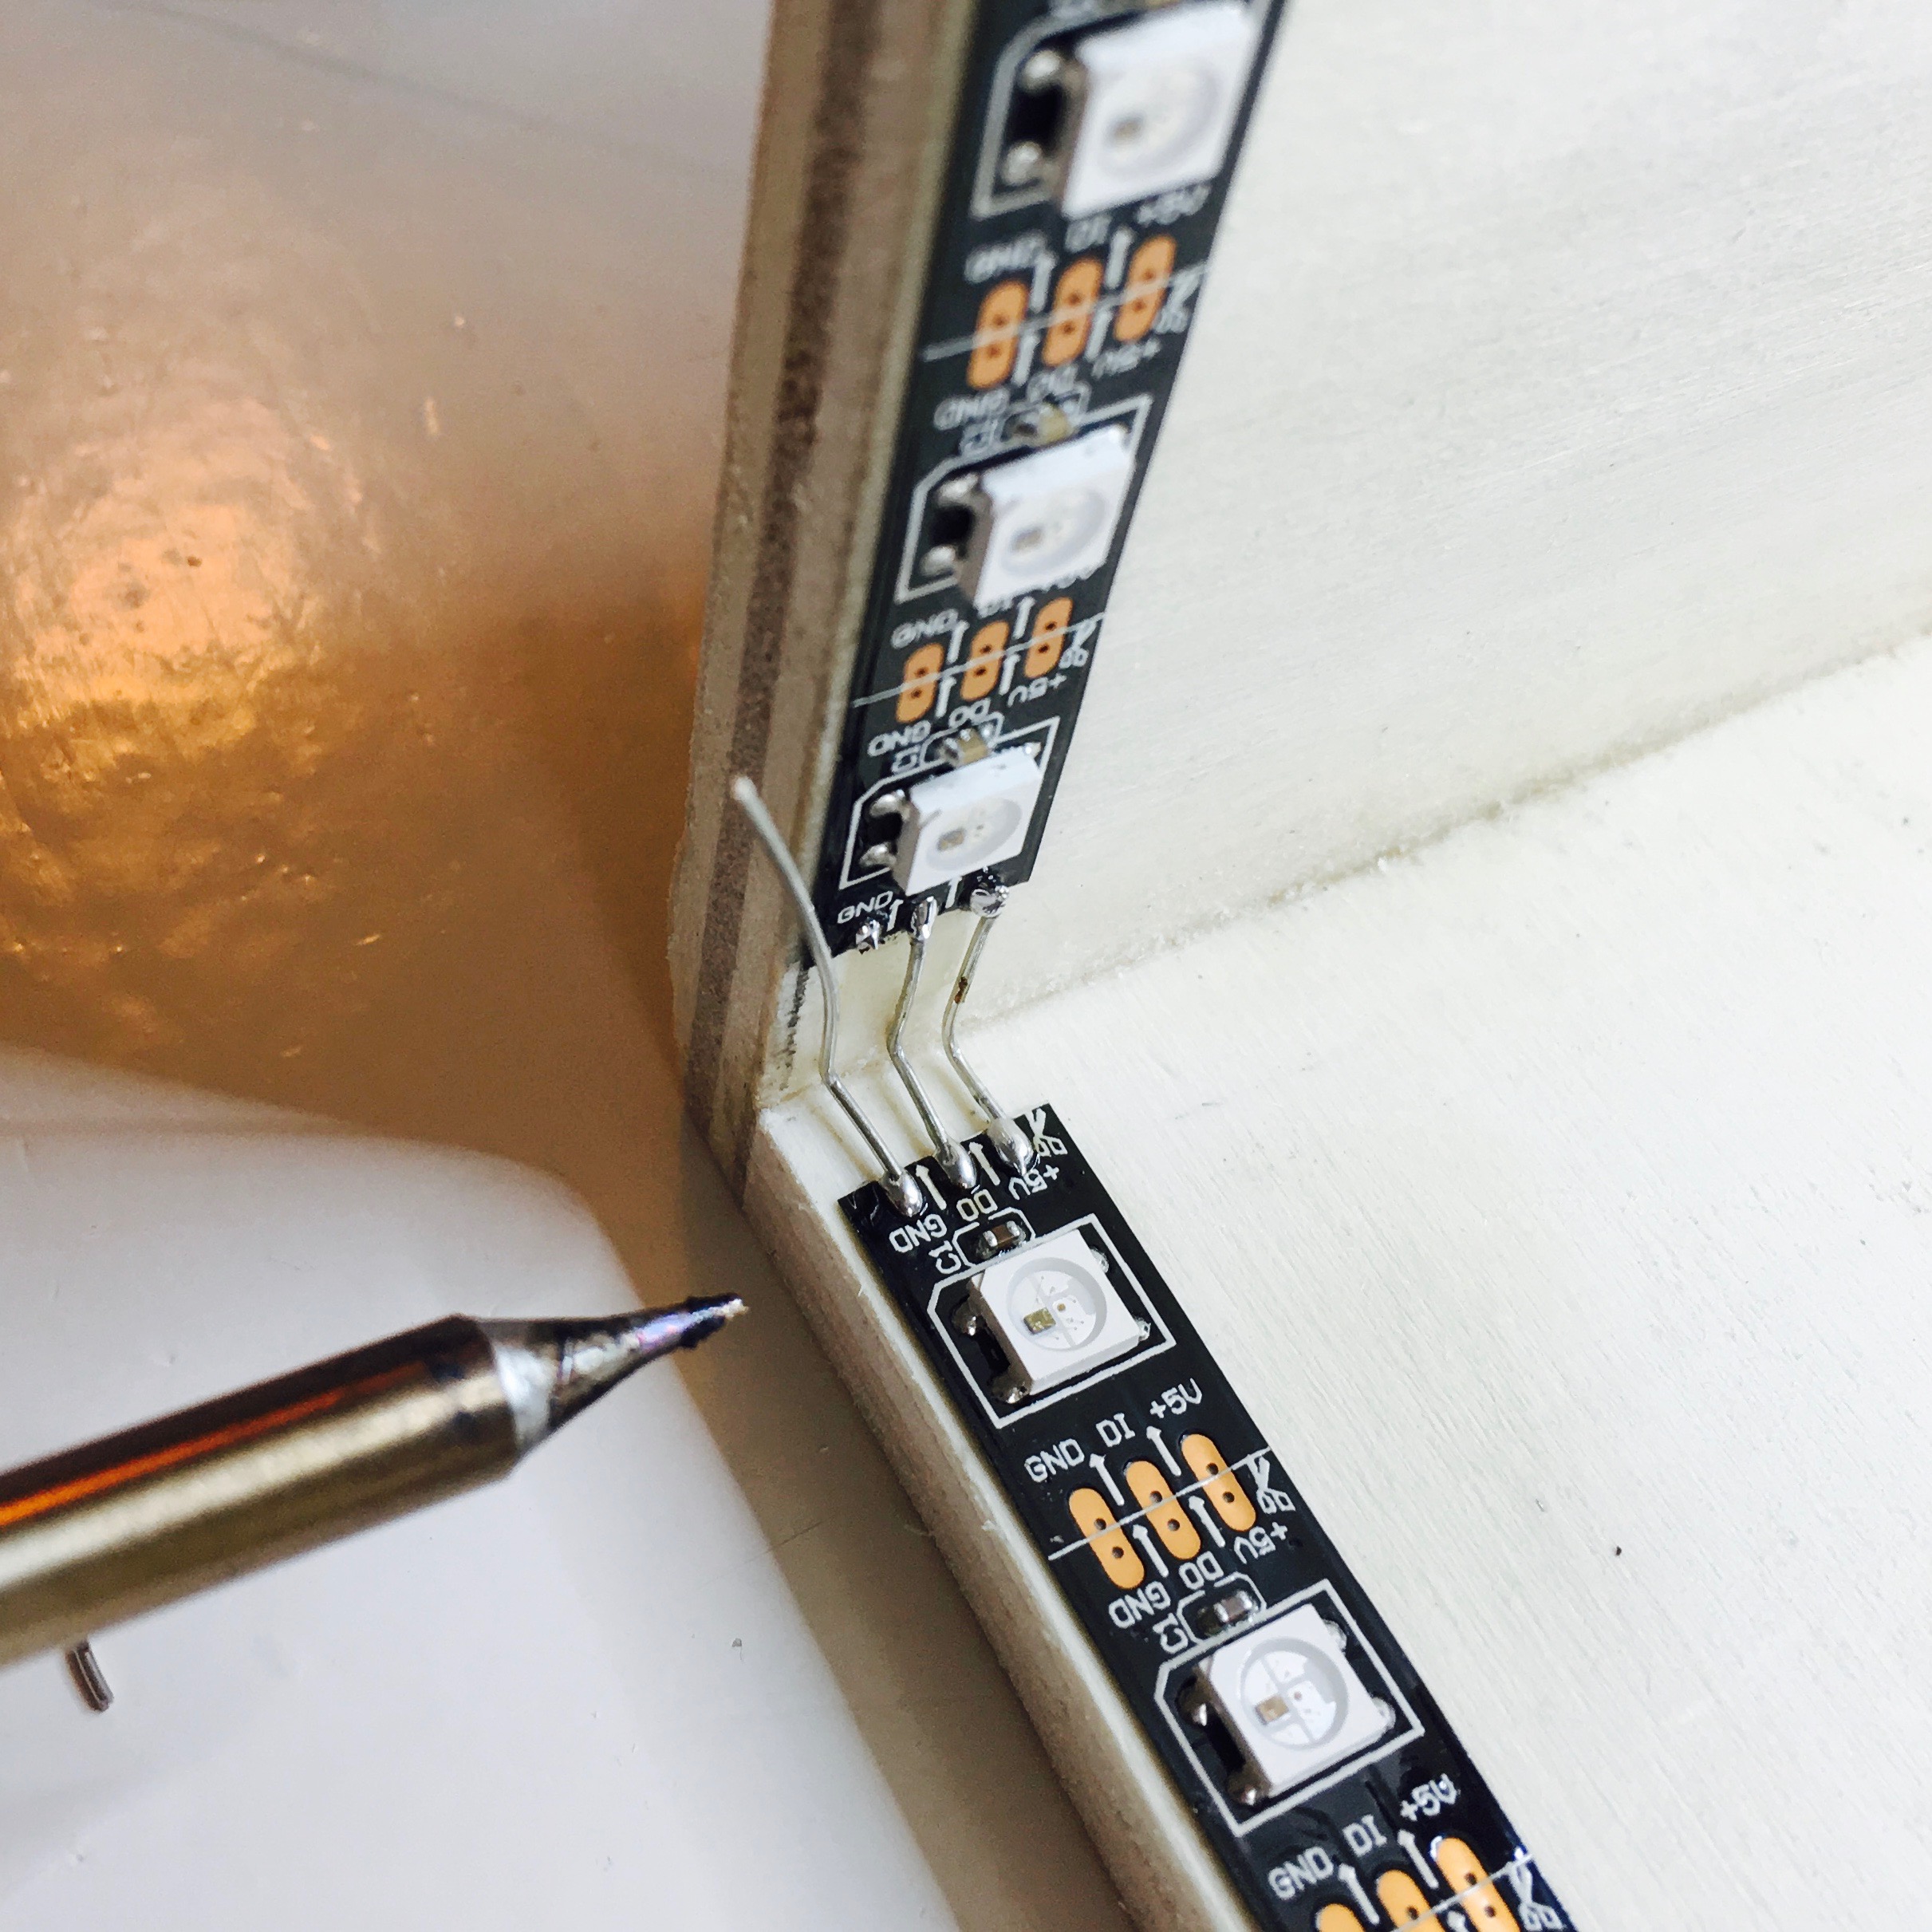
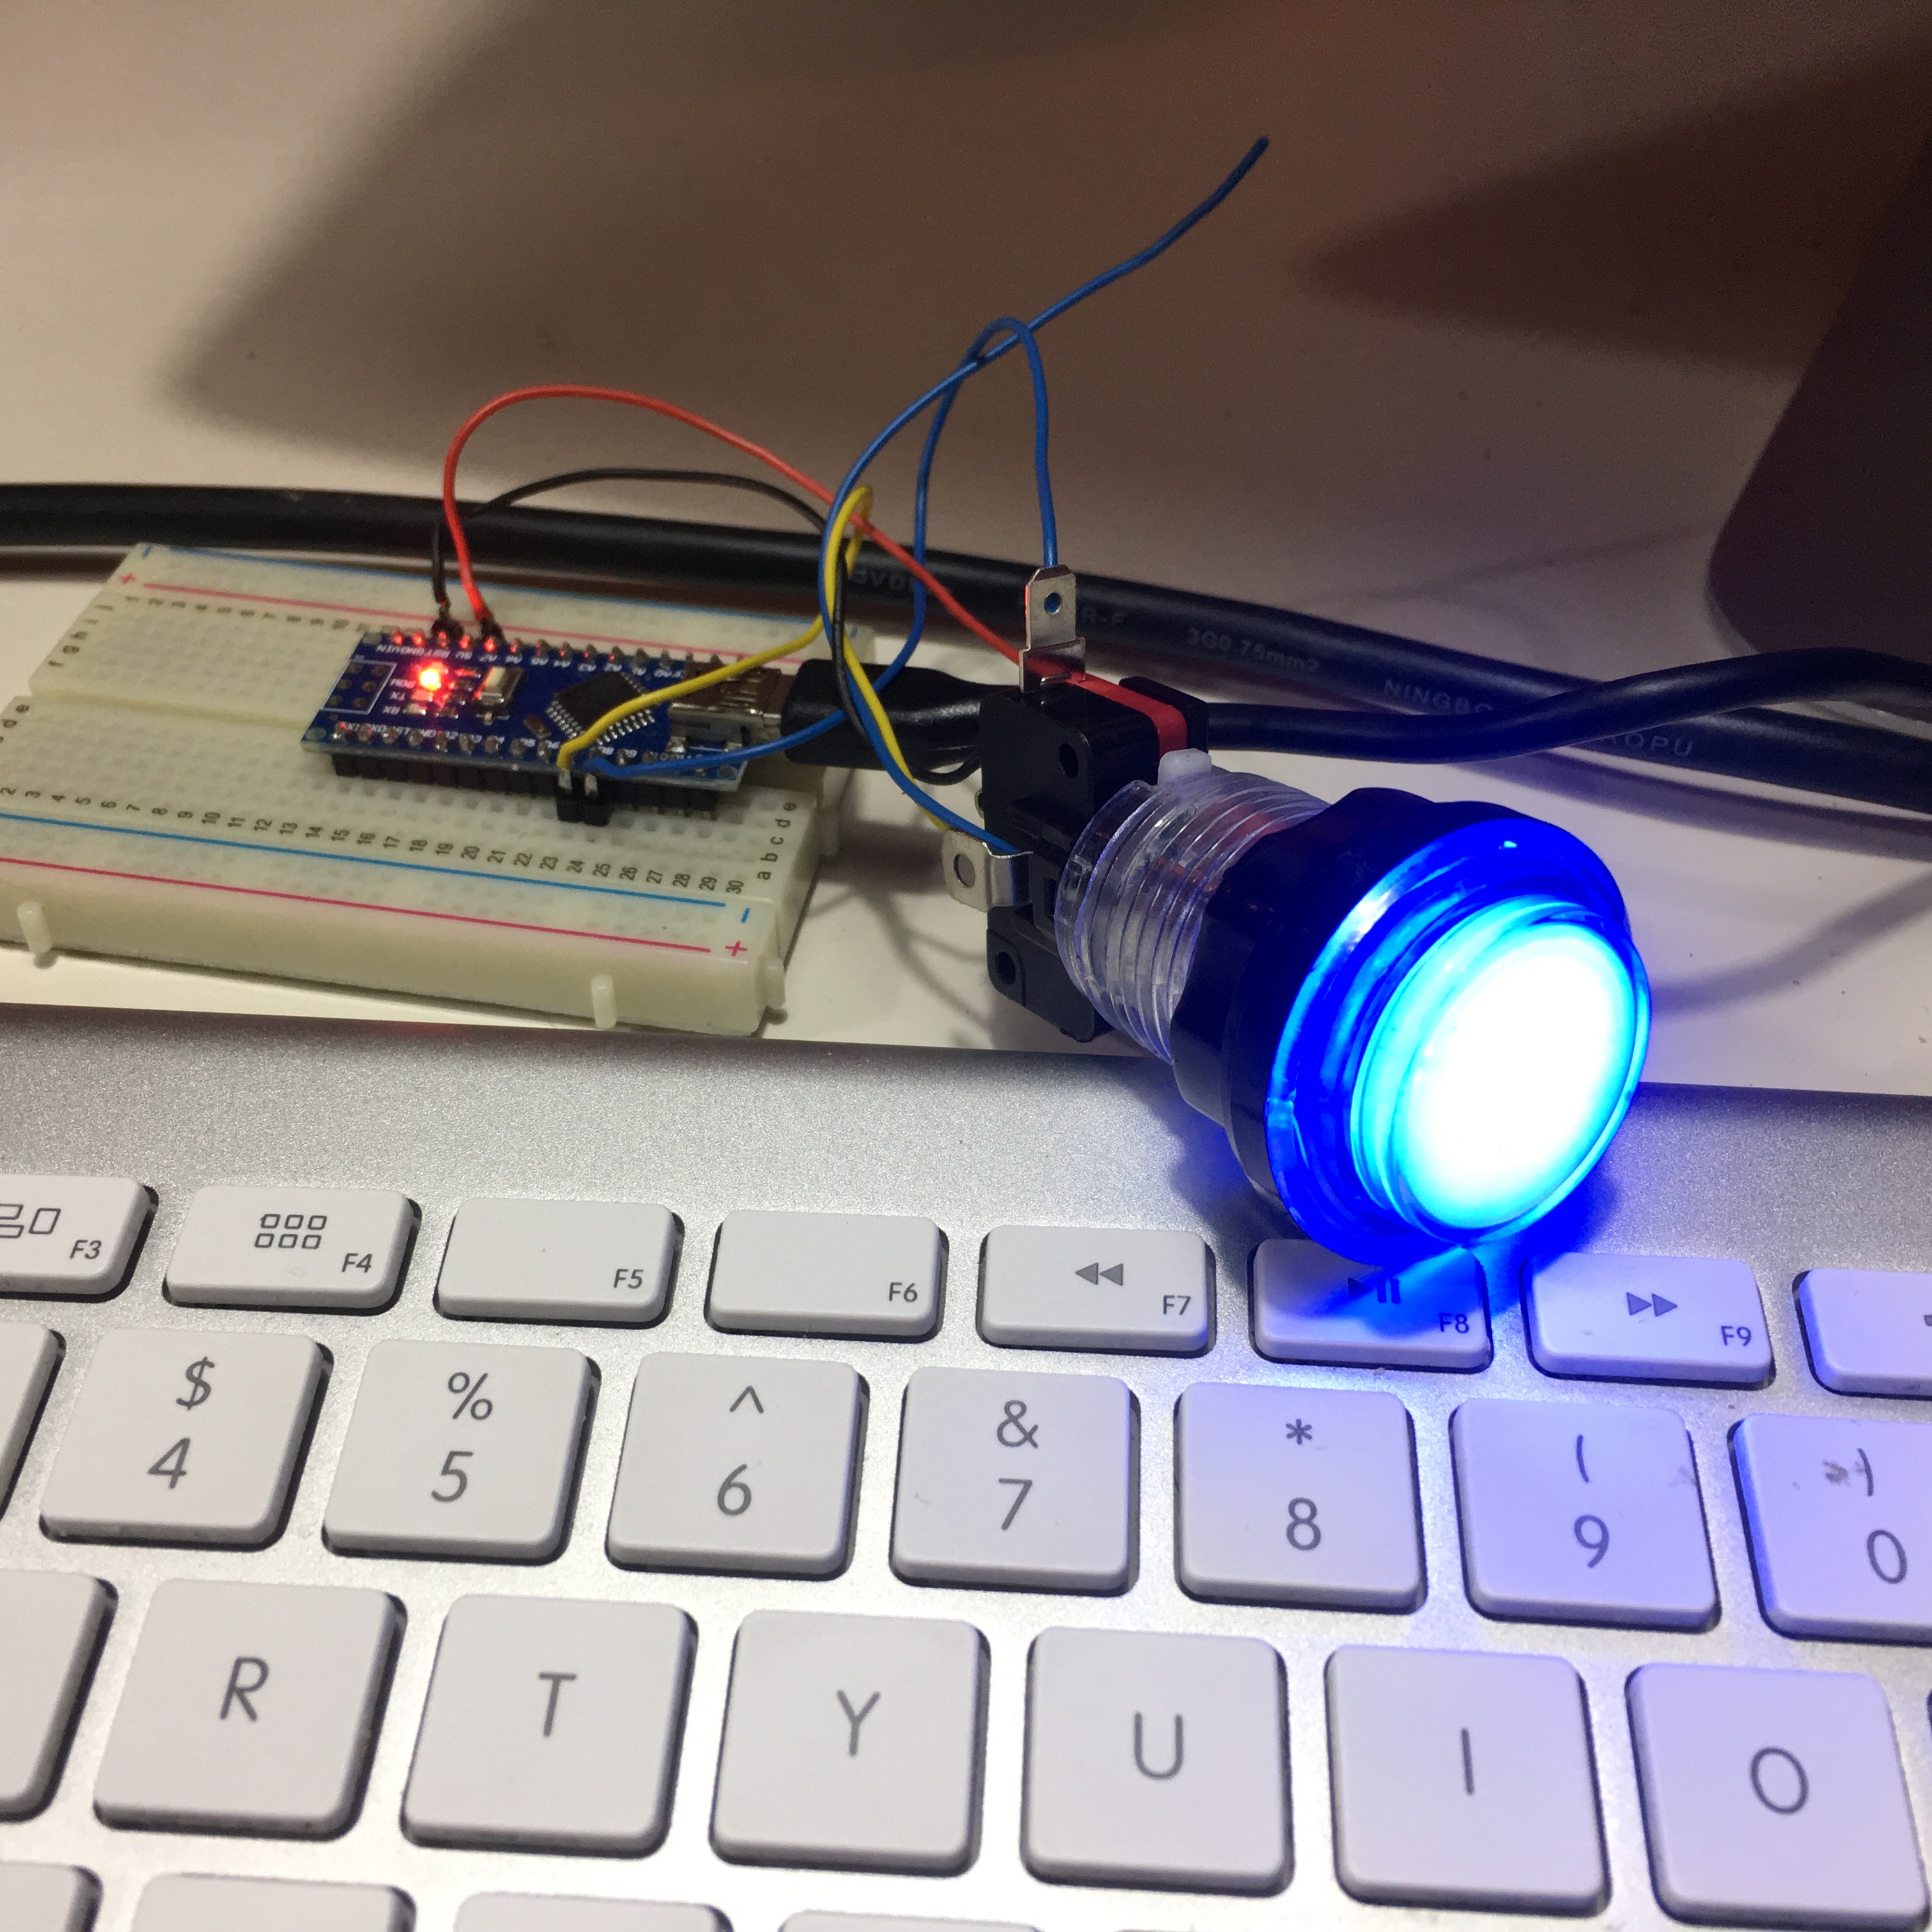
The reason why I ordered white arcade buttons, Is because I want to control the color of the button by controlling the internal LED. To make life easy, I use a WS2812 (aka NeoPixel) LED allowing me to control the color of the led using one simple data line. As a matter of fact, I can just daisy chain all the NeoPixel buttons with the other NeoPixels I’ll be using.
The end result is pretty cool. Somehow LEDs always give your project some sexiness. It gets even better when the color if controlled by the push of the button.
Check out this video I posted on my Instagram a while ago:
Activity Board: Building the Box