After I solved the mirror issue, it was time to get my hands on a monitor to incorporate into the Magic Mirror project.
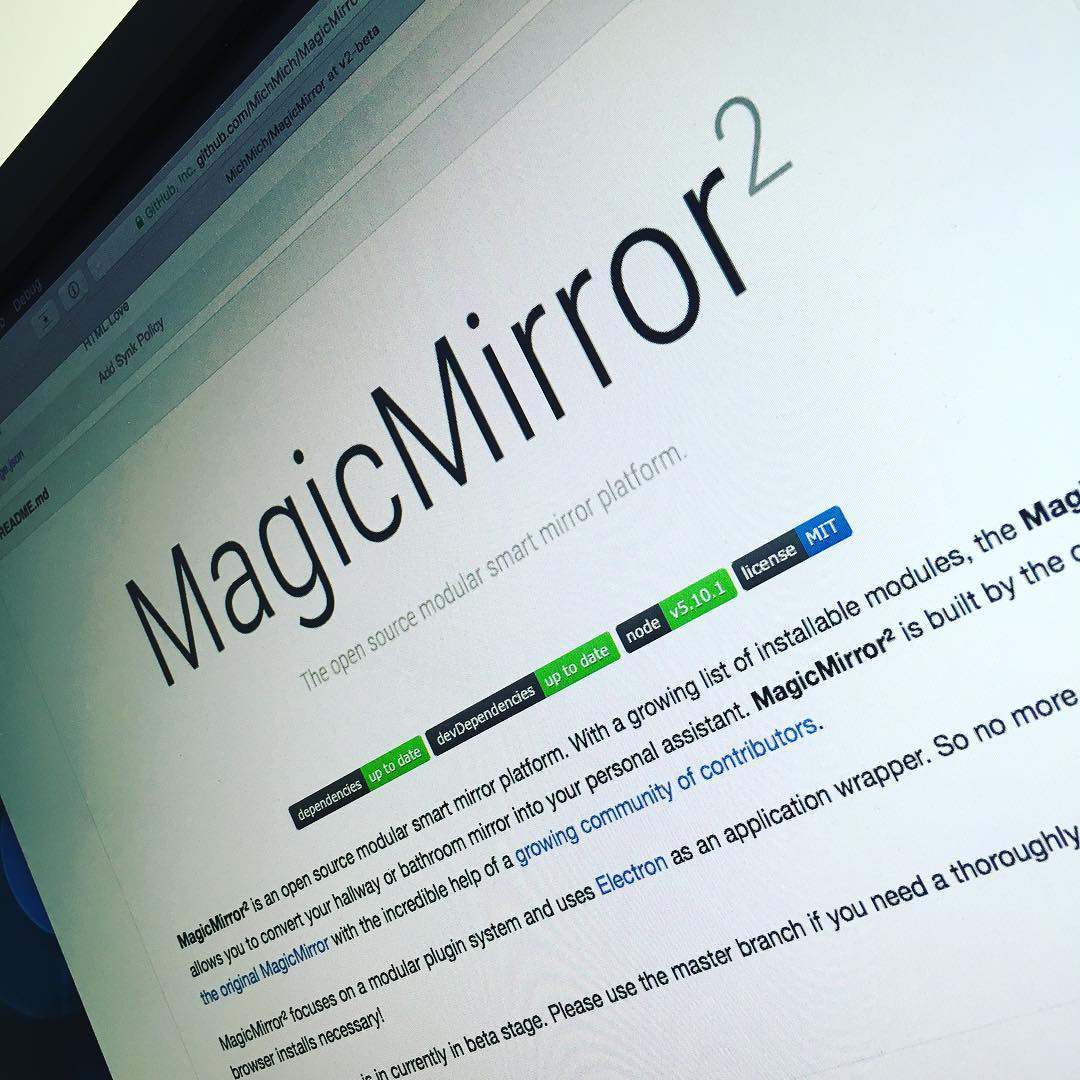
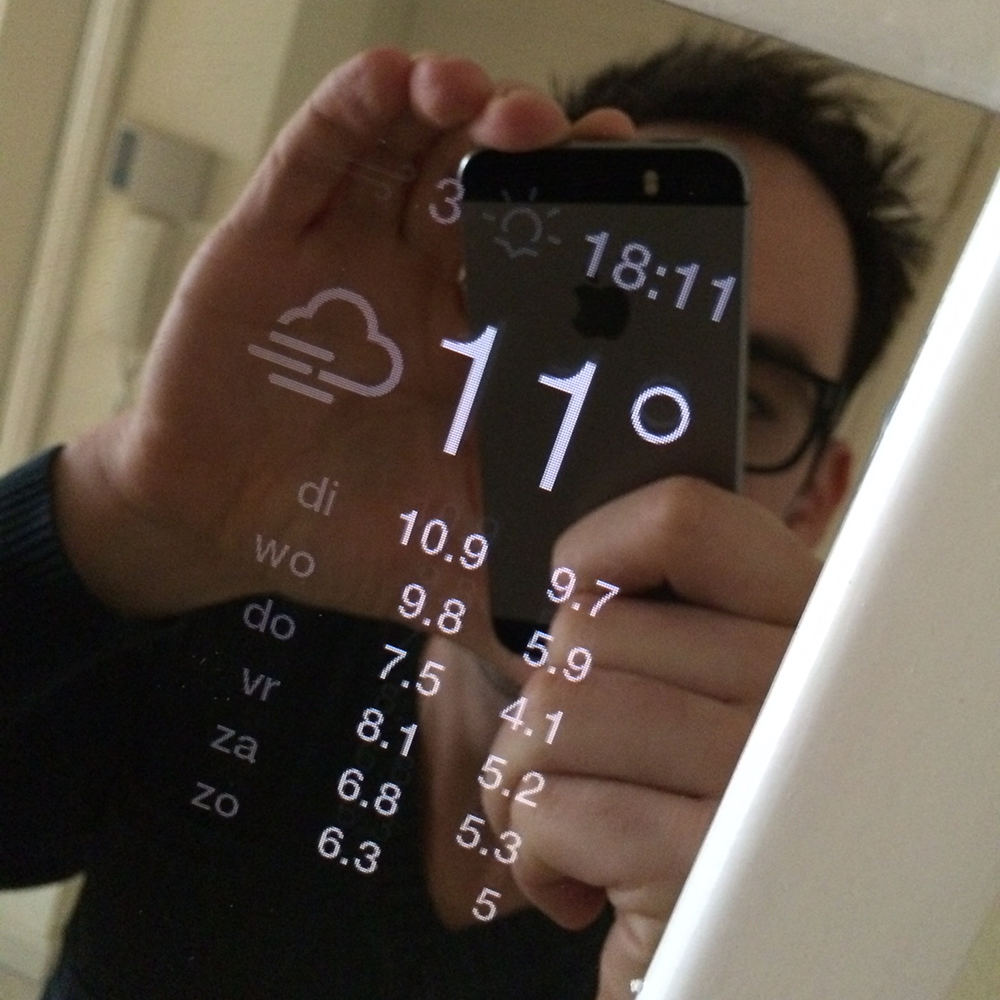
MagicMirror: The Idea & The Mirror
In my journey searching the right monitor for my Magic Mirror, I had to make some difficult decisions. Did I want to buy a new monitor or should I use a cast-off? What size did I need? Wat was the thinness possible monitor to get? How would I be able to move the control buttons? And was the monitor bright enough to counter my personal shiny appearance?
Since I would be using the monitor in portrait orientation, choosing the right size was mostly about the correct width of the monitor (resulting into the correct height of the mirror). After a few measurements and some tryouts by sticking tape on the wall where I planned to eventually mount the mirror, I figured 24" would be the perfect monitor size. The additional benefit of this size is that most (cheap) 24" monitors have a native 1080P resolution. Exactly the resolution I wanted to use for this project.
In a quest for the right type and brand, i visited most electronics shops in 20Km radius. I’m sure the security guys kept a close eye while is inspected the back and bottom of all displayed monitors.
Most brands were immediately rejected because the power and video connector were mounted to the back. I needed connecters that were mounted to the sides.
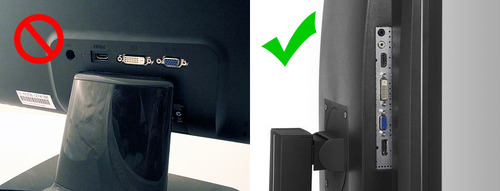
Eventually I figured iiyama monitors met most of my expectations. They are relatively cheap, have a small bezel, simple touch buttons and the right connector orientation.
Still, I didn’t knew if the casing was easily removable and how the control pad was connected and mounted on the inside of the monitor. In some weird way the salesmen didn’t allow me to brutally open the monitor’s casing. So it came down to mostly luck.

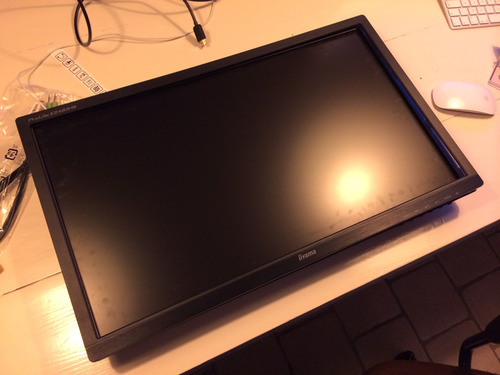
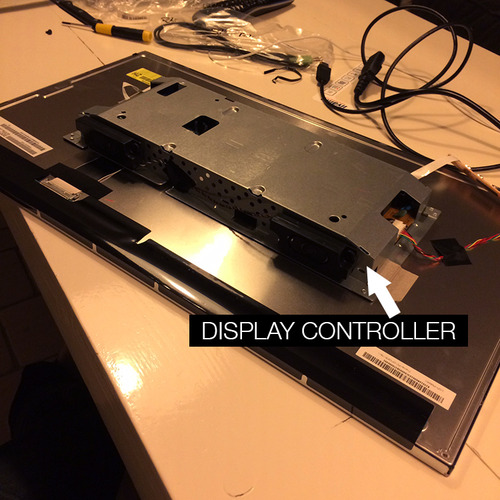
I ordered a 24" iiyama monitor: E2481HS-B1. To make sure the monitor would be “air tight” against the mirror, I removed the casing. It’s kind of nerve wracking to do this when you’ve just unboxed the monitor, but hey, living on the edge …
The nice part about this iiyama monitor is that the display controller (the electronics in the metal box) leave plenty of room around for the rest of the parts needed to make this mirror come to life while remaining it’s thinness.
The actual display panel is only 9mm thick, and has a tiny bezel of 10mm. When I include the display controller, it came down to the following dimension: 556mm x 323mm x 46mm (+ 6mm mirror). These dimensions would form the basis for the new wooden casing.
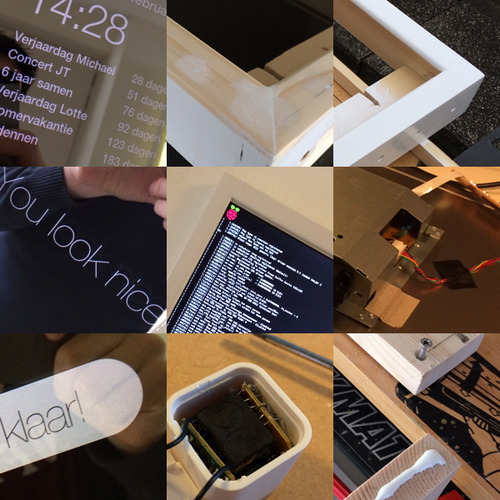
MagicMirror: The Casing