In the past few months, the maker scene went totally crazy about the ESP8266: a 3 dollar wifi to serial module. I wanted to know what the fuzz was all about, and spent a whopping 10 dollars to order some of these cute little toys a few days ago. This weekend, the Chinese package arrived and resulted in me spending too much time behind my desk …
Wiring it all up.
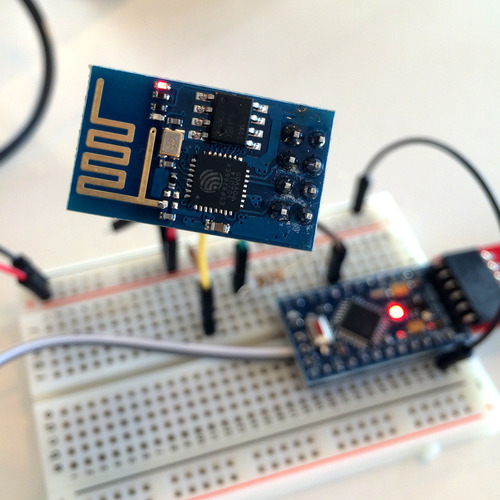
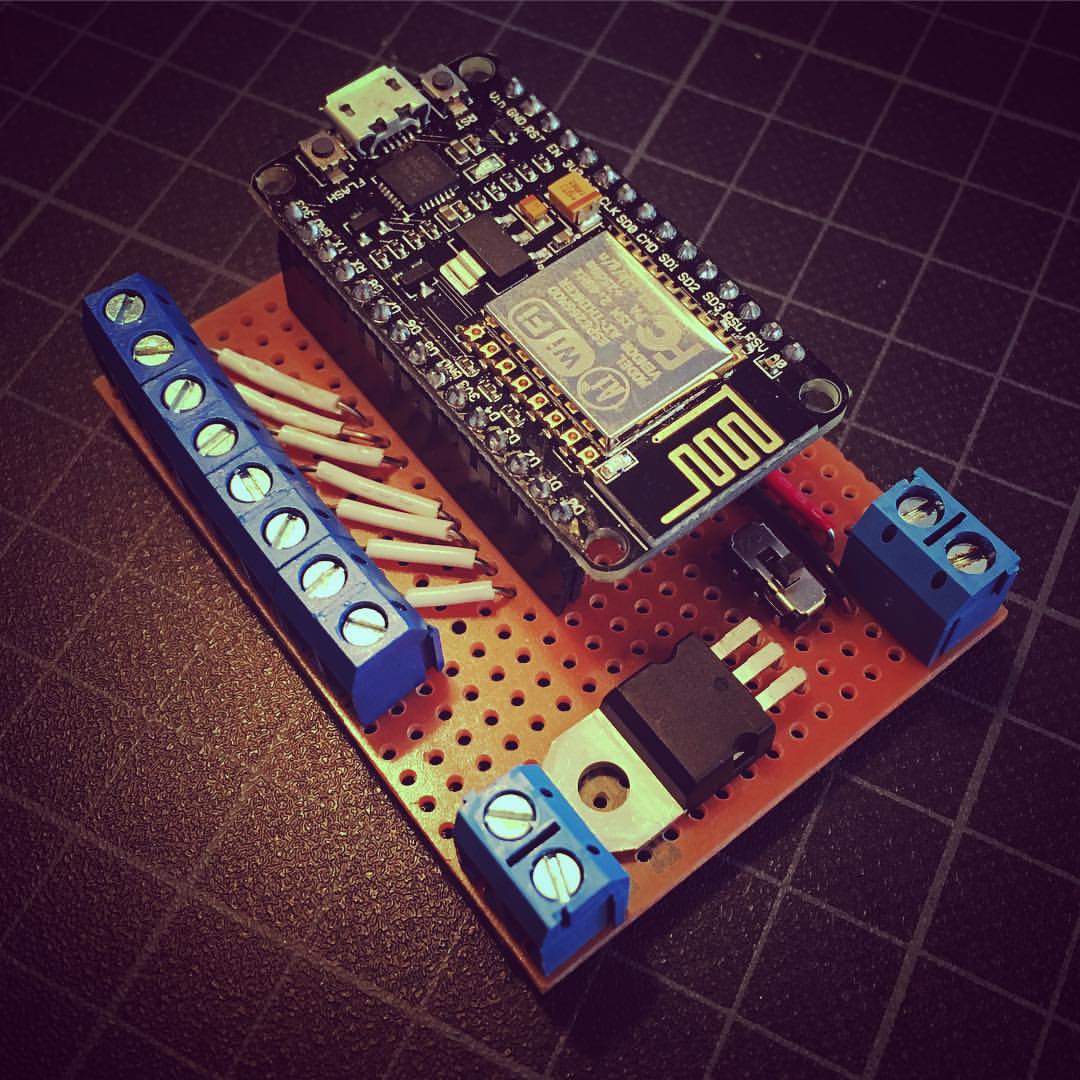
The small pcb measures 2.5cm x 1.5cm and uses 8 (annoyingly breadboard unfriendly) pins to connect. Unfortunately, the ESP8266 works on 3.3 volts, and doesn’t like voltage-obesity. To make sure it doesn’t die when we connect it to a 5 volt Arduino, we need to use a voltage divider. Don’t worry: you don’t need more fancy parts, a few resistors will be sufficient.
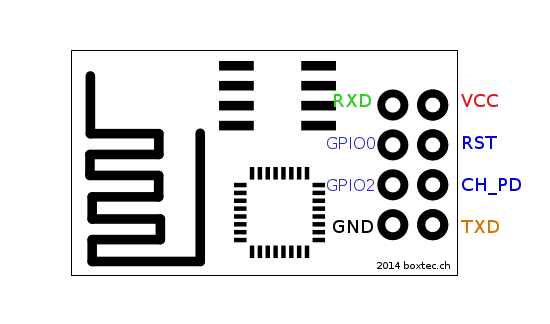
- ESP8266’s VCC is connected to a 3v3 power supply.
- ESP8266’s GND is connected to the ground.
- ESP8266’s RXD is connected to Arduino’s pin 4 using a voltage divider (330Ω to GND, 170Ω to pin 4).
- ESP8266’s TXD is connected to Arduino’s pin 5 (The Arduino can handle 3v3 just fine.)
- ESP8266’s CH_PD is connected to VCC using a 10k pull up resistor. (This will enable the wifi module.)
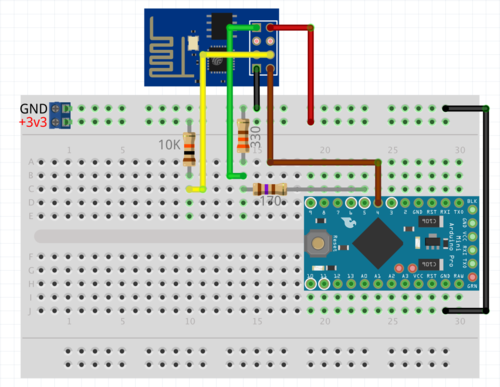
I connected my ESP8266 to one of my beloved Arduino Pro Mini Clones (also 3 dollars each, I’m clearly on a tight budget …) which, unfortunately, doesn’t offer a 3.3 volt power supply. A perfect reason to fire up my Rigol Power Supply! :)
Write the sketch
After connecting everything, and making sure nothing turned into smoke and fire, I threw together a small Arduino sketch. Since the Arduino Pro Mini has only one Serial port, I used the SoftwareSerial library to create a virtual serial port to connect to the ESP8266. A few extra lines of code made the communication between my Mac and the ESP8266 possible:
#include <SoftwareSerial.h>

SoftwareSerial esp8266(4, 5); // RX, TX

void setup() {

    Serial.begin(9600);
    esp8266.begin(9600);

    while(!Serial); // Wait for the serial port to be ready.
    Serial.println("Serial ready!");

}

void loop() {

    while (esp8266.available() > 0) {
        Serial.write(esp8266.read());
    }

    while (Serial.available() > 0) {
        esp8266.write(Serial.read());
    }

}
The above code makes sure everything that is sent from my Mac to the Arduino, will be send to the ESP8266. And everything that is sent from the ESP8266 to the Arduino, will be sent to my Mac.
Send the commands
Using the Serial monitor, I can communicate with the ESP8266. The only pitfall here, is that the carriage return of the serial monitor has to be set to Both NL & CR.
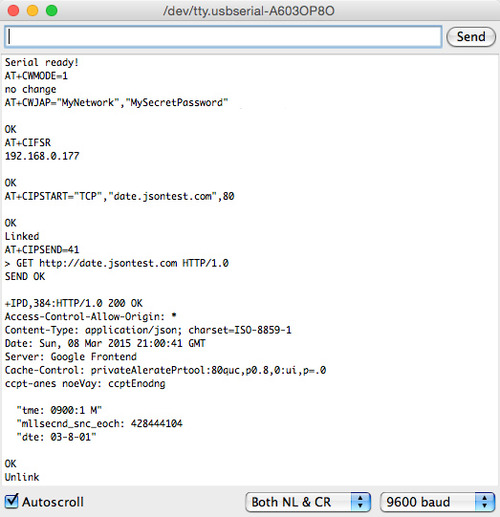
Let’s start of by checking the firmware, to see if it responds, using the AT+GMR command. (In all following examples, < means sent, > means received.)
< AT+GMR
> 0018000902-AI03
Cool! That works! Now, let’s change the ESP8266 to client mode:
< AT+CWMODE=1
> no change
It turned out it was already in client mode, so we’re good to go! Let’s connect to my wireless network!
< AT+CWJAP="MyNetwork","MySuperSecretPassword"
> OK
Yeah! I’m connected! But what is the local IP it got?
< AT+CIFSR
> 192.168.0.177
How about that! It works! My cute little Arduino is connected to the mad and scary internet!

Now, executing a GET request to a server is a bit more difficult. In this example, I will connect to http://date.jsontest.co to fetch the current date and time. First we need to connect to a server:
< AT+CIPSTART="TCP","date.jsontest.com",80
> OK
> Linked
Now, we tell the ESP8266 how many bytes we want to send …
< AT+CIPSEND=41
> >
Indeed, it returns a >, telling us it wants to receive the get request. Now we send the 41 bytes the form the GET request:
> GET http://date.jsontest.com HTTP/1.0
If you count, you will notice those are 37 characters. But both the new line and carriage return will be added. Which will add up to 39 characters. Then we need to press Send one more time to send an extra new line and carriage return. This will complete the request, resulting in the following:
> SEND OK

> +IPD,384:HTTP/1.0 200 OK
> Access-Control-Allow-Origin: *
> Content-Type: application/json; charset=ISO-8859-1
> Date: Sun, 08 Mar 2015 21:51:02 GMT
> Server: Google Frontend
> Cache-Control: private
> AlerntePrtocl:80qui,p0.8,8:qicp=008
> ccet-anes:noe
> Var: ccpt-ncdig

> {  "tme: 09:1:2 M",  "mllsecnd_siceepch" 128516230
> "dte: 03-8-01"
> }
As you can see, the we receive the server’s response … Yeah! But unfortunatly, we’re missing some characters. It turns out, the Arduinio isn’t able to read out all the bytes coming in, and then sending them to my Mac using the serial port. Because it’s sending to slow, the Software Serial port will overflow.

Now, now, don’t worry! This only affects this demo. If we want to use this to send the state of a button to a server, it will just work fine. Or if we want to poll a server, in order to control a LED. Also, no problem … as long as we don’t try to forward the incoming data to the Mac (or slow down the loop in any other significant way).
If you want to overcome this issue, try the Arduino Mega, which has multiple hardware serial ports. But in most projects, the Software Serial will be enough. Overall it is a fun little toy, but using it takes more then 3 lines of code. If you’re not afraid to write some code, the ESP8266 will even make you want to connect your toilet to the internet.
If you have any good suggestions for projects using this sweet little toy, leave a comment down below!
